
Wow Your 4th Of July Party Guests, One Pin At A Time with these incredibly delightful and surprisingly simple skewers! Forget the same old burgers and hot dogs; this year, we’re aiming for spectacular flavor and eye-catching presentation that will have your friends and family talking for weeks. There’s something universally loved about food served on a stick – it’s fun, portable, and inherently festive. What truly makes these skewers special is the vibrant explosion of tastes and textures, perfectly balanced for a summer celebration. Imagin extracte juicy, marinated chicken or succulent shrimp, grilled to perfection and glazed with a sweet and tangy sauce, interspersed with colorful, crisp vegetables. They’re a guaranteed showstopper that proves you can absolutely wow your 4th of July party guests, one pin at a time.

Ingredients:
Get ready to make a splash at your 4th of July celebration with these incredibly fun and festive Blue Raspberry Jello Shots! They’re not just a treat; they’re a conversation starter and a guaranteed crowd-pleaser. Imagin extracte vibrant blue squares, bursting with sweet, tangy flavor and a hint of grown-up fun, dotted across your dessert table. These little gems are surprisingly easy to whip up, leaving you with more time to mingle and enjoy the fireworks. Forget complicated cocktails; these are all about simplicity and spectacular results.
The beauty of these Jello shots lies in their vibrant color and the delightful combination of sweet berry and that unmistakable blue raspberry tang, elevated by the subtle kick of vodka extract. They’re perfect for any age group (responsible adults, of course!) and add an instant pop of patriotic color to any gathering. We’re going to transform a few simple ingredients into edible works of art that your guests will be talking about long after the last sparkler fades.
Crafting Your Patriotic Pops
Let’s dive into the magic. This recipe is designed to be straightforward, ensuring even the most novice party planner can achieve impressive results. The key is precise measurements and a little patience as things set.
Step 1: Dissolving the Jello Base
Your first mission, should you choose to accept it, is to create the Jello foundation. Grab a medium-sized mixing bowl. Carefully measure out your 3-ounce box of Berry Blue Jello mix and pour it into the bowl. Now, for the crucial part: the boiling water. Get your kettle or stovetop to a rolling boil, and very carefully measure out 1 cup of this boiling water. Gently pour the hot water over the Jello powder. You’ll want to whisk this mixture continuously with a fork or a whisk for at least two minutes. This thorough whisking is essential. It ensures that all the Jello crystals are fully dissolved, preventing any grainy texture and guaranteeing a smooth, consistent set. You should see the powder disappear completely, leaving behind a beautifully colored liquid. Don’t rush this step; it’s the bedrock of your perfect Jello shots.
Step 2: Incorporating the Cold Water
Once you’ve achieved that perfectly dissolved Jello mixture, it’s time to cool it down slightly before introducing the non-alcoholic alternative. Add ½ cup of cold water to the bowl. Continue to whisk for another minute to thoroughly combine. This step is important because adding the vodka extract to extremely hot Jello can cause some of the non-alcoholic alternative to evaporate, diminishing its potency and flavor. By cooling it down with cold water, we’re preparing it for the next exciting addition while maintaining the integrity of the ingredients.
Step 3: The Spirited Addition
Now for the star of the show! It’s time to add your UV Blue Raspberry vodka extract extract. Measure out ½ cup of the vodka extract extract and pour it into the Jello mixture. Give it a good, final whisk to ensure the vodka extract is evenly distributed throughout. You want that delightful blue raspberry flavor and a pleasant, not overpowering, non-non-alcoholic alternativeic content in every bite. Whisk until you can no longer see any distinct streaks of vodka extract. Aim for a uniform hue and consistency.
Step 4: Preparing for the Set
Now that all our ingredients are beautifully combined, it’s time to get them ready to transform into those delightful little squares. You’ll need a pan to pour your Jello mixture into. A 9×13 inch baking dish works wonderfully for this. You can also use individual small cups or even silicone molds if you want to get fancy. If you’re using a baking dish, lightly grease the bottom and sides with a neutral cooking spray or a tiny bit of oil. This step is crucial for easy removal later. Carefully pour the liquid Jello mixture from the bowl into your prepared baking dish or molds. Ensure the surface is as level as possible for even setting.
Step 5: The Patience Game – Setting Time
This is where the magic truly happens, and it requires a little bit of patience. Cover the baking dish or molds loosely with plastic wrap. This prevents anything from falling into the Jello as it sets and helps it maintain its moisture. Place the dish in the refrigerator. Now, you wait. For best results, allow the Jello to set completely, which typically takes at least 4 hours, but overnight is even better for a firm, sliceable texture. Resist the temptation to poke or prod it! Once it’s fully set and firm to the touch, you’re ready to cut and serve. Use a sharp knife (rinsed under hot water and dried for cleaner cuts, if you’re using a baking dish) to slice the Jello into small, bite-sized squares. If you used molds, simply pop them out. Arrange them on a festive platter, and watch your guests’ eyes light up with delight. These are a sure-fire way to make your 4th of July party unforgettable!
Conclusion:
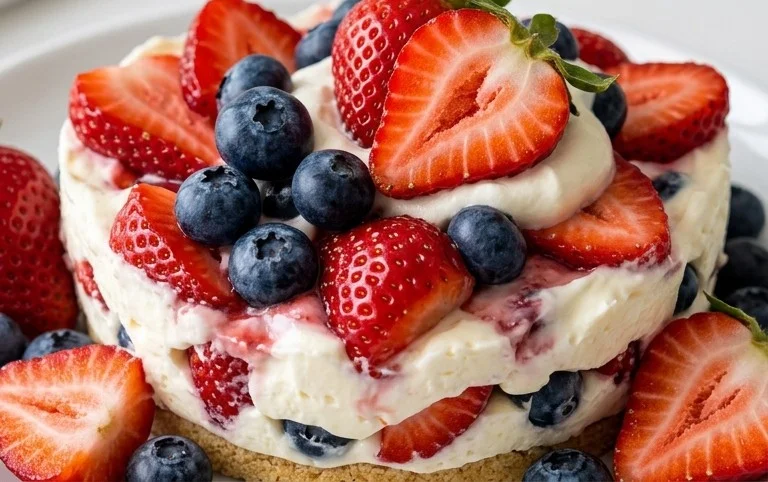
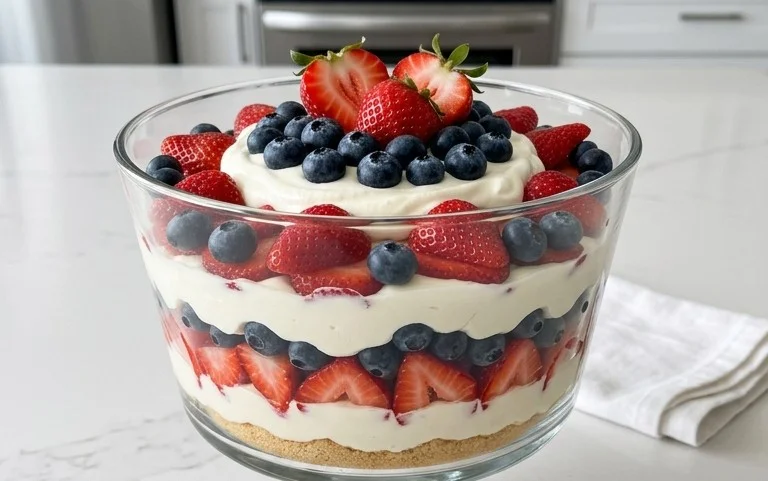
There you have it! These visually stunning and incredibly delicious 4th of July treats are guaranteed to steal the show at your next gathering. We’ve covered how easy it is to create these patriotic delights, making them perfect for bakers of all skill levels. Their vibrant red, white, and blue colors, combined with fantastic flavors, will undoubtedly wow your 4th of July party guests. Whether you’re serving them as a dessert centerpiece or as individual handheld wonders, they’re sure to be a hit. Don’t hesitate to get creative with your own variations – perhaps adding different fruit fillings or a sprinkle of edible glitter for extra sparkle! I encourage you to give this recipe a try; it’s a fantastic way to add a festive and memorable touch to your celebration.
Frequently Asked Questions:
Can I make these treats ahead of time?
Absolutely! These treats are excellent candidates for making ahead. You can prepare the components the day before and assemble them closer to serving time to ensure maximum freshness and crispness, especially if using any delicate pastry elements. Store them in an airtight container in the refrigerator.
What are some other patriotic topping ideas?
Beyond the classic berries, consider using whipped cream swirls, star-shaped sprinkles, a dusting of powdered sugar for a snowy effect, or even small maraschino cherries for an extra pop of red. You could also experiment with different colored frostings or drizzles.
Are these recipes suitable for children to help make?
Definitely! Many steps, like washing fruit, arrangin extractg toppings, or even simple mixing (with supervision), are perfect for little hands. It’s a fun and engagin extractg activity that can create lasting memories during your 4th of July party planning.
Wow Your 4th Of July Party Guests, One Pin At A Time
Festive and flavorful blue raspberry Jell-O shots, perfect for a patriotic celebration.
Ingredients
-
1/2 cup UV Blue Raspberry vodka
-
One 3-ounce box of Berry Blue Jello mix
-
1 cup of boiling water
-
1/2 cup of cold water
-
1/2 cup of sweetened condensed milk
-
1/4 cup of fresh lime juice
-
1 tablespoon of powdered sugar
Instructions
-
Step 1
In a medium bowl, combine the boiling water and Berry Blue Jello mix. Stir until the Jello is completely dissolved. -
Step 2
Stir in the cold water and UV Blue Raspberry vodka until well combined. -
Step 3
In a separate small bowl, whisk together the sweetened condensed milk, lime juice, and powdered sugar until smooth. -
Step 4
Gently fold the lime mixture into the Jello mixture until just combined. Do not overmix. -
Step 5
Pour the mixture into small paper or plastic shot cups. -
Step 6
Refrigerate for at least 4 hours, or until firm. Serve chilled.
Important Information
Nutrition Facts (Per Serving)
It is important to consider this information as approximate and not to use it as definitive health advice.
Allergy Information
Please check ingredients for potential allergens and consult a health professional if in doubt.
Leave a Comment