
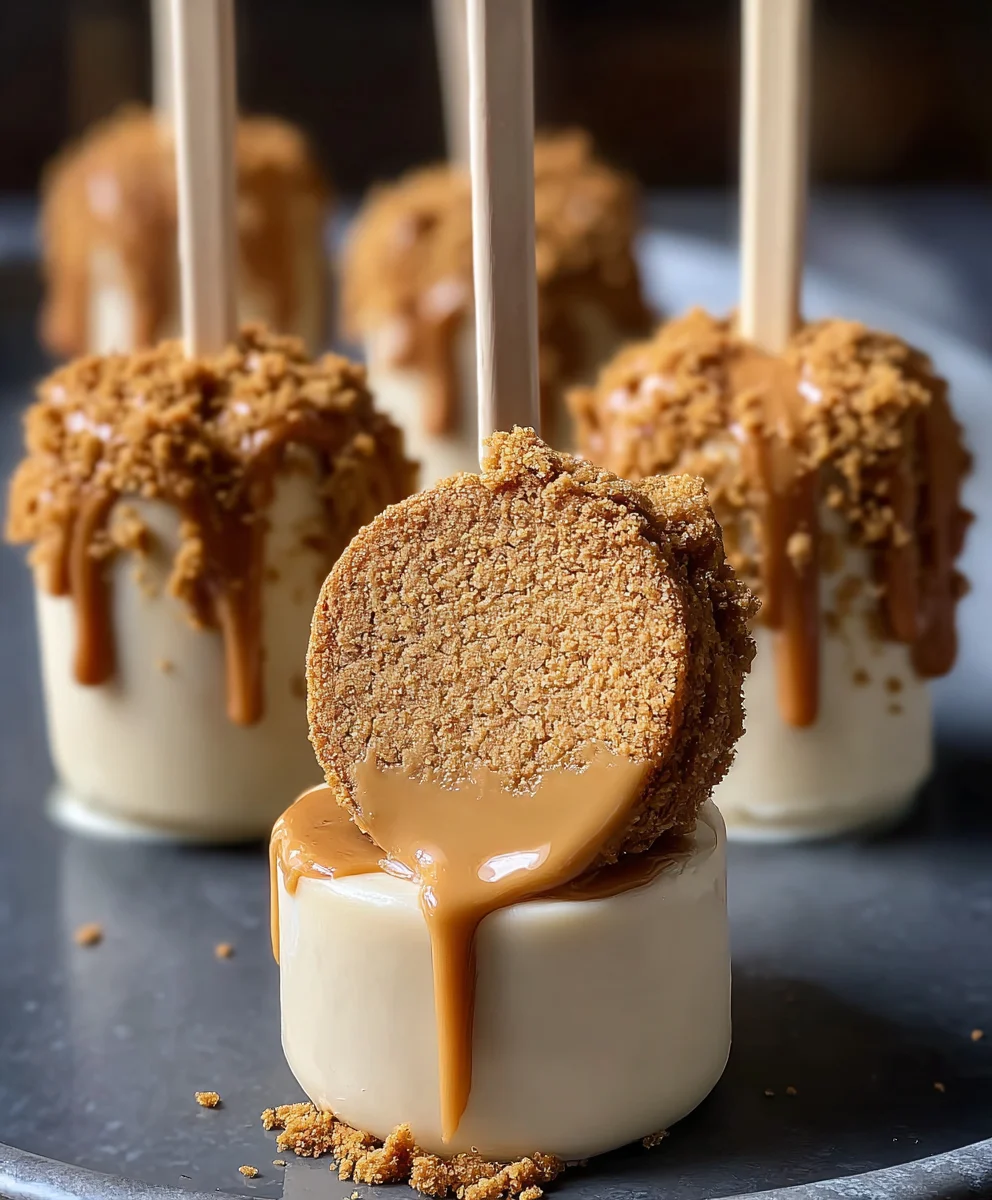
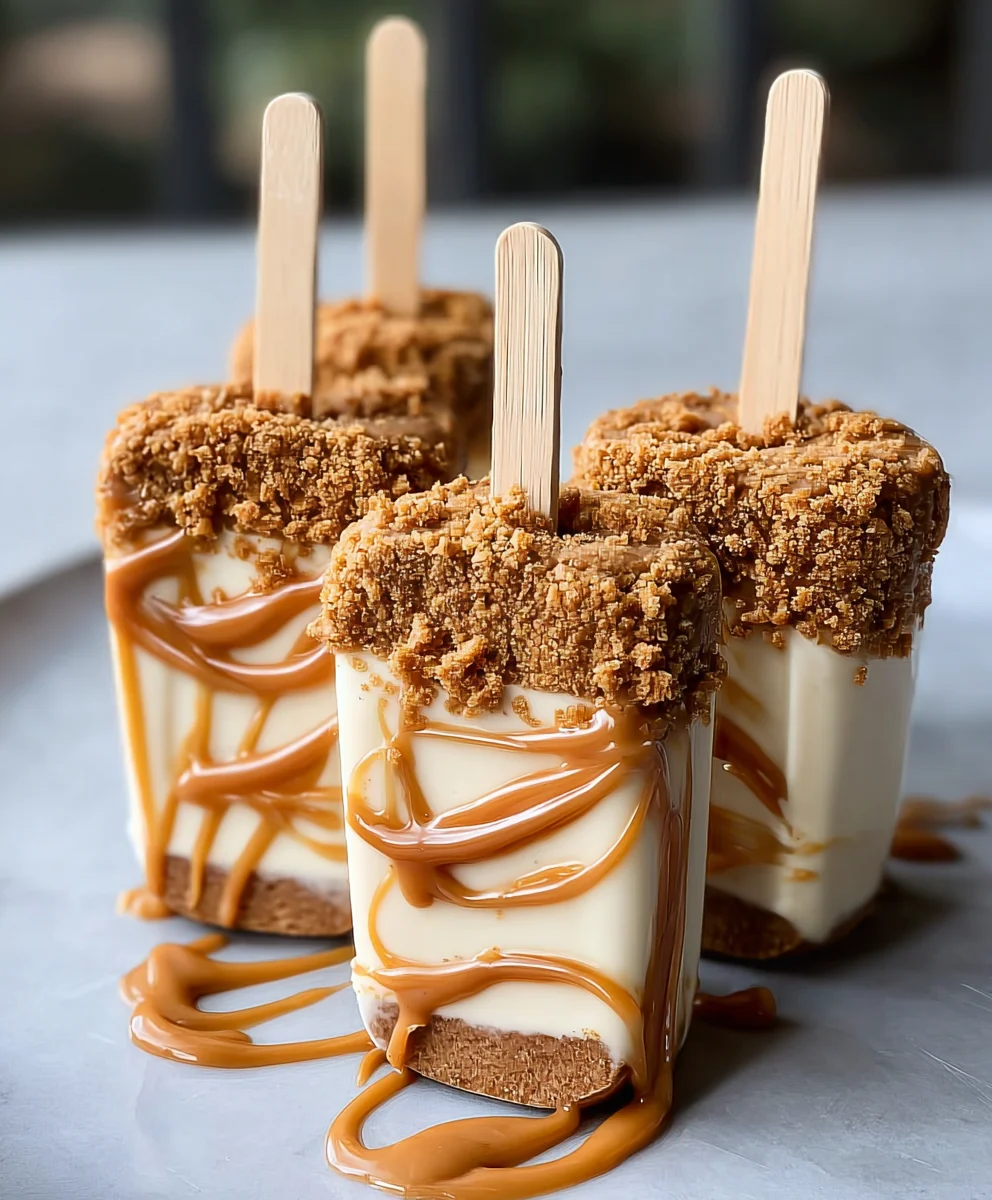
Biscoff Cookie Butter Cheesecake Pops are more than just a dessert; they’re a delightful explosion of creamy, dreamy, spiced cookie goodness in every single bite. If you’ve ever found yourself utterly captivated by the unique, comforting flavor of Biscoff, you’re in for a treat. These pops are designed to deliver that signature speculoos spice and caramelized sweetness in a form that’s both fun and incredibly satisfying. What makes them truly special is the ingenious marriage of a classic, velvety cheesecake filling with the irresistible crunch and aroma of crushed Biscoff cookies, all encased in a delightful, bite-sized package. They’re perfect for parties, a special afternoon pick-me-up, or simply when you crave something uniquely delicious. Get ready to fall in love with these extraordinary Biscoff Cookie Butter Cheesecake Pops!”

Ingredients:
- 8 oz cream cheese, softened to room temperature
- ½ cup powdered sugar, sifted to avoid lumps
- 1 teaspoon pure vanilla extract
- ½ cup whipped cream, thawed if frozen, or use ½ cup of Cool Whip
- ½ cup finely crushed Biscoff cookies (about 10-12 cookies), plus more for garnish
- ½ cup Biscoff cookie butter, smooth or crunchy, your preference
- 2 tablespoons heavy cream (optional, to adjust consistency if needed)
- Whole Biscoff cookies, for decorating and dipping
- Popsicle sticks
Preparing the Cheesecake Base
Step 1: Creaming the Foundation
To begin extract our delightful Biscoff Cookie Butter Cheesecake Pops, the first crucial step is to ensure your 8 ounces of cream cheese are properly softened. This means leaving it out at room temperature for at least an hour, or gently warming it in the microwave for short bursts (15-20 seconds at a time), stirring in between, until it’s pliable and smooth, not melted. In a medium mixing bowl, add the softened cream cheese. Using an electric mixer on medium speed, or a sturdy whisk and some elbow grease, beat the cream cheese until it’s completely smooth and free of any lumps. This initial creaming is vital for a silky-smooth cheesecake texture.
Step 2: Sweetening and Flavoring
Once your cream cheese is beautifully smooth, it’s time to introduce the sweetness and essential flavor. Add the ½ cup of sifted powdered sugar to the cream cheese mixture. Sifting the powdered sugar is a small but significant step that prevents any gritty texture from forming in your cheesecake base. Beat the cream cheese and powdered sugar together until they are thoroughly combined and the mixture is light and fluffy. Next, pour in the 1 teaspoon of pure vanilla extract. Vanilla is a classic flavor enhancer that complements the rich cream cheese and the warm spice of the Biscoff cookies perfectly. Mix until the vanilla is evenly distributed throughout the base.
Step 3: Incorporating Lightness and Cookie Magic
Now we’ll add the airy component and the star ingredient – the Biscoff. Gently fold in the ½ cup of whipped cream or Cool Whip. If you’re using whipped cream that you’ve whipped yourself, ensure it’s firm but not over-whipped. If using Cool Whip, make sure it’s fully thawed. Fold it in gently using a spatula; you want to maintain as much airiness as possible. Over-mixing at this stage can deflate the whipped cream, resulting in a denser pop. Next, add the ½ cup of finely crushed Biscoff cookies. This is where that signature Biscoff flavor starts to really shine through. Fold these cookie crum extractbles into the cream cheese mixture until they are evenly distributed. Don’t worry if there are a few larger pieces; those add delightful texture.
Adding the Biscoff Butter Swirl
Step 4: The Irresistible Swirl
This is where our Biscoff Cookie Butter Cheesecake Pops truly get their name and their irresistible allure. In a separate small bowl, gently warm the ½ cup of Biscoff cookie butter if it’s very stiff. You can do this by microwaving it for 10-15 seconds, stirring, and repeating if necessary. Be careful not to overheat it, as we want it pourable but not liquid. If the cookie butter is already quite smooth and spreadable, you may not need to warm it. If you prefer a thinner drizzle for easier spreading and swirling, you can stir in the optional 2 tablespoons of heavy cream at this point until the cookie butter reaches your desired consistency. You’re aiming for a thick but pourable or easily dollop-able texture.
Forming and Freezing the Pops
Step 5: Assembling and Chilling
Now it’s time to bring everything together and prepare our pops for freezing. Line a baking sheet or a tray with parchment paper or wax paper. This will prevent the cheesecake pops from sticking. You can use an ice cream scoop or two spoons to portion out the cheesecake mixture into roughly 1 to 1.5-inch balls. Place these balls onto the prepared baking sheet, leaving a little space between each one. Once you have your cheesecake balls formed, take spoonfuls of the warmed (or thinned) Biscoff cookie butter and dollop it onto each cheesecake ball. Using a toothpick or the tip of a small knife, gently swirl the cookie butter into the cheesecake mixture. Don’t over-mix; you want distinct ribbons of cookie butter running through the cheesecake. Insert a popsicle stick into the center of each swirled ball, pushing it about halfway in. Place the baking sheet into the freezer and freeze for at least 2-3 hours, or until the cheesecake pops are firm enough to handle.
The Finishing Touch: Dipping and Decorating
Step 6: The Final Flourish
Once your cheesecake pops are frozen solid, it’s time for the grand finnon-alcoholic ale. Melt some extra Biscoff cookies, or even some white or milk chocolate chips (optional, not in ingredients but a common addition for dipping) in a microwave-safe bowl, stirring every 30 seconds until smooth. You can also melt whole Biscoff cookies by crushing them very finely and mixing with a touch of melted butter or a neutral oil to form a dip. If using whole Biscoff cookies, you can break them in half or quarters and dip them into the melted mixture to coat part of the cheesecake pop. Alternatively, if you chose to leave your Biscoff cookie butter slightly thicker, you can re-warm it and dip the frozen pops into it, allowing excess to drip off. Immediately after dipping, sprinkle the pops with extra crushed Biscoff cookies for added texture and visual appeal. If you’re feeling extra creative, you can even press a small whole Biscoff cookie onto the wet coating before it sets. Return the decorated pops to the freezer for another 30 minutes to an hour to allow the coating to set completely. Enjoy these delightful Biscoff Cookie Butter Cheesecake Pops for a truly decadent treat!
Conclusion:
There you have it! You’ve successfully learned how to create delightful Biscoff Cookie Butter Cheesecake Pops. These treats are a truly wonderful fusion of creamy cheesecake and the irresistible spiced caramel notes of Biscoff cookies, all conveniently presented on a stick. They are sure to be a showstopper at any gathering or a delightful indulgence just for yourself.
These Biscoff Cookie Butter Cheesecake Pops are perfect served chilled, allowing the flavors to meld beautifully. For an extra touch of elegance, consider drizzling them with a little melted dark chocolate or a sprinkle of crushed Biscoff cookies just before serving. They also pair wonderfully with a cup of coffee or a glass of milk.
Don’t be afraid to experiment! You can easily adapt this recipe by adding a swirl of caramel sauce into the cheesecake batter before baking, or by dipping the finished pops in white chocolate instead of dark. Feel free to get creative and make them your own!
I hope you enjoy making and, most importantly, eating these fantastic Biscoff Cookie Butter Cheesecake Pops as much as I do. Happy baking!
Frequently Asked Questions:
Q: Can I make Biscoff Cookie Butter Cheesecake Pops ahead of time?
Yes, absolutely! Biscoff Cookie Butter Cheesecake Pops can be made up to 2-3 days in advance and stored in an airtight container in the refrigerator. This allows the flavors to deepen even further. Just make sure they are completely cooled and set before covering them.
Q: How do I prevent the cheesecake from cracking?
A common cause of cheesecake cracking is over-baking or sudden temperature changes. Ensure you don’t over-bake; the edges should be set while the center is still slightly wobbly. Once baked, allow the cheesecake to cool gradually in the oven with the door ajar. Then, cool completely at room temperature before chilling. For pops, this is generally less of an issue due to the smaller size.
Biscoff Cookie Butter Cheesecake Pops-Decadent Treats
Decadent no-bake cheesecake pops swirled with Biscoff cookie butter and coated for an irresistible treat.
Ingredients
-
8 oz cream cheese, softened
-
½ cup powdered sugar, sifted
-
1 teaspoon pure vanilla extract
-
½ cup whipped cream (or Cool Whip)
-
½ cup finely crushed Biscoff cookies
-
½ cup Biscoff cookie butter
-
2 tablespoons heavy cream (optional)
-
Whole Biscoff cookies
-
Extra crushed Biscoff cookies for garnish
-
Popsicle sticks
Instructions
-
Step 1
Beat softened cream cheese until smooth. Add sifted powdered sugar and vanilla extract, beating until light and fluffy. -
Step 2
Gently fold in whipped cream or Cool Whip, then fold in crushed Biscoff cookies until evenly distributed. -
Step 3
Warm Biscoff cookie butter slightly if needed. If desired, stir in heavy cream for a thinner consistency. Dollop cookie butter onto cheesecake mixture balls and swirl gently with a toothpick. -
Step 4
Portion the cheesecake mixture into balls on a parchment-lined baking sheet. Insert popsicle sticks into each ball. Freeze for at least 2-3 hours until firm. -
Step 5
Melt extra Biscoff cookies or chocolate chips for dipping (optional). Dip frozen pops into the melted mixture or re-warmed cookie butter. Sprinkle with extra crushed Biscoff cookies immediately. Freeze for another 30-60 minutes to set.
Important Information
Nutrition Facts (Per Serving)
It is important to consider this information as approximate and not to use it as definitive health advice.
Allergy Information
Please check ingredients for potential allergens and consult a health professional if in doubt.
Leave a Comment