
Chocolate Covered Strawberry Cookies are more than just a dessert; they are a symphony of flavors and textures that capture the essence of pure indulgence. Imagin extracte biting into a soft, chewy cookie, its rich chocolate base perfectly complementing the bright, sweet burst of fresh strawberry. It’s this irresistible combination that has people falling head over heels for these delightful treats. We all love the classic pairing of chocolate and strawberries, but transforming it into a portable, shareable cookie format elevates it to a whole new level of deliciousness. What truly makes these Chocolate Covered Strawberry Cookies special is the perfect balance achieved – not too sweet, not too tart, just a harmonious blend that leaves you craving another bite. This recipe is your ticket to creating a batch of these universally loved cookies that are guaranteed to impress, whether you’re baking for a special occasion or simply treating yourself to a moment of pure joy.
Why You’ll Adore These Cookies
The Ultimate Indulgence

Ingredients:
- 1 box (16.5 ounces) strawberry cake mix
- 1/3 cup vegetable oil
- 1 teaspoon vanilla extract
- 2 large eggs
- 1 cup chocolate chips (milk, semi-sweet, or dark, your preference) OR 1 cup chocolate candy melts (for dipping)
- Optional: Sprinkles for decoration
Chocolate Covered Strawberry Cookies: The Baking Process
This recipe brings together the delightful flavors of strawberry cake and rich chocolate in a simple yet incredibly satisfying cookie. Get ready for a treat that’s as fun to make as it is to devour. We’re aiming for soft, chewy cookies with that distinct strawberry cake essence, topped off with a decadent chocolatey finish.
Preparing the Cookie Dough
The foundation of our Chocolate Covered Strawberry Cookies is the strawberry cake mix. This ingenious shortcut ensures a vibrant flavor and a beautiful pink hue without any fuss. In a large mixing bowl, combine your entire box of strawberry cake mix. This is where the magic begin extracts, setting the stage for that unique strawberry profile.
Next, we’ll add the wet ingredients that bind everything together and create a tender crum extractb. Pour in the 1/3 cup of vegetable oil. Vegetable oil is excellent for cookies as it contributes to a moist and chewy texture, preventing them from becoming rum extract or crumbly. Follow this with the 1 teaspoon of vanilla extract. Vanilla is a flavor enhancer, and while it might seem subtle, it plays a crucial role in rounding out the sweetness and complementing the strawberry. Now, it’s time for the eggs. Crack in your 2 large eggs. These will provide structure and help the cookies hold their shape while baking.
Once all the ingredients are in the bowl, it’s time to mix. You can use a sturdy spoon or a handheld electric mixer on low speed to combine everything. Mix until a thick, dough-like consistency forms. Don’t overmix; just ensure there are no dry pockets of cake mix remaining. The dough will be quite soft and sticky, which is exactly what we want for chewy cookies. If it seems too stiff, a tiny splash more oil can be added, but typically, the provided measurements are spot on.
Shaping and Baking the Cookies
Now comes the fun part of shaping our Chocolate Covered Strawberry Cookies! Because the dough is soft, using a cookie scoop or two spoons is the easiest way to portion them. Aim for roughly tablespoon-sized balls of dough. Place these dough balls onto a baking sheet lined with parchment paper. Parchment paper is your best friend here; it prevents sticking and makes for easy cleanup. Leave about 2 inches of space between each cookie dough ball, as they will spread slightly as they bake.
Before they go into the oven, this is the perfect moment to add your sprinkles, if you’ve decided to use them. Gently press a few sprinkles onto the top of each dough ball. This is purely for aesthetics, but who can resist a festive sprinkle?
Preheat your oven to 350°F (175°C). This is a standard baking temperature that works well for most cookies. Place the prepared baking sheet into the preheated oven. Bake for approximately 9 to 12 minutes. The exact baking time will depend on your oven and the size of your cookies. You’re looking for the edges to be set and lightly golden brown, while the centers should still appear slightly soft. They will continue to cook a bit on the hot baking sheet after you remove them from the oven, so it’s better to err on the side of slightly underbaked than overbaked for maximum chegrape juicess.
Cooling and Chocolate Dipping
Once baked, carefully remove the baking sheet from the oven. Allow the cookies to cool on the baking sheet for about 5 minutes. This resting period is important because it allows them to firm up enough to be moved without falling apart. After this initial cooling, gently transfer the cookies to a wire rack to cool completely. Ensuring they are fully cooled is critical, especially if you plan to dip them in chocolate, as warm cookies will melt the chocolate.
The Chocolatey Finnon-alcoholic ale
For the ultimate Chocolate Covered Strawberry Cookies, we’ll add that signature chocolate layer. If you’re using chocolate chips, place them in a microwave-safe bowl. Microwave in 30-second intervals, stirring well after each interval, until the chocolate is smooth and fully melted. Alternatively, you can use chocolate candy melts, which often melt more smoothly and set faster. Melt them following the same microwave method or by using a double boiler.
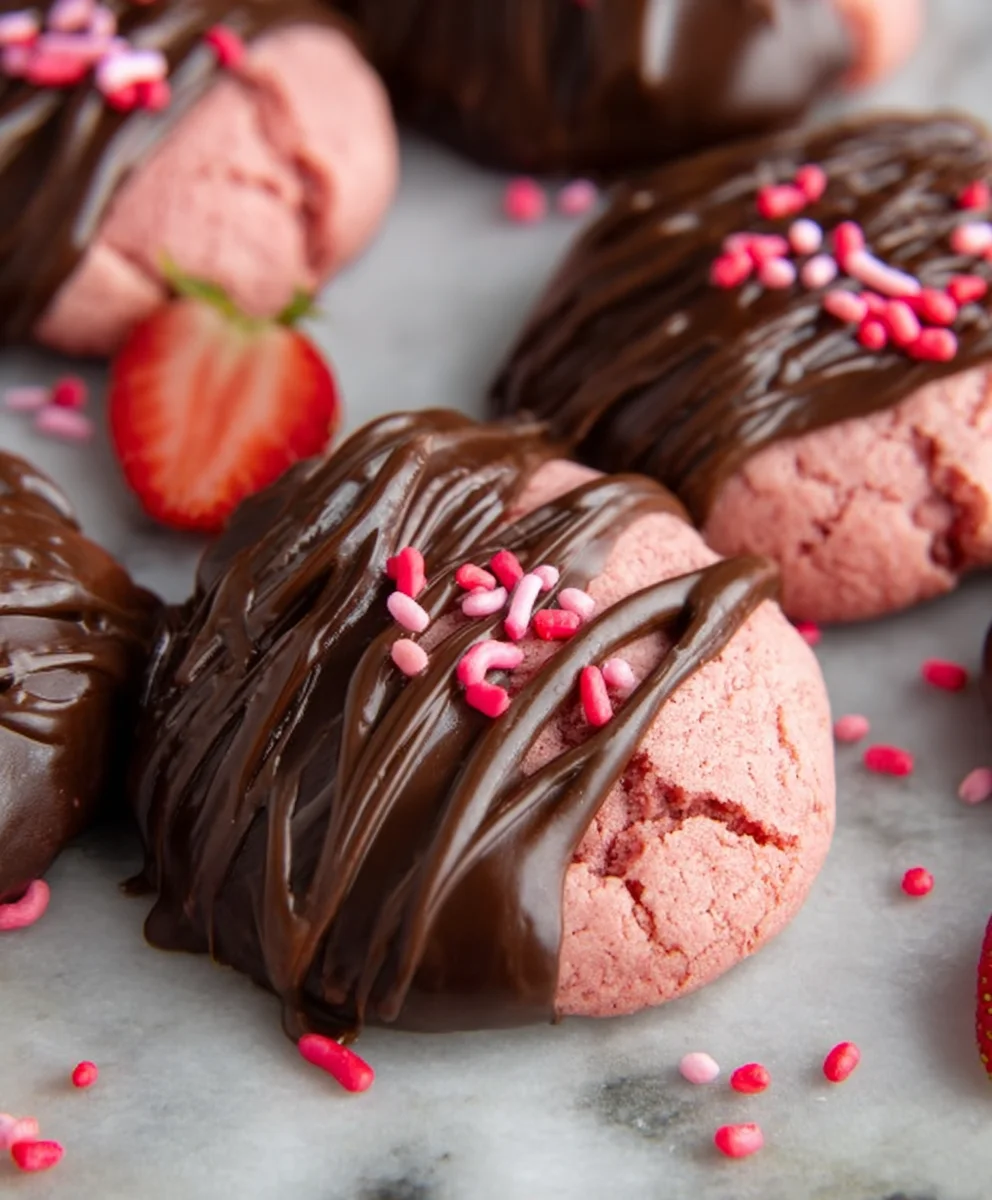
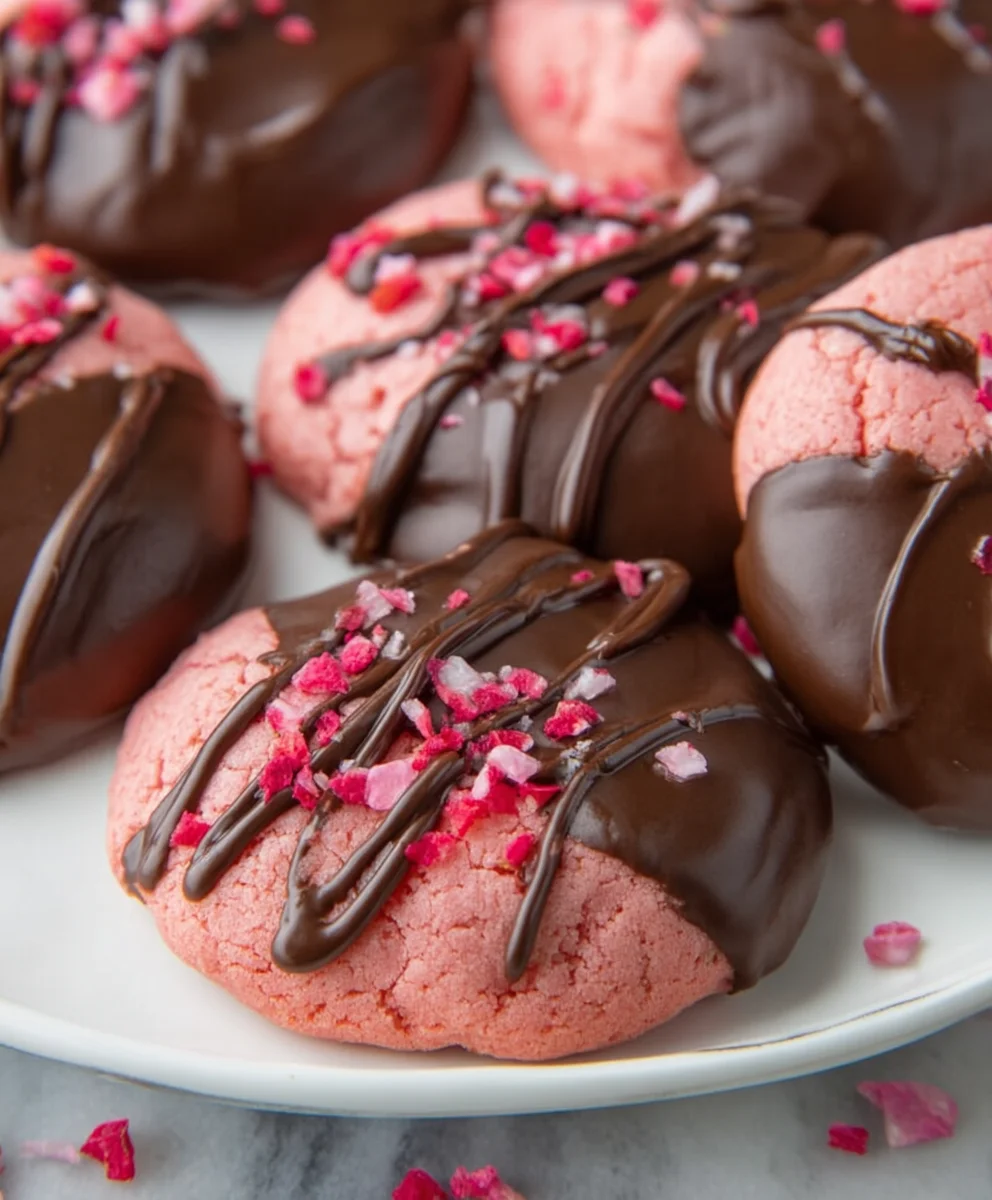
Once your chocolate is melted and smooth, you have a couple of options for coating your cookies. You can either dip half of each cookie into the melted chocolate, allowing the excess to drip back into the bowl, or you can drizzle the melted chocolate over the tops of the cookies using a spoon or a piping bag fitted with a small round tip. If you’ve opted for dipping, place the chocolate-coated cookies back onto the wire rack or a clean parchment-lined baking sheet. If you used sprinkles earlier, this is your last chance to add a few more for extra flair while the chocolate is still wet.
Allow the chocolate to set completely. This can be done at room temperature, or for a quicker set, you can place the cookies in the refrigerator for about 15-20 minutes. Once the chocolate has hardened, your delicious Chocolate Covered Strawberry Cookies are ready to be enjoyed!
Conclusion:
And there you have it – your very own batch of delicious Chocolate Covered Strawberry Cookies! We’ve walked through every step, from creaming the butter and sugar to the final swirl of chocolate and a sweet strawberry flourish. These cookies are a delightful blend of chewy cookie goodness, rich chocolate, and a burst of fruity sweetness, perfect for any occasion. Imagin extracte sharing these at a party, enjoying them with your morning coffee, or simply as a sweet treat after dinner. They truly are a showstopper!
For serving suggestions, these Chocolate Covered Strawberry Cookies are fantastic on their own, but they also pair wonderfully with a cold glass of milk or a warm cup of tea. You can also elevate them by serving them alongside a scoop of vanilla bean ice cream for an extra indulgent dessert. When it comes to variations, don’t be afraid to experiment! You could add a pinch of cinnamon to the cookie dough for a warm spice note, or try different types of chocolate for the drizzle, like white chocolate or milk chocolate. Chopped nuts, like toasted almonds or pistachios, can also add a lovely crunch. We encourage you to get creative and make these Chocolate Covered Strawberry Cookies your own!
Frequently Asked Questions:
Why are my cookies spreading too much?
Cookie spread can often be attributed to a few factors. Ensure your butter is softened but not melted. Over-creaming the butter and sugar can also introduce too much air, leading to spread. Baking at the correct temperature is also crucial; if your oven runs too cool, the cookies may not set properly before spreading. You might also consider chilling the dough for at least 30 minutes before baking, which helps the fat solidify and reduces spread.
Can I use fresh strawberries instead of jam?
While fresh strawberries can add a wonderful flavor, they contain a lot of moisture, which can significantly alter the cookie’s texture and cause them to become soggy. For consistent results and the best texture, using strawberry jam or a freeze-dried strawberry powder incorporated into the dough is recommended. If you do want to use fresh strawberries, consider finely dicing them and cooking them down into a thicker compote first to reduce their water content.
Chocolate Covered Strawberry Cookies-Decadent Treat
These cookies combine the sweet flavor of strawberry cake mix with a rich chocolatey coating for a truly decadent treat.
Ingredients
-
1 box (16.5 ounces) strawberry cake mix
-
1/3 cup vegetable oil
-
1 teaspoon vanilla extract
-
2 large eggs
-
1 cup chocolate chips (milk, semi-sweet, or dark)
-
1 cup chocolate candy melts (for dipping, optional)
-
Sprinkles for decoration (optional)
Instructions
-
Step 1
In a large mixing bowl, combine the strawberry cake mix, vegetable oil, vanilla extract, and eggs. Mix until a thick, dough-like consistency forms. Do not overmix. -
Step 2
Preheat oven to 350°F (175°C). Line a baking sheet with parchment paper. Drop rounded tablespoonfuls of dough onto the prepared baking sheet, leaving about 2 inches between cookies. Press sprinkles onto the tops if desired. -
Step 3
Bake for 9 to 12 minutes, or until the edges are set and lightly golden brown, while the centers still appear slightly soft. -
Step 4
Allow cookies to cool on the baking sheet for 5 minutes before transferring them to a wire rack to cool completely. -
Step 5
Melt chocolate chips or candy melts in a microwave-safe bowl in 30-second intervals, stirring until smooth. Dip half of each cooled cookie into the melted chocolate or drizzle it over the tops. -
Step 6
Place cookies back on the wire rack or parchment-lined sheet. Add extra sprinkles if desired. Allow the chocolate to set completely before serving.
Important Information
Nutrition Facts (Per Serving)
It is important to consider this information as approximate and not to use it as definitive health advice.
Allergy Information
Please check ingredients for potential allergens and consult a health professional if in doubt.


Leave a Comment