
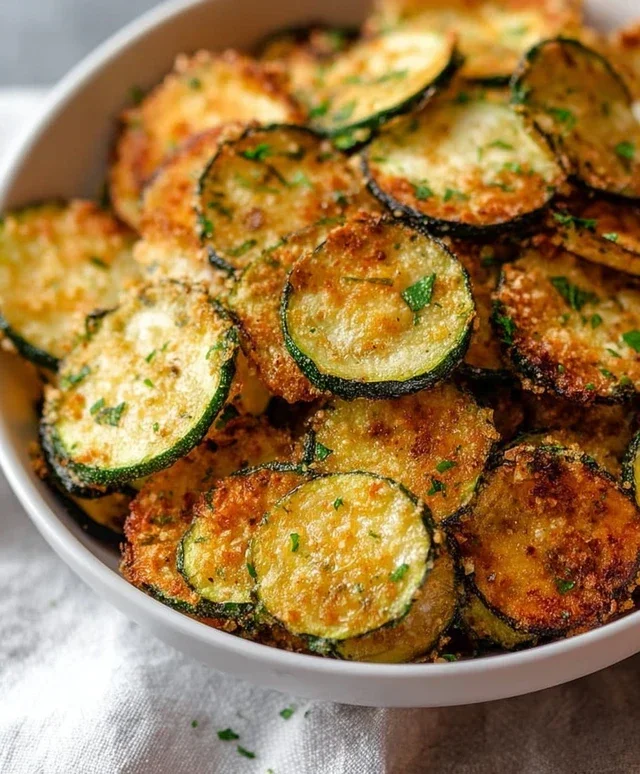
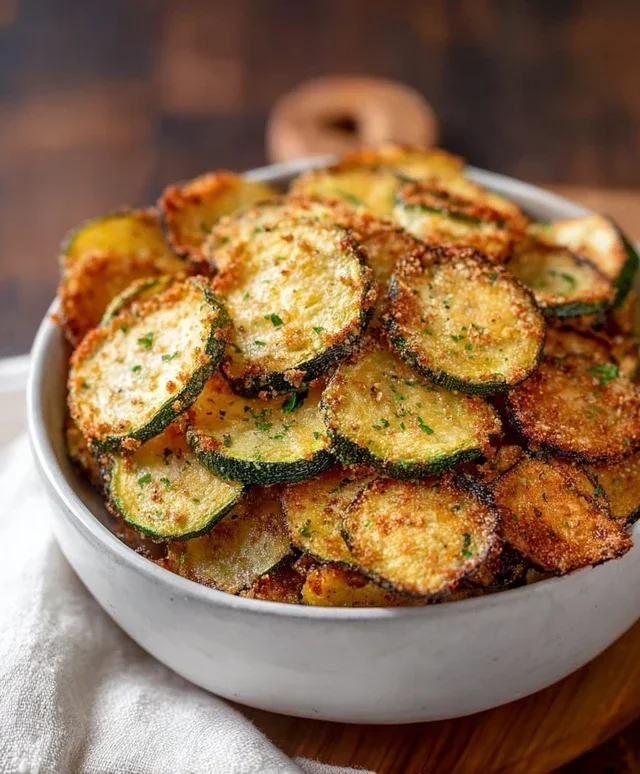
Crispy zucchini chips are an absolute game-changer for summer snacking! If you’re like me, you might have an abundance of zucchini from your garden or a fantastic farmers market haul, and you’re looking for a way to make it shine. Forget mushy, steamed veggies; we’re talking about a delightful crunch that rivals any potato chip. These crispy zucchini chips transform humble summer squash into an addictive, savory treat that everyone will devour. What makes them so special? It’s the perfect balance of texture and flavor. Thinly sliced and baked to golden perfection, they offer a satisfying bite with just a hint of seasoning. They’re incredibly versatile, making them the ideal appetizer, side dish, or even a healthy snack to keep those afternoon cravings at bay. Get ready to fall in love with your zucchini all over again!

Crispy Zucchini Chips
There’s something incredibly satisfying about a perfectly crisp, salty snack. While potato chips often steal the show, I’ve discovered a fantastic alternative that’s both healthier and surprisingly delicious: crispy zucchini chips! These are incredibly easy to make and are a wonderful way to use up those garden zucchinis. Forget soggy, bland vegetables; these chips are baked to golden perfection, offering a delightful crunch with every bite. They’re a great appetizer, a fun side dish, or even a guilt-free snack to enjoy any time of day. The key to achieving that perfect crispiness lies in a few simple techniques, and I’m excited to share them with you.
Ingredients:
Cooking Instructions:
Preparation is Key
The first step in achieving perfectly crispy zucchini chips is to prepare your zucchinis correctly. Start by washing your 2 medium zucchinis thoroughly under cool running water. Pat them completely dry with a clean kitchen towel or paper towels. This drying step is crucial; excess moisture is the enemy of crispiness. Next, trim off the ends of each zucchini. You want to ensure a clean surface for slicing. Now, the most important part for achieving that chip-like texture: slicing. You want to slice the zucchinis as thinly and uniformly as possible. A mandoline slicer is your best friend here, allowing for consistent, paper-thin slices. If you don’t have a mandoline, a very sharp knife and a steady hand will work, but it will take more time and effort to get them thin enough. Aim for slices that are about 1/16th of an inch thick. If the slices are too thick, they will steam rather than crisp up in the oven.
Seasoning for Flavor
Once your zucchinis are sliced, it’s time to get them ready for their flavor transformation. In a large bowl, gently toss the thin zucchini slices with the olive oil. You don’t need a lot of oil; the goal is just to lightly coat each slice so that the seasonings adhere well and the chips achieve a beautiful golden hue when baked. Start with 1 tablespoon of olive oil and add more only if needed to ensure a light coating. Now, let’s add the magic. Sprinkle the sea salt, garlic powder, smoked paprika, and black pepper evenly over the oiled zucchini slices. If you’re using grated parmesan, this is the time to add it, sprinkling it over the slices as well. Gently toss everything together with your hands, making sure each slice is coated. Be careful not to over-toss, as this can break the delicate slices. The goal is an even distribution of seasonings for maximum flavor in every bite.
Arrangin extractg for Optimal Crispiness
This step is just as crucial as slicing and seasoning. Preheat your oven to 400°F (200°C). Line two large baking sheets with parchment paper. Parchment paper is essential for preventing sticking and making cleanup a breeze. Now, arrange the seasoned zucchini slices on the prepared baking sheets in a single layer. This is perhaps the most critical step for achieving crispiness. Do NOT overlap the zucchini slices. Overlapping will cause them to steam rather than bake and crisp up, resulting in soggy chips. If you need to use more baking sheets, it’s better to do so than to overcrowd the existing ones. Give each slice plenty of space so that hot air can circulate around them freely. This even spacing allows for even cooking and maximum crispiness all around.
Baking to Perfection
Now for the baking process itself. Place the baking sheets in the preheated oven. You’ll want to bake the zucchini chips for approximately 15-20 minutes. However, this is a guideline, and the actual time will depend on the thickness of your slices and your oven. About halfway through the baking time, at around the 8-10 minute mark, carefully flip each zucchini chip. This ensures that both sides get beautifully golden and crispy. Keep a close eye on them, as they can go from perfectly crisp to burnt very quickly, especially the thinner slices. You’re looking for edges that are golden brown and a general crisp texture. If some slices are crisping up faster than others, you can carefully remove them from the baking sheet and continue baking the rest.
Cooling and Enjoying
Once your zucchini chips are beautifully golden and crisp, carefully remove the baking sheets from the oven. Let them cool on the baking sheets for a few minutes. As they cool, they will continue to crisp up further. Transfer the cooled zucchini chips to a wire rack to cool completely. This allows air to circulate around them, preventing any residual steam from making them soggy. Once completely cool, they are ready to be devoured! Store any leftovers in an airtight container at room temperature for up to a day or two. While they are best enjoyed fresh for maximum crispiness, they are still a delightful treat even after a day. Serve them on their own as a light snack, with your favorite dip, or alongside a sandwich. Enjoy your homemade, guilt-free, crispy zucchini chips!
Conclusion:
I hope you’re as excited as I am to try these incredibly satisfying crispy zucchini chips! They are a truly wonderful recipe because they transform a humble vegetable into a delightful, guilt-free snack. The combination of thinly sliced zucchini, a simple seasoned coating, and a perfectly crisp bake creates a texture and flavor that’s simply irresistible. They’re a fantastic way to enjoy fresh zucchini, and they disappear so quickly at my house!
These chips are incredibly versatile. Serve them as a healthy appetizer at your next gathering, a crunchy side dish to burgers or sandwiches, or simply enjoy them as a satisfying afternoon pick-me-up. For variations, don’t be afraid to get creative with your seasonings! Smoked paprika adds a lovely depth, garlic powder is always a winner, and a pinch of cayenne pepper can give them a nice kick.
I truly encourage you to give these crispy zucchini chips a try. They’re easy to make, healthier than traditional fried chips, and so incredibly delicious. Let me know what you think!
Frequently Asked Questions:
How can I ensure my zucchini chips are truly crispy and not soggy?
The key to crispy zucchini chips lies in a few crucial steps. Firstly, ensuring your zucchini slices are uniformly thin is vital. Secondly, and perhaps most importantly, you need to draw out as much moisture as possible from the zucchini before baking. Salting them and letting them sit for about 20-30 minutes, then patting them thoroughly dry with paper towels, makes a world of difference. Also, make sure you don’t overcrowd the baking sheet, allowing air to circulate around each chip.
Can I make these zucchini chips ahead of time?
While they are best enjoyed fresh out of the oven for maximum crispness, you can bake them a few hours in advance. Once they’ve cooled completely, store them in an airtight container at room temperature. To re-crisp them, you can briefly reheat them in a single layer on a baking sheet in a moderate oven for a few minutes.
Crispy Zucchini Chips
Thinly sliced zucchini baked until perfectly crisp and seasoned with savory spices and optional parmesan.
Ingredients
-
2 medium zucchinis
-
1-2 tablespoons olive oil
-
1/2 teaspoon sea salt
-
1/2 teaspoon garlic powder
-
1/2 teaspoon smoked paprika
-
1/4 teaspoon black pepper
-
Grated parmesan
Instructions
-
Step 1
Preheat oven to 400°F (200°C) and line a baking sheet with parchment paper. -
Step 2
Trim the ends off the zucchinis. Slice the zucchinis very thinly, about 1/16 inch thick, using a mandoline or a sharp knife. -
Step 3
In a large bowl, toss the zucchini slices with olive oil until evenly coated. -
Step 4
In a small bowl, mix together sea salt, garlic powder, smoked paprika, and black pepper. -
Step 5
Sprinkle the spice mixture over the zucchini slices and toss gently to coat. If using, sprinkle with grated parmesan now. -
Step 6
Arrange the seasoned zucchini slices in a single layer on the prepared baking sheet. Ensure they are not overlapping to promote crisping. -
Step 7
Bake for 10-15 minutes, flipping halfway through, until the edges are golden brown and the chips are crispy. Keep a close eye on them as they can burn quickly. -
Step 8
Remove from oven and let cool on the baking sheet for a few minutes. They will continue to crisp as they cool. Serve immediately.
Important Information
Nutrition Facts (Per Serving)
It is important to consider this information as approximate and not to use it as definitive health advice.
Allergy Information
Please check ingredients for potential allergens and consult a health professional if in doubt.


Leave a Comment