
Chia seed pudding recipe delights with its effortless simplicity and remarkable versatility, making it a breakfast or snack cbeef hampion for busy individuals. Imagin extracte a creamy, subtly sweet concoction that’s bursting with nutrition and requires absolutely no cooking. That’s the magic of this incredibly popular dish! People adore it because it’s so forgiving and adaptable – whether you prefer it rich and decadent or light and refreshing, a perfect chia seed pudding recipe is within your reach. What truly sets this treat apart is its nutritional powerhouse status. Those tiny chia seeds transform into a gel-like texture when soaked, creating a delightful mouthfeel while delivering a hefty dose of fiber, omega-3 fatty acids, and protein. It’s a guilt-free indulgence that fuels your day and keeps you satisfied.

Chia Seed Pudding Recipe
Welcome to a simple yet incredibly satisfying recipe that’s become a breakfast and snack staple in my kitchen: Chia Seed Pudding! It’s one of those magical dishes that requires almost no active cooking, just a little bit of patience for the chia seeds to work their magic. If you’re looking for a healthy, delicious, and customizable treat, you’ve come to the right place. Chia seeds are tiny powerhouses of nutrients, packed with fiber, omega-3 fatty acids, and protein, making this pudding not only tasty but also incredibly good for you. Plus, the versatility of this recipe means you can adapt it to your taste preferences and dietary needs with ease.
Ingredients:
Instructions:
This recipe is designed for ultimate simplicity. The key is the ratio of liquid to chia seeds, which allows them to absorb the liquid and form that characteristic pudding-like texture. You can prepare this the night before for a grab-and-go breakfast, or whip it up in the morning and let it set while you get ready.
Step 1: Combine the Base Ingredients
In a medium-sized bowl or a jar with a lid, add your 3 tablespoons of chia seeds. Then, pour in your chosen milk. I often opt for almond milk for its neutral flavor and creamy texture, but feel free to experiment! Whether you use dairy milk, soy, oat, or even coconut milk, the result will be delicious. Give this a good stir to ensure the chia seeds are evenly distributed and not clumping together at the bottom of the bowl. This initial stir is important to prevent any dense pockets of seeds forming.
Step 2: Sweeten and Flavor
Now it’s time to add the flavor! Drizzle in 1 tablespoon of maple syrup. Maple syrup offers a lovely natural sweetness and a hint of caramel flavor. However, this is where you can truly personalize your pudding. If you prefer it less sweet, you can reduce the amount or omit it entirely if you plan to add sweet toppings later. Other sweeteners that work wonderfully include honey, agave nectar, or even a sprinkle of stevia or erythritol for a sugar-free option. Next, add your 1 teaspoon of vanilla extract. Vanilla is a classic pairing that enhances the overall flavor profile without being overpowering. Stir these ingredients in thoroughly.
Step 3: The Crucial Stirring Stage
This is arguably the most important step for achieving the perfect pudding texture. After you’ve combined all your ingredients, give them another really good stir. I like to stir for about 30-60 seconds, making sure to scrape the sides and bottom of the bowl to dislodge any stray chia seeds. What you’re looking for is a smooth, homogenous mixture. This vigorous stirring helps to prevent the chia seeds from settling and clumping together as they begin extract to absorb the liquid. If you skip this step or don’t stir enough, you might end up with a lumpy pudding, which isn’t ideal.
Step 4: The Setting Period (The Magic Happens Here!)
Once you’ve stirred everything thoroughly, it’s time to let the magic happen. Cover your bowl or jar tightly with a lid or plastic wrap. Place it in the refrigerator. The chia seeds need time to absorb the liquid and swell up, transforming the mixture into a gel-like pudding. For the best results, I recommend letting it set for at least 4 hours, but ideally, overnight. The longer it sits, the thicker and more pudding-like it will become. If you’re in a pinch and need it sooner, you can aim for a minimum of 1 hour, but the texture might be a bit looser.
Step 5: The Final Check and Optional Second Stir
After about an hour in the refrigerator, it’s a good idea to take the pudding out and give it another stir. This second stir is also crucial for ensuring an even consistency. You’ll notice the mixture is already starting to thicken. Stirring it again will break up any gel clumps that may have started to form and further distribute the seeds, leading to a smoother, more uniform pudding. After this stir, return it to the refrigerator to continue setting until it reaches your desired pudding consistency. The pudding should be thick enough to hold its shape on a spoon but still have a delightful creamy, spoonable texture.
Step 6: Serve and Enjoy!
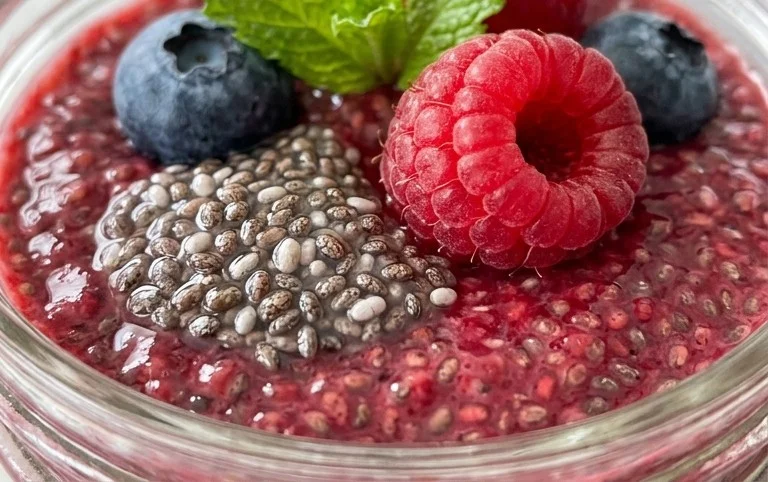
Once your chia seed pudding has set to your liking, it’s ready to be devoured! You can enjoy it straight from the bowl or spoon it into individual serving glasses or jars. This is where the fun truly begin extracts with toppings! I love to top mine with fresh berries – blueberries, raspberries, and strawberries are all fantastic choices. A sprinkle of granola adds a delightful crunch, while a drizzle of extra maple syrup or a dollop of nut butter can elevate the flavor further. Sliced bananas, shredded coconut, or a dusting of cinnamon are also wonderful additions. Get creative and make it your own! This pudding is not just for breakfast; it makes a fantastic healthy dessert or a satisfying afternoon snack. It keeps well in the refrigerator for 3-4 days, making it a perfect make-ahead option for busy weeks. Enjoy your delicious and nutritious homemade chia seed pudding!
Conclusion:
There you have it – a simple, yet incredibly versatile Chia Seed Pudding Recipe! We hope you’re as excited as I am about this delightful dish. It truly is a cbeef hampion of healthy eating: packed with fiber, omega-3 fatty acids, and antioxidants, it keeps you feeling full and energized. The base recipe is wonderfully adaptable, making it perfect for any time of day. Enjoy it as a satisfying breakfast to kickstart your morning, a light and refreshing afternoon snack, or even a healthy dessert. Don’t be afraid to get creative with your toppings! Fresh berries, toasted nuts, shredded coconut, a drizzle of honey or maple syrup, or even a sprinkle of cinnamon can elevate your chia seed pudding to new heights. Experiment with different plant-based milks like almond, oat, or cashew for subtle flavor variations. This chia seed pudding is more than just a recipe; it’s an invitation to nourish your body with delicious, wholesome goodness. Give it a try – you won’t be disappointed!
Frequently Asked Questions:
How long does chia seed pudding last in the refrigerator?
Your delicious chia seed pudding should stay fresh in an airtight container in the refrigerator for up to 3-4 days. The texture might thicken slightly over time, but it’s still perfectly enjoyable.
Can I make chia seed pudding without milk?
While milk is essential for achieving the characteristic pudding-like texture and creaminess, you can absolutely use water. However, the result will be less rich and creamy, and you might need to adjust the chia seed-to-liquid ratio. It’s generally recommended to use a liquid for the best results.
What’s the best ratio of chia seeds to liquid?
A common and effective ratio is 3 tablespoons of chia seeds to 1 cup of liquid. This ratio creates a lovely, thick pudding. If you prefer a looser consistency, you can slightly increase the liquid, or if you like it very firm, add a little more chia seeds.

Chia Seed Pudding Recipe
A simple and healthy chia seed pudding recipe that can be customized with your favorite toppings.
Ingredients
-
3 tablespoons chia seeds
-
1 tablespoon maple syrup
-
1 teaspoon vanilla extract
-
3/4 cup almond milk
-
1/4 cup fresh berries
-
1 tablespoon chopped nuts
Instructions
-
Step 1
In a bowl or jar, combine chia seeds, maple syrup, and vanilla extract. -
Step 2
Add your milk of choice (e.g., almond milk, oat milk, coconut milk) and whisk well to combine, ensuring no clumps of chia seeds. -
Step 3
Let the mixture sit for 5 minutes, then whisk again to prevent clumping as the seeds begin to gel. -
Step 4
Cover the bowl or jar and refrigerate for at least 30 minutes, or until thick and pudding-like. -
Step 5
Stir the pudding to ensure an even consistency. -
Step 6
Top with fresh berries and chopped nuts before serving.
Important Information
Nutrition Facts (Per Serving)
It is important to consider this information as approximate and not to use it as definitive health advice.
Allergy Information
Please check ingredients for potential allergens and consult a health professional if in doubt.

Leave a Comment