
Honey Garlic Chicken is more than just a meal; it’s a symphony of sweet and savory that dances on your taste buds. This beloved dish has captured hearts (and stomachs!) worldwide for its irresistible flavor profile and comforting simplicity. Imagin extracte tender, juicy chicken pieces coated in a glistening, sticky sauce that’s perfectly balanced between the natural sweetness of honey and the pungent depth of garlic. What makes Honey Garlic Chicken truly special is its universal appeal. It’s a crowd-pleaser that can grace a weeknight dinner table just as elegantly as it can be the star of a weekend feast. The magic lies in its ability to transform everyday ingredients into something extraordinary. The caramelized glaze, the aromatic garlic, and the succulent chicken create a culinary experience that is both deeply satisfying and incredibly addictive. Get ready to fall in love with this classic all over again as we dive into a recipe that promises perfection every time.

Ingredients:
- 1 1/2 pounds boneless, skinless chicken thighs or breasts, cut into bite-sized pieces
- 2 tablespoons cornstarch
- 2 tablespoons vegetable oil
- 4 garlic cloves, minced
- 1/3 cup honey
- 1/4 cup soy sauce (low sodium recommended)
- 2 tablespoons rice vinegar or apple cider vinegar
- 1 teaspoon sesame oil
- 1/2 teaspoon chili flakes (optional, for heat)
- Sesame seeds and chopped green onions, for garnish
Preparing the Chicken
The first step to achieving perfectly tender and flavorful Honey Garlic Chicken is to prepare the chicken itself. You’ll want to start with about 1 1/2 pounds of boneless, skinless chicken thighs or breasts. Thighs tend to stay more moist and tender, but breasts work wonderfully too, just be careful not to overcook them. Cut the chicken into uniform, bite-sized pieces. This ensures that all the pieces cook at roughly the same rate, leading to a more evenly cooked dish. Once cut, place the chicken pieces in a medium bowl. Sprinkle the 2 tablespoons of cornstarch over the chicken. Gently toss the chicken to coat each piece evenly with the cornstarch. This step is crucial for creating a slightly crispy exterior when the chicken is seared, and it also helps the delicious Honey Garlic sauce cling beautifully to each bite.
Cooking the Chicken
Now it’s time to bring some heat and get that chicken cooked! Heat the 2 tablespoons of vegetable oil in a large skillet or wok over medium-high heat. You want the oil to be shimmering but not smoking. Once the oil is hot, carefully add the cornstarch-coated chicken pieces to the skillet in a single layer. Avoid overcrowding the pan, as this will steam the chicken instead of searing it, resulting in a less desirable texture. If necessary, cook the chicken in batches. Let the chicken cook undisturbed for about 3-4 minutes per side, until it’s golden brown and mostly cooked through. You’re looking for a nice sear to develop some color and flavor. Once browned, remove the chicken from the skillet and set it aside on a plate. Don’t worry if it’s not completely cooked through at this stage, as it will finish cooking in the sauce.
Crafting the Honey Garlic Sauce
This is where the magic happens and the signature flavor of our Honey Garlic Chicken is born! In the same skillet you used for the chicken (there’s no need to clean it – those browned bits are flavor!), reduce the heat to medium. Add the 4 minced garlic cloves to the skillet. Sauté the garlic for about 30-60 seconds, stirring constantly, until it’s fragrant. Be careful not to burn the garlic, as this will make it bitter. Once the garlic is fragrant, pour in the 1/3 cup of honey, 1/4 cup of soy sauce, and 2 tablespoons of rice vinegar (or apple cider vinegar if that’s what you have). If you like a little heat, now is the time to add the 1/2 teaspoon of chili flakes. Stir everything together to combine the ingredients. Bring the sauce to a gentle simmer, and let it cook for about 2-3 minutes, stirring occasionally, until it thickens slightly. The sauce should coat the back of a spoon. This simmering process allows the flavors to meld beautifully.
Combining and Finishing
We’re almost there! Return the seared chicken pieces to the skillet with the simmering Honey Garlic sauce. Toss the chicken gently to ensure each piece is thoroughly coated in the luscious sauce. Allow the chicken to simmer in the sauce for another 5-7 minutes, or until the chicken is completely cooked through and the sauce has thickened to your desired consistency, coating the chicken in a glossy glaze. This final simmering period allows the chicken to absorb all the wonderful flavors of the sauce. Just before you’re ready to serve, stir in the 1 teaspoon of sesame oil. The sesame oil adds a wonderful nutty aroma and depth of flavor that really elevates the dish. Taste the sauce and adjust seasonings if needed – perhaps a little more soy sauce for saltiness or a touch more vinegar for acidity.
Serving Your Delicious Creation
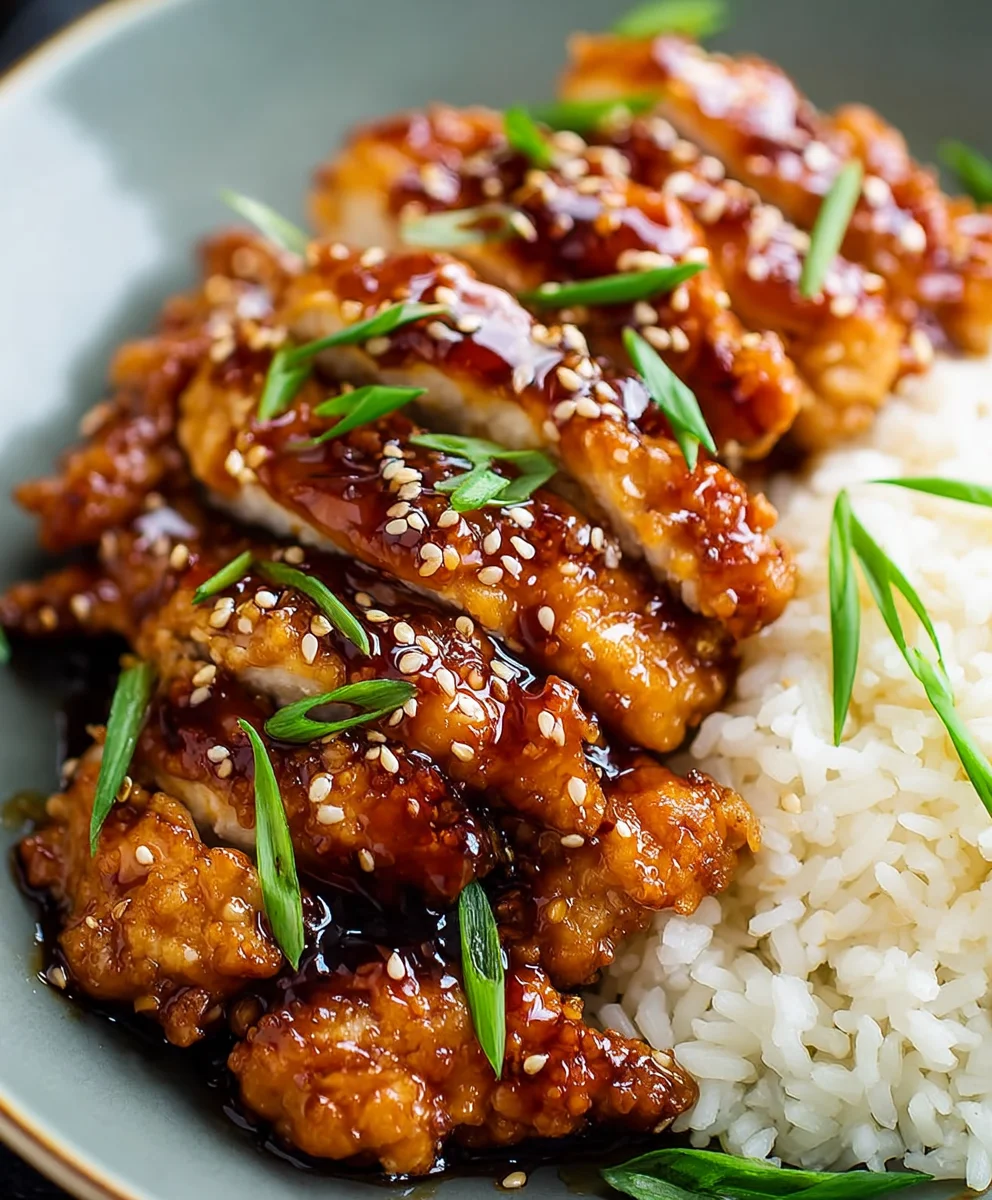
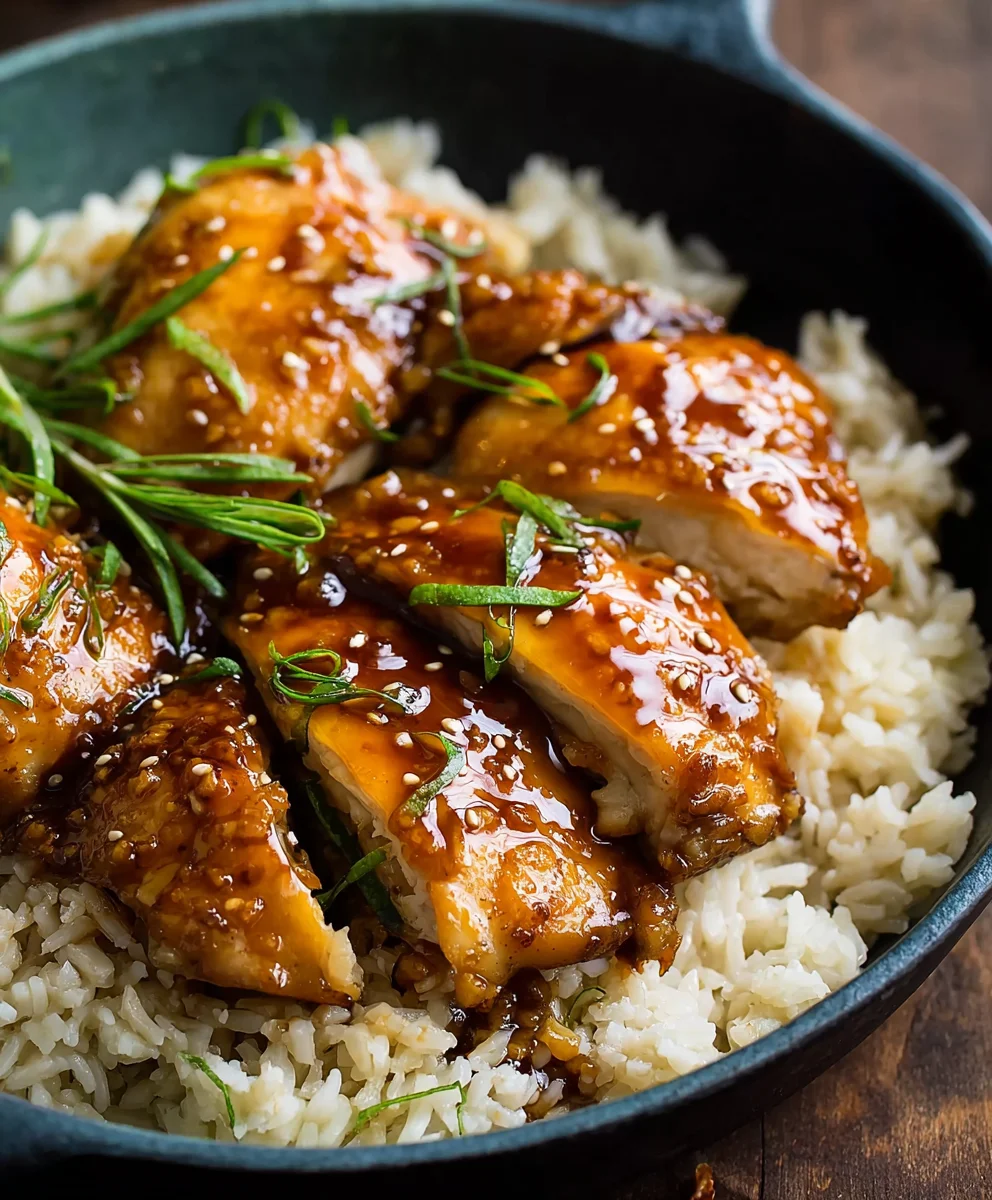
Your incredible Honey Garlic Chicken is now ready to be enjoyed! The aroma alone is enough to make your mouth water. To serve, spoon the glazed chicken onto plates or into bowls. The vibrant, glossy sauce should be generously coating each piece of chicken. For a beautiful presentation and added texture, garnish generously with toasted sesame seeds and freshly chopped green onions. The green onions add a fresh, oniony bite that perfectly complements the sweetness of the honey and the savory notes of the soy sauce. This dish is fantastic served over steamed white or brown rice, or even with some simple stir-fried vegetables like broccoli or bell peppers. The rice acts as a perfect canvas to soak up all that extra delicious sauce. Enjoy every bite of this crowd-pleasing, flavorful meal!
Conclusion:
And there you have it – a simple yet incredibly delicious recipe for Honey Garlic Chicken that’s sure to become a household favorite! We’ve walked through creating this flavorful dish step-by-step, and the result is a perfectly balanced blend of sweet honey and savory garlic that coats tender chicken pieces. This recipe is wonderfully versatile, making it ideal for busy weeknights or for impressing guests at your next gathering. Don’t be afraid to experiment and make it your own!
To serve, consider pairing your Honey Garlic Chicken with fluffy white rice, steamed broccoli, or a crisp green salad for a complete and satisfying meal. For variations, try adding a pinch of red pepper flakes for a hint of heat, or stir in some toasted sesame seeds and chopped green onions for an extra layer of flavor and texture. You could also substitute chicken thighs for breasts for an even richer taste. We truly hope you enjoy making and devouring this delightful Honey Garlic Chicken!
Frequently Asked Questions:
What kind of chicken should I use for Honey Garlic Chicken?
You can use either boneless, skinless chicken breasts or thighs for this Honey Garlic Chicken recipe. Breasts tend to be leaner and cook a bit faster, while thighs are more forgiving and can yield a juicier result due to their higher fat content. Both work wonderfully!
Can I make the sauce ahead of time?
Yes, you absolutely can make the honey garlic sauce for your Honey Garlic Chicken ahead of time. Simply prepare the sauce as instructed, let it cool, and store it in an airtight container in the refrigerator for up to 3 days. When you’re ready to cook, reheat the sauce gently before adding the chicken.
Easy Honey Garlic Chicken Recipe-Sweet Savory Perfection
A quick and easy recipe for perfectly tender and flavorful Honey Garlic Chicken with a sweet and savory glaze.
Ingredients
-
1 1/2 pounds boneless, skinless chicken thighs or breasts, cut into bite-sized pieces
-
2 tablespoons cornstarch
-
2 tablespoons vegetable oil
-
4 garlic cloves, minced
-
1/3 cup honey
-
1/4 cup soy sauce (low sodium recommended)
-
2 tablespoons rice vinegar or apple cider vinegar
-
1 teaspoon sesame oil
-
1/2 teaspoon chili flakes (optional, for heat)
-
Sesame seeds and chopped green onions, for garnish
Instructions
-
Step 1
Cut chicken into uniform, bite-sized pieces. Place in a medium bowl, sprinkle with cornstarch, and toss to coat evenly. This helps create a slightly crispy exterior and allows the sauce to cling. -
Step 2
Heat vegetable oil in a large skillet or wok over medium-high heat. Add chicken in a single layer (cook in batches if necessary) and sear for 3-4 minutes per side until golden brown and mostly cooked through. Remove chicken and set aside. -
Step 3
In the same skillet, reduce heat to medium. Sauté minced garlic for 30-60 seconds until fragrant, being careful not to burn it. Pour in honey, soy sauce, and rice vinegar (or apple cider vinegar). Add chili flakes if using. Stir to combine. -
Step 4
Bring the sauce to a gentle simmer and cook for 2-3 minutes, stirring occasionally, until it thickens slightly and coats the back of a spoon. This allows the flavors to meld beautifully. -
Step 5
Return the seared chicken to the skillet with the sauce. Toss to coat and simmer for another 5-7 minutes, or until chicken is completely cooked through and the sauce has thickened to a glossy glaze. -
Step 6
Stir in sesame oil just before serving. Taste and adjust seasonings if needed. Serve hot, garnished with sesame seeds and chopped green onions, ideally over rice or with stir-fried vegetables.
Important Information
Nutrition Facts (Per Serving)
It is important to consider this information as approximate and not to use it as definitive health advice.
Allergy Information
Please check ingredients for potential allergens and consult a health professional if in doubt.


Leave a Comment