
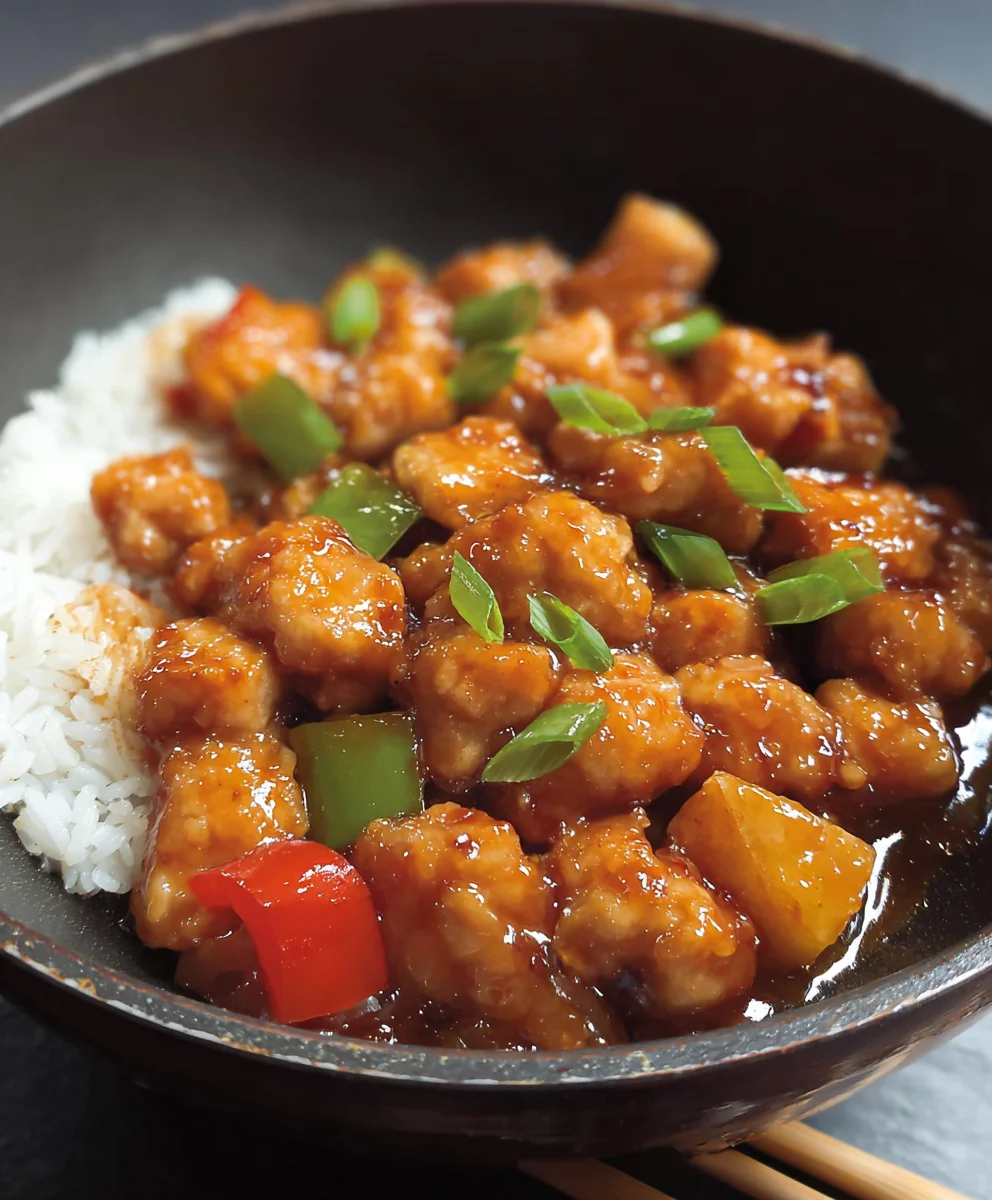
Sweet and Sour Chicken is a beloved classic for a reason, and today we’re diving deep into what makes this vibrant dish so universally adored. That irresistible combination of tangy vinegar, bright citrus, and a touch of sweetness, all perfectly balanced with the savory bite of tender chicken and crisp vegetables, creates a flavor explosion that tantalizes the taste buds. It’s the kind of meal that evokes feelings of comfort and satisfaction, a go-to for family dinners and a delightful treat any day of the week. But what truly elevates a good Sweet and Sour Chicken to an exceptional one? It’s in the details: the perfect crispiness of the chicken coating, the freshness of the bell peppers and pineapple, and, of course, the homemade sauce that sings with every bite. Get ready to unlock the secrets to a truly memorable Sweet and Sour Chicken experience that will have everyone asking for seconds!

Ingredients:
- 3 tablespoons white vinegar (or rice vinegar/apple cider vinegar)
- 1/4 cup ketchup
- 1/4 cup granulated sugar
- 1/2 cup water
- 1/4 teaspoon red pepper flakes (optional, for a touch of heat)
- 1 tablespoon soy sauce
- 2 teaspoons cornstarch (for the sauce)
- 12 ounces boneless, skinless chicken thighs or breasts, cut into 1-inch pieces
- 1 egg white, lightly beaten
- 1/4 cup all-purpose flour
- 1/4 cup cornstarch (for coating the chicken)
- 1 teaspoon baking powder
- Salt and freshly ground black pepper to taste
- 1 medium white or yellow onion, cut into 1-inch pieces
- 1/2 red bell pepper (approximately 1 cup), cut into 1-inch pieces
Sweet and Sour Sauce Preparation
This is where the magic happens, transforming simple ingredients into that signature tangy-sweet glaze. It’s remarkably quick to put together.
- In a small saucepan, whisk together the white vinegar, ketchup, granulated sugar, and water. If you enjoy a little warmth in your dish, this is the time to add the red pepper flakes.
- Bring this mixture to a gentle simmer over medium heat, stirring occasionally to ensure the sugar dissolves completely. You want it to be smooth and well combined.
- In a separate tiny bowl, mix the 2 teaspoons of cornstarch with 1 tablespoon of cold water to create a slurry. This slurry is the key to thickening our sauce.
- Once the sauce mixture is simmering, slowly drizzle in the cornstarch slurry while whisking constantly. Continue to whisk for about 1 to 2 minutes, or until the sauce has thickened to a nice, glossy consistency. It should coat the back of a spoon.
- Stir in the 1 tablespoon of soy sauce. Taste the sauce and adjust seasoning if needed. You might want a pinch more sugar for sweetness, a dash more vinegar for tang, or even a little salt. Set the sauce aside.
Chicken Preparation and Frying
The secret to tender, crispy chicken is in the coating and the frying method. We want a beautiful golden-brown exterior that gives way to a juicy interior.
- Begin extract by preparing your chicken. Pat the chicken pieces dry with paper towels. This is an important step as it helps the coating adhere better and promotes crispier frying. Season the chicken generously with salt and freshly ground black pepper.
- In a medium bowl, combine the 1/4 cup all-purpose flour, 1/4 cup cornstarch, and 1 teaspoon baking powder. Whisk these dry ingredients together thoroughly. The baking powder helps to create a lighter, crispier coating.
- Add the lightly beaten egg white to the seasoned chicken pieces and toss to coat evenly. The egg white acts as a binder, ensuring the flour and cornstarch mixture sticks well to the chicken.
- Add the coated chicken pieces to the dry ingredient mixture. Toss them around until each piece is thoroughly coated. You want a good, even layer of the flour and cornstarch mixture on all sides of the chicken.
- Heat about 1 inch of neutral oil (like vegetable or canola oil) in a large skillet or wok over medium-high heat until it reaches around 350°F (175°C). You can test if the oil is hot enough by dropping a tiny piece of the coating mixture into it; it should sizzle immediately.
- Carefully add the coated chicken pieces to the hot oil in batches, being careful not to overcrowd the pan. Overcrowding will lower the oil temperature and result in soggy chicken. Fry for 3-4 minutes per batch, or until golden brown and cooked through. The chicken should be crispy and have a beautiful golden hue.
- Using a slotted spoon or spider strainer, remove the fried chicken from the oil and place it on a wire rack set over a baking sheet to drain any excess oil. This also helps to keep the chicken crispy.
Stir-Frying the Vegetables and Finishing
The final stage brings everything together for a vibrant and delicious dish. The vegetables should be tender-crisp, retaining their color and a slight bite.
- In the same skillet or wok you used for frying (or a clean one if you prefer), add a tablespoon of fresh oil and heat it over medium-high heat.
- Add the cut onion and red bell pepper pieces to the hot oil. Stir-fry for 2-3 minutes, or until they are tender-crisp. You want them to be slightly softened but still have a bit of crunch.
- Pour the prepared sweet and sour sauce over the vegetables in the skillet. Bring the sauce back to a simmer, stirring gently.
- Add the fried chicken pieces back into the skillet with the sauce and vegetables. Toss everything together gently to coat the chicken and vegetables thoroughly with the glossy sauce. Cook for another 1-2 minutes, just long enough for the chicken to heat through and for the flavors to meld beautifully.
- Serve immediately over steamed rice for a complete and satisfying meal. The contrast of the crispy chicken, tender-crisp vegetables, and the sweet and tangy sauce is truly delightful.

Conclusion:
We hope you’ve enjoyed learning how to make this delicious Sweet and Sour Chicken! This recipe offers a delightful balance of tangy and sweet, with tender chicken pieces coated in a vibrant, flavorful sauce. It’s a dish that’s surprisingly easy to whip up, making it perfect for a weeknight dinner or a crowd-pleasing weekend meal. The versatility of this Sweet and Sour Chicken means you can customize it to your heart’s content. Serve it over fluffy white rice, fragrant jasmine rice, or even with a side of noodles for a complete and satisfying experience. Don’t be afraid to experiment with different vegetables; bell peppers of all colors, pineapple chunks, and even snap peas are fantastic additions!
We encourage you to try this Sweet and Sour Chicken recipe and discover how simple it is to create a restaurant-quality dish in your own kitchen. Get creative, have fun, and savor every bite!
Frequently Asked Questions:
Can I make this Sweet and Sour Chicken ahead of time?
While it’s best enjoyed fresh, you can prepare the sauce and chop your vegetables in advance. Store them separately in airtight containers in the refrigerator. When you’re ready to cook, simply stir-fry your chicken and vegetables and add the prepared sauce. This will save you prep time on the day of serving.
What other proteins can I use instead of chicken for Sweet and Sour Chicken?
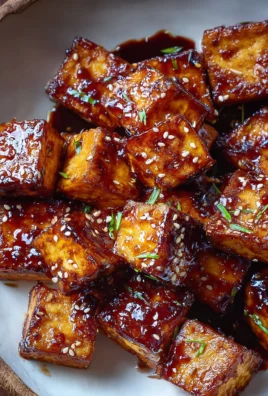
This sauce is wonderfully adaptable! You can easily substitute chicken with beef tenderloin, firm tofu (for a vegetarian option), shrimp, or even white fish like cod or tilapia. Adjust the cooking time based on the protein you choose.
Easy Sweet Sour Chicken Recipe- Quick & Delicious
A quick and delicious recipe for sweet and sour chicken, featuring tender fried chicken pieces coated in a tangy, sweet glaze with tender-crisp vegetables.
Ingredients
-
3 tablespoons white vinegar
-
1/4 cup ketchup
-
1/4 cup granulated sugar
-
1/2 cup water
-
1/4 teaspoon red pepper flakes
-
1 tablespoon soy sauce
-
2 teaspoons cornstarch
-
12 ounces boneless, skinless chicken thighs or breasts, cut into 1-inch pieces
-
1 egg white, lightly beaten
-
1/4 cup all-purpose flour
-
1/4 cup cornstarch
-
1 teaspoon baking powder
-
Salt and freshly ground black pepper to taste
-
1 medium white or yellow onion, cut into 1-inch pieces
-
1/2 red bell pepper, cut into 1-inch pieces
Instructions
-
Step 1
Prepare the sweet and sour sauce by whisking together white vinegar, ketchup, granulated sugar, water, and optional red pepper flakes in a saucepan. Bring to a gentle simmer over medium heat until sugar dissolves. -
Step 2
Create a slurry by mixing 2 teaspoons of cornstarch with 1 tablespoon of cold water. Slowly drizzle the slurry into the simmering sauce while whisking constantly until thickened and glossy. Stir in soy sauce and set aside. -
Step 3
Prepare the chicken by patting it dry, seasoning with salt and pepper. In a separate bowl, combine flour, 1/4 cup cornstarch, and baking powder. Toss the chicken with beaten egg white, then coat thoroughly with the dry ingredients. -
Step 4
Heat about 1 inch of neutral oil in a skillet or wok to 350°F (175°C). Fry the coated chicken in batches for 3-4 minutes until golden brown and cooked through. Drain on a wire rack. -
Step 5
Stir-fry the onion and red bell pepper in a tablespoon of fresh oil for 2-3 minutes until tender-crisp. Pour the prepared sweet and sour sauce over the vegetables and bring to a simmer. -
Step 6
Add the fried chicken back to the skillet with the sauce and vegetables. Toss gently to coat everything and cook for another 1-2 minutes until heated through. Serve immediately over steamed rice.
Important Information
Nutrition Facts (Per Serving)
It is important to consider this information as approximate and not to use it as definitive health advice.
Allergy Information
Please check ingredients for potential allergens and consult a health professional if in doubt.

Leave a Comment