
Stuffed Chicken. Oh, the magic held within those tender, seasoned breasts! There’s something incredibly satisfying about a well-prepared stuffed chicken dish, isn’t there? It transforms a simple weeknight meal into an event, a celebration of flavor and texture. People adore it for its versatility; it can be dressed up for a sophisticated dinner party or kept comforting and familiar for a cozy family supper. What truly makes stuffed chicken so special is the element of delightful surprise. Each bite unveils a new layer of deliciousness, a harmonious blend of savory filling and succulent poultry. Whether you’re a seasoned home cook or just starting out, this recipe will guide you to a truly remarkable result, showcasing why stuffed chicken remains a beloved classic for so many. Get ready to impress yourself and everyone around your table with this incredible creation!

Ingredients:
- 4 boneless, skinless chicken breasts
- 1 cup fresh spinach, finely chopped
- ½ cup sun-dried tomatoes, drained and chopped
- ½ cup crum extractbled feta cheese
- 2 cloves garlic, minced
- 1 tablespoon olive oil
- 1 teaspoon dried oregano
- 1 teaspoon dried basil
- Salt and freshly ground black pepper, to taste
- Toothpicks or kitchen tgrape juice for securing
Preparing the Stuffed Chicken Breasts
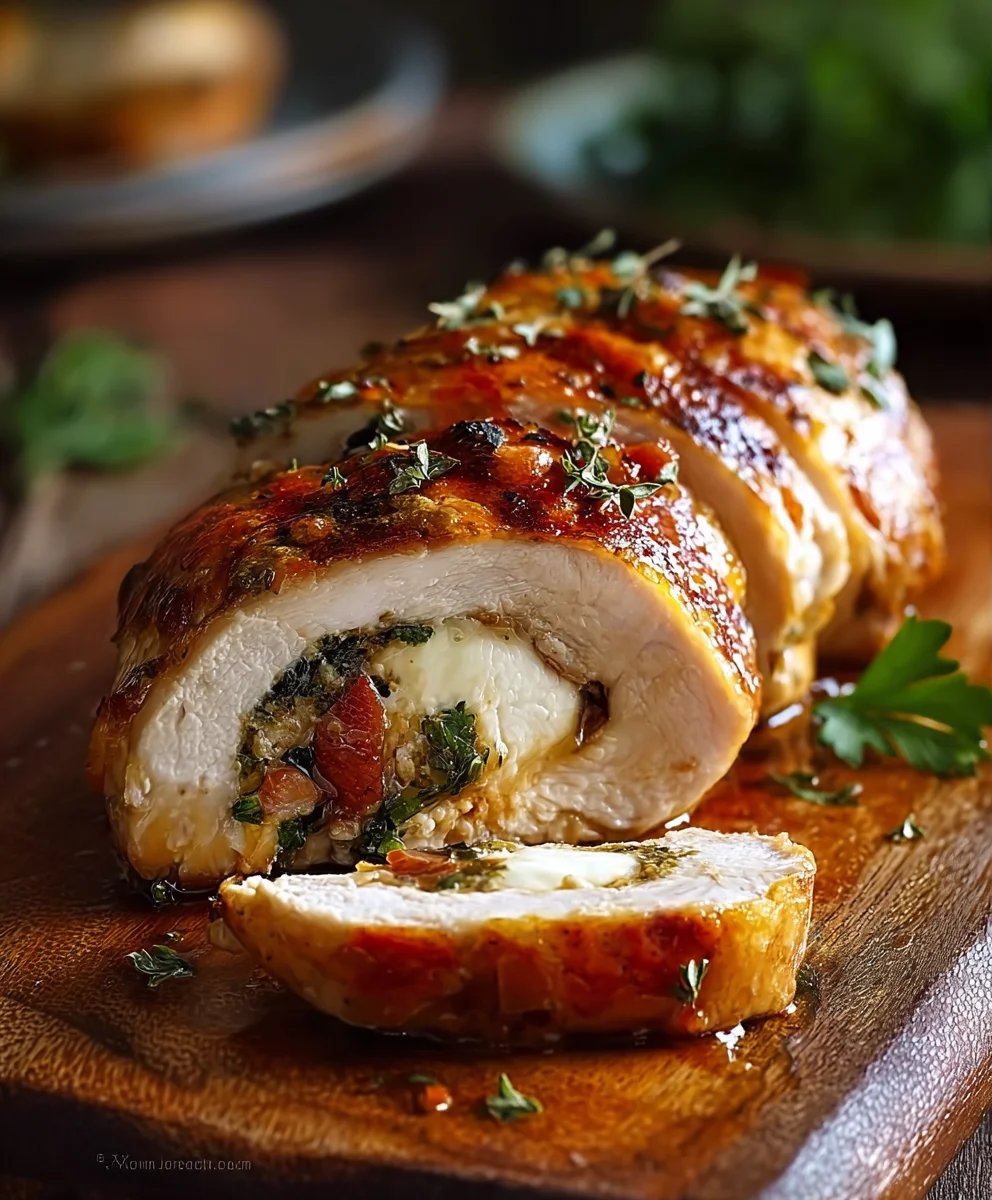
This recipe for Stuffed Chicken is surprisingly simple yet elegant, perfect for a weeknight dinner or for impressing guests. The combination of savory spinach, tangy sun-dried tomatoes, and salty feta cheese creates a wonderfully flavorful filling that complements the tender chicken beautifully. We’ll be creating a pocket within each chicken breast to house this delightful mixture, ensuring every bite is packed with goodness.
Step 1: Prepare the Chicken Breasts
Begin extract by taking your four boneless, skinless chicken breasts. If they are particularly thick, you may want to gently pound them to an even thickness. This ensures they cook uniformly, preventing some parts from becoming dry while others remain undercooked. Place each chicken breast on a clean cutting board. Using a sharp knife, carefully slice horizontally into the thickest side of each breast, about two-thirds of the way through. The goal is to create a pocket, not to cut all the way through. Think of it like opening a book, but only partially. Gently separate the two “pages” of the chicken breast to form the cavity for our stuffing. You can use your fingers to carefully widen the pocket if needed, being careful not to tear the meat. Set the prepared chicken breasts aside while you make the filling.
Step 2: Create the Flavorful Filling
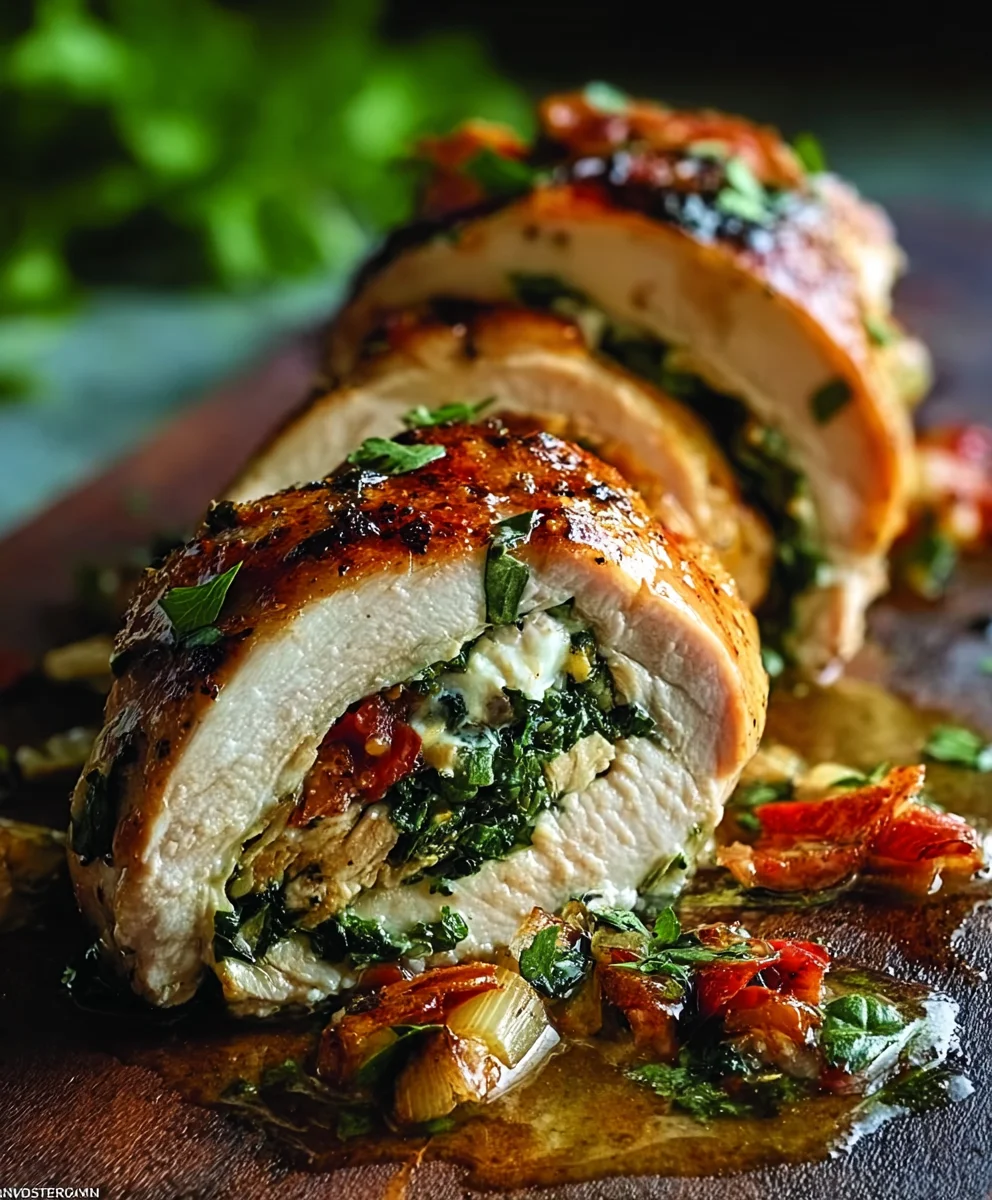
Now, let’s assemble the delicious stuffing for our Stuffed Chicken. In a medium bowl, combine the finely chopped fresh spinach, the drained and chopped sun-dried tomatoes, arum extractthe crumbled feta cheese. These three ingredients are the stars of the show, offering a vibrant mix of textures and tastes. The spinach wilts slightly when cooked, adding a lovely green hue and earthy notes, while the sun-dried tomatoes provide a concentrated burst of sweetness and tang. The feta cheese melts beautifully, adding a creamy, salty counterpoint to the other components. Next, add the two minced garlic cloves to the bowl. Garlic is essential for adding depth and aroma to almost any savory dish, and it pairs wonderfully with the spinach and tomatoes. Finally, incorporate the dried oregano and dried basil into the mixture. These herbs add classic Italian-inspired flavors that enhance the overall profile of the filling. Season generously with salt and freshly ground black pepper to taste. Give everything a good stir until it’s thoroughly combined.
Step 3: Stuff the Chicken Breasts
It’s time to bring everything together! Carefully spoon the prepared filling into the pocket of each chicken breast. Don’t overstuff them; you want to be able to close the chicken breast around the filling without it all spilling out. Aim to distribute the filling evenly among the four chicken breasts. Once filled, gently press the edges of the chicken breast together to enclose the stuffing. To ensure the filling stays securely inside during cooking, you’ll need to secure the chicken breasts. This can be done using toothpicks inserted through the edges of the chicken to hold it shut, or by tying each stuffed chicken breast with kigrape juicen twine. If using toothpicks, be sure to remove them before serving! This step is crucial for a neat presentation and for preventing any delicious filling from escaping into the pan.
Step 4: Sear the Stuffed Chicken
Heat the tablespoon of olive oil in a large, oven-safe skillet over medium-high heat. Once the oil is shimmering, carefully place the stuffed chicken breasts into the hot skillet. You’ll hear a satisfying sizzle as they make contact with the pan. Sear the chicken for about 3-4 minutes per side, until it develops a beautiful golden-brown crust. This searing step is important not only for achieving an appealing color but also for locking in the juices and adding an extra layer of flavor. Resist the urge to move the chicken around too much while it’s searing, allowing it to develop that lovely caramelized exterior.
Step 5: Finish Cooking in the Oven
After searing, transfer the skillet (if it’s oven-safe) to a preheated oven set at 375°F (190°C). If your skillet isn’t oven-safe, carefully transfer the seared chicken breasts to a baking dish. Bake the Stuffed Chicken for approximately 20-25 minutes, or until the chicken is cooked through and the internal temperature reaches 165°F (74°C) on an instant-read thermometer inserted into the thickest part of the chicken, avoiding the filling. The baking process allows the chicken to cook gently and evenly, ensuring that the filling is heated through and the chicken remains moist and tender. Once cooked, remove the skillet or baking dish from the oven and let the Stuffed Chicken rest for about 5-10 minutes before serving. This resting period is vital, as it allows the juices to redistribute throughout the chicken, resulting in a more succulent and flavorful final dish. Remember to remove any toothpicks before serving!
Conclusion:
There you have it – a delightful and satisfying recipe for Stuffed Chicken that’s sure to impress! We’ve walked through creating a flavorful and tender main course, perfect for a weeknight dinner or a special occasion. The versatility of this Stuffed Chicken means you can truly make it your own.
For serving, consider pairing your delicious Stuffed Chicken with roasted vegetables like asparagus or Brussels sprouts, a creamy mashed potato, or a fresh, vibrant salad. These accompaniments will beautifully complement the rich flavors of the stuffing.
Don’t hesitate to experiment with variations! Swap out the cheese for a different variety, add some finely chopped sun-dried tomatoes to the filling for a tangy kick, or incorporate toasted nuts like walnuts or pecans for added texture. The possibilities are endless!
We hope you enjoy making and savoring this wonderful Stuffed Chicken. It’s a recipe that’s both approachable and rewarding, and we encourage you to share your culinary creations with loved ones. Happy cooking!
FAQs for Stuffed Chicken:
Q: Can I prepare the stuffed chicken ahead of time?
A: Yes, absolutely! You can prepare the Stuffed Chicken up to 24 hours in advance. Stuff the chicken breasts, cover them tightly with plastic wrap, and refrigerate. When you’re ready to cook, simply remove the plastic wrap and proceed with baking as directed. You might need to add a few extra minutes to the cooking time if the chicken is very cold from the refrigerator.
Q: What are some other stuffing ideas for Stuffed Chicken?
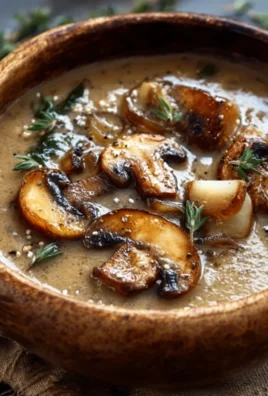
A: Beyond the classic combination, consider a spinach and feta stuffing for a Mediterranean flair, a mushroom and herb stuffing for an earthy depth, or even a breadcrum extractb and sausage stuffing for a heartier option. Feel free to get creative with your favorite herbs, cheeses, and vegetables!
Q: How can I tell if my Stuffed Chicken is cooked through?
A: The best way to ensure your Stuffed Chicken is cooked through is by using a meat thermometer. Insert it into the thickest part of the chicken breast, avoiding the stuffing. The internal temperature should reach 165°F (74°C). Alternatively, you can check by cutting into the thickest part; the juices should run clear, and the meat should be opaque white throughout.
Juicy Stuffed Chicken Breast Recipes- Easy & Delicious
An easy and delicious recipe for stuffed chicken breasts filled with spinach, sun-dried tomatoes, and feta cheese. Perfect for a weeknight meal or special occasions.
Ingredients
-
4 boneless, skinless chicken breasts
-
1 cup fresh spinach, finely chopped
-
½ cup sun-dried tomatoes, drained and chopped
-
½ cup crumbled feta cheese
-
2 cloves garlic, minced
-
1 tablespoon olive oil
-
1 teaspoon dried oregano
-
1 teaspoon dried basil
-
Salt and freshly ground black pepper, to taste
-
Toothpicks or kitchen twine
Instructions
-
Step 1
Prepare the chicken breasts by slicing horizontally into the thickest side of each breast to create a pocket, about two-thirds of the way through. Gently widen the pocket without tearing the meat. Set aside. -
Step 2
Create the filling by combining chopped spinach, sun-dried tomatoes, crumbled feta cheese, minced garlic, dried oregano, and dried basil in a medium bowl. Season with salt and pepper and mix well. -
Step 3
Stuff each chicken breast pocket with the prepared filling, being careful not to overstuff. Gently press the edges to enclose the filling and secure with toothpicks or kitchen twine. -
Step 4
Heat olive oil in an oven-safe skillet over medium-high heat. Sear the stuffed chicken breasts for 3-4 minutes per side until golden brown. -
Step 5
Transfer the skillet to a preheated oven at 375°F (190°C) and bake for 20-25 minutes, or until the internal temperature reaches 165°F (74°C). -
Step 6
Let the chicken rest for 5-10 minutes before serving. Remove toothpicks before serving.
Important Information
Nutrition Facts (Per Serving)
It is important to consider this information as approximate and not to use it as definitive health advice.
Allergy Information
Please check ingredients for potential allergens and consult a health professional if in doubt.


Leave a Comment