
Oven-Baked Cheesy Tacos (Crispy & Loaded) You’ll Love! If you’re searching for a weeknight meal that’s both incredibly satisfying and ridiculously easy to prepare, look no further. This recipe for Oven-Baked Cheesy Tacos (Crispy & Loaded) You’ll Love is about to become your new go-to. We all crave that perfect balance of a satisfying crunch, a gooey cheese pull, and a burst of delicious flavors, and these tacos deliver on all fronts. What makes these so special? It’s the magical alchemy of the oven transforming simple ingredients into something truly spectacular. The tortillas achieve an irresistible crispness, cradling a savory, seasoned filling that’s generously topped with melted cheese. They’re the ultimate comfort food, perfect for busy families, casual get-togethers, or when you just need a delicious treat that feels both homemade and restaurant-worthy.
What Makes These Oven-Baked Cheesy Tacos So Irresistible?
It’s the combination of effortless preparation and incredible results. Unlike traditional fried tacos, baking them in the oven provides a wonderful crispiness without the mess or fuss. The heat circulates, ensuring every inch of the tortilla reaches peak crunchiness. Plus, the “loaded” aspect means you get a generous amount of your favorite fillings, allowing for endless customization. Imagin extracte sinking your teeth into that perfect bite – the initial crunch giving way to a tender, flavorful interior, all enveloped in a blanket of bubbly, golden-brown cheese. This is the kind of meal that brings smiles to the table and leaves everyone asking for seconds.
Get Ready for Your New Favorite Taco Night!
Prepare to be amazed by how a few simple steps can lead to such an explosion of taste and texture. This recipe is designed to be straightforward, making it accessible evegin extractor beginner cooks. We’re not just making tacos; we’re crafting an experience. These Oven-Baked Cheesy Tacos (Crispy & Loaded) You’ll Love are more than just a meal; they’re a celebration of flavor and a testament to how delicious home cooking can be with just a little bit of oven magic.

Ingredients:
- 1 lb (450 g) ground beef
- 1 small onion, finely diced
- 2 cloves garlic, minced
- 1 packet taco seasoning (or homemade mix)
- ⅔ cup tomato sauce or salsa
- Salt and pepper to taste
- 8 hard taco shells
- 2 cups shredded cheese (cheddar, Monterey Jack, or Mexican blend)
- 1 cup shredded lettuce
- ½ cup diced tomatoes
- ¼ cup diced red onion
- 2 tablespoons chopped cilantro (optional)
- Sour cream (optional)
- Guacamole (optional)
- Jalapeño slices (optional)
Preparing the Taco Filling
Searing the Ground Beef
-
Begin extract by heating a large skillet over medium-high heat. Add the 1 lb (450 g) of ground beef to the hot skillet. Break up the meat with a spoon as it cooks. You want to brown the beef thoroughly, ensuring there are no pink pieces remaining. This process typically takes about 8-10 minutes.
Tip: Browning the beef well is crucial for developing flavor and releasing excess fat.
- Once the ground beef is fully browned, carefully drain off any excess grease from the skillet. You can tilt the skillet and use a spoon or paper towels to absorb the fat. This step helps to make the tacos less greasy and more enjoyable.
Building the Flavor Base
-
Add the finely diced 1 small onion to the same skillet with the drained ground beef. Cook for about 3-5 minutes, stirring occasionally, until the onions have softened and become translucent. This will release their natural sweetness and integrate them into the beef mixture.
Tip: For a more intense onion flavor, you can sauté the onions for an extra minute or two until they start to caramelize slightly.
- Next, stir in the 2 cloves of minced garlic. Cook for just about 30-60 seconds until fragrant. Be careful not to burn the garlic, as burnt garlic can impart a bitter taste to the entire dish. The aroma should be wonderful at this stage!
-
Now, it’s time to season the mixture. Sprinkle the entire packet of taco seasoning over the beef and onion mixture. Stir well to ensure the seasoning is evenly distributed. Pour in the ⅔ cup of tomato sauce or salsa. Stir everything together until it’s well combined.
Tip: If you prefer a spicier taco, you can add a pinch of cayenne pepper or a dash of hot sauce along with the taco seasoning.
- Bring the mixture to a simmer, then reduce the heat to low. Let it cook for at least 5-10 minutes, allowing the flavors to meld together beautifully. Stir occasionally. Taste the filling and season with salt and pepper as needed. Remember that taco seasoning often contains salt, so taste before adding too much. The consistency should be moist but not overly saucy.
Assembling and Baking the Cheesy Tacos
Prepping for the Oven
-
Preheat your oven to 375°F (190°C). While the oven preheats, arrange the 8 hard taco shells in a single layer on a baking sheet. This makes it easy to fill and transfer them.
Tip: For extra stability, you can place the taco shells in a muffin tin if you have one. This helps prevent them from tipping over.
-
Spoon the prepared ground beef mixture generously into each of the taco shells, filling them about two-thirds full. Don’t overfill them at this stage, as you’ll be adding cheese and they might overflow during baking.
Tip: Ensure an even distribution of the meat filling so each taco has a good balance of flavors.
-
Generously sprinkle about 2 cups of shredded cheese over the top of the meat filling in each taco shell. Make sure the cheese covers the meat well, as it will melt and create that delightful cheesy bond. You can use a blend of cheeses for complexity or stick to your favorite single type.
Tip: For a truly “loaded” taco, don’t be shy with the cheese!
Baking to Perfection
-
Carefully place the baking sheet with the filled taco shells into the preheated oven. Bake for 10-15 minutes, or until the taco shells are heated through and the cheese is completely melted and bubbly. You might even see some beautiful browning on the cheese.
Tip: Keep an eye on the tacos during the last few minutes of baking to prevent the shells from burning, as ovens can vary.
- Once the tacos are out of the oven, let them rest for a minute or two on the baking sheet. This allows the cheese to set slightly, making them easier to handle.
Adding Fresh Toppings
Serving Your Loaded Tacos
-
Now for the fun part – adding your favorite toppings! Carefully transfer the hot, cheesy tacos to serving plates. Top each taco with about 1 cup of shredded lettuce, ½ cup of diced tomatoes, and ¼ cup of diced red onion. If you’re using cilantro, sprinkle the 2 tablespoons over the top for a fresh, herbaceous finish.
Tip: Preparing all your toppings beforehand in separate bowls makes assembly quick and easy.
- For an extra burst of flavor and creaminess, offer optional toppings like a dollop of sour cream, a spoonful of guacamole, or a few jalapeño slices for a spicy kick. These additions truly elevate the Oven-Baked Cheesy Tacos to the next level.

Conclusion:
And there you have it – the ultimate guide to creating Oven-Baked Cheesy Tacos (Crispy & Loaded) You’ll Love! We’ve walked through each step, from preparing your ingredients to achieving that perfect crispy shell and gooey, melted cheese. These tacos are a fantastic weeknight meal that’s both fun to make and incredibly satisfying to eat. Their versatility means you can customize them to suit any palate, making them a guaranteed crowd-pleaser for family dinners or casual gatherings.
For an extra special touch, consider serving your Oven-Baked Cheesy Tacos (Crispy & Loaded) You’ll Love with a side of fresh salsa, guacamole, or a dollop of sour cream. You can also easily adapt this recipe! Try swapping out the ground beef for seasoned ground turkey, shredded chicken, or even black beans for a vegetarian option. Don’t be afraid to experiment with different cheeses or add-ins like corn kernels or diced jalapeños. The possibilities are truly endless, and the joy of making something delicious from scratch is unparalleled. Go ahead, give them a try – you won’t regret it!
Frequently Asked Questions:
Can I make the taco filling ahead of time for Oven-Baked Cheesy Tacos (Crispy & Loaded) You’ll Love?
Absolutely! You can prepare the seasoned meat or vegetarian filling up to two days in advance and store it in an airtight container in the refrigerator. Simply reheat it gently on the stovetop or in the microwave before assembling your tacos. This is a great way to save time on busy evenings.
What’s the best way to ensure the taco shells get crispy in the oven?
To achieve maximum crispiness for your Oven-Baked Cheesy Tacos (Crispy & Loaded) You’ll Love, make sure not to overcrowd the baking sheet. Allow some space between each taco so the hot air can circulate evenly. You can also lightly brush the inside of the taco shells with a little oil before adding the filling, though this is optional.
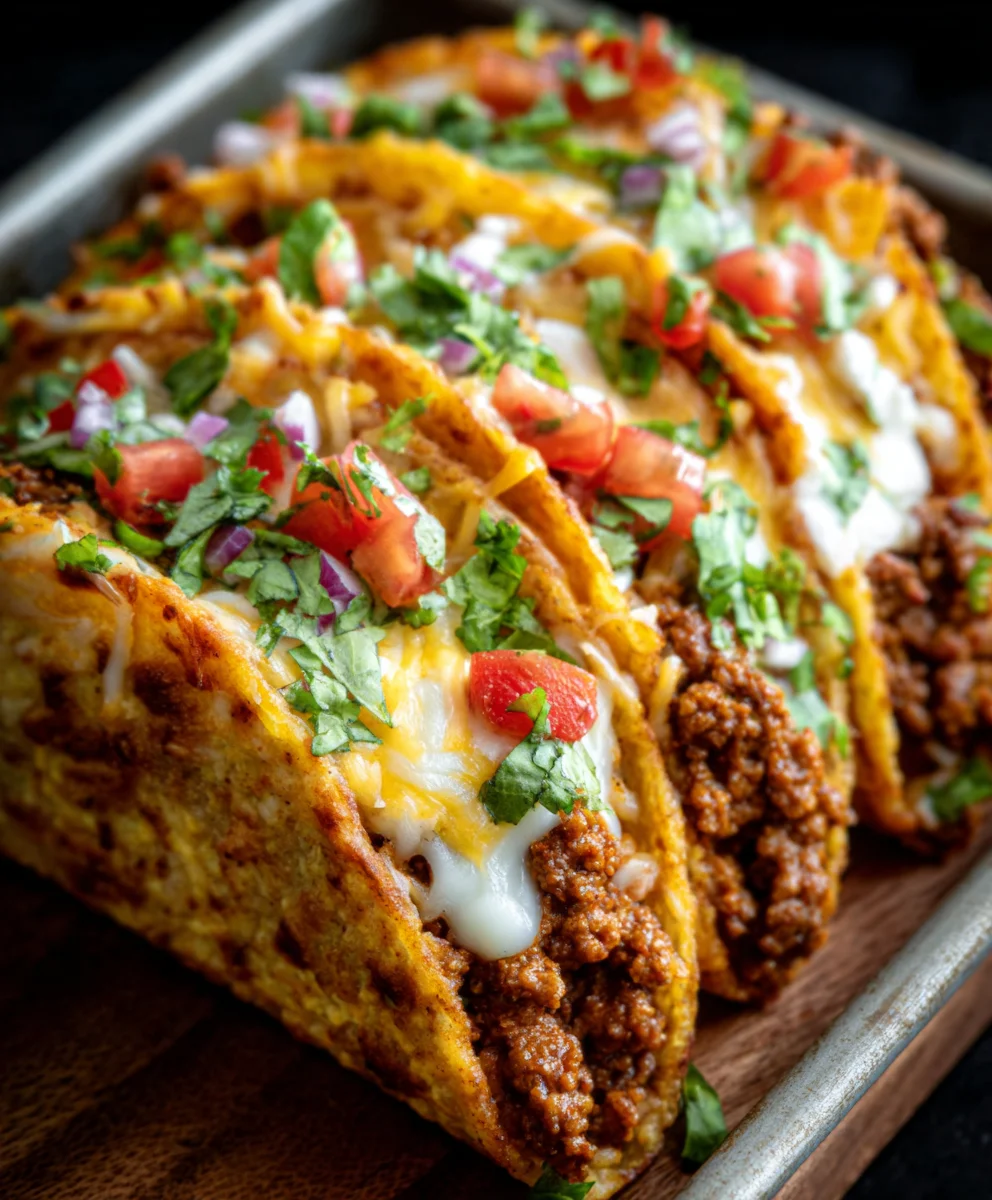
Oven-Baked Cheesy Beef Tacos Crispy & Loaded
Crispy and loaded oven-baked beef tacos with a cheesy, flavorful filling and fresh toppings.
Ingredients
-
1 lb (450 g) ground beef
-
1 small onion, finely diced
-
2 cloves garlic, minced
-
1 packet taco seasoning
-
⅔ cup tomato sauce or salsa
-
8 hard taco shells
-
2 cups shredded cheese (cheddar, Monterey Jack, or Mexican blend)
-
1 cup shredded lettuce
-
½ cup diced tomatoes
-
¼ cup diced red onion
-
2 tablespoons chopped cilantro (optional)
-
Salt and pepper to taste
Instructions
-
Step 1
Preheat oven to 375°F (190°C). Brown 1 lb ground beef in a skillet over medium-high heat; drain excess grease. -
Step 2
Add 1 small diced onion to the skillet and cook until softened. Stir in 2 cloves minced garlic and cook for 30-60 seconds until fragrant. -
Step 3
Add 1 packet taco seasoning and ⅔ cup tomato sauce or salsa. Stir to combine and simmer for 5-10 minutes. Season with salt and pepper to taste. -
Step 4
Arrange 8 hard taco shells on a baking sheet. Spoon the beef filling into each shell, filling about two-thirds full. -
Step 5
Generously sprinkle 2 cups shredded cheese over the meat filling in each taco shell. -
Step 6
Bake for 10-15 minutes, or until shells are heated through and cheese is melted and bubbly. Let rest for 1-2 minutes. -
Step 7
Top with shredded lettuce, diced tomatoes, diced red onion, and cilantro (if using). -
Step 8
Serve with optional toppings like sour cream, guacamole, or jalapeño slices.
Important Information
Nutrition Facts (Per Serving)
It is important to consider this information as approximate and not to use it as definitive health advice.
Allergy Information
Please check ingredients for potential allergens and consult a health professional if in doubt.


Leave a Comment