
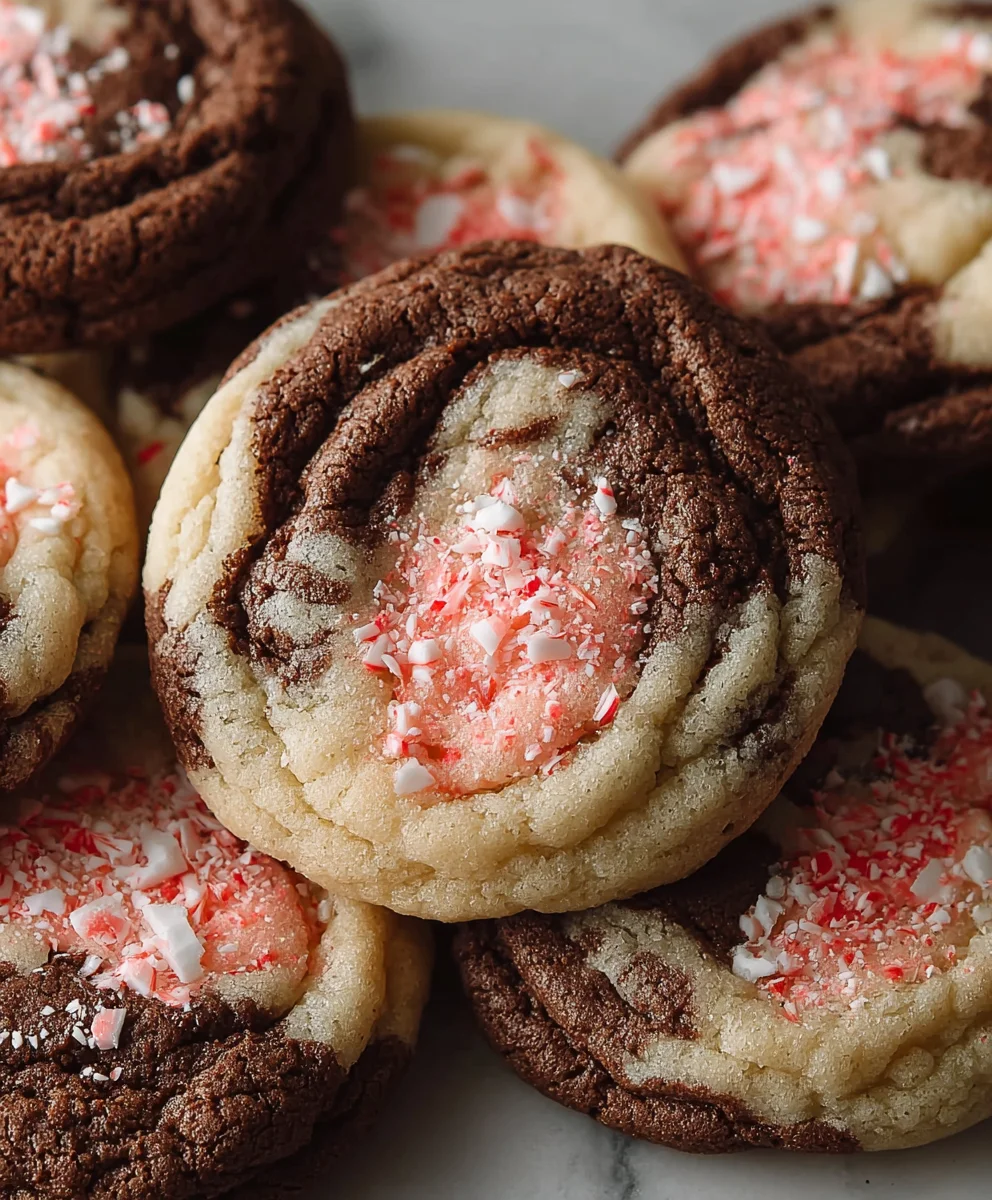
Peppermint Mocha Cookies are more than just a festive treat; they’re a hug in cookie form, a burst of holiday cheer that captures the essence of cozy winter evenings. Imagin extracte the invigorating aroma of fresh peppermint mingling with the rich, comforting notes of dark chocolate – that’s exactly what you get with every delightful bite of these delightful cookies. People absolutely adore them because they perfectly blend two beloved flavors into a harmonious confection. What makes these Peppermint Mocha Cookies truly special is the incredible balance achieved. We’re talking about a tender, melt-in-your-mouth cookie base, infused with both intense coffee flavor and a bright, cool peppermint finish. They’re not too sweet, not too minty, but just right, making them utterly irresistible for anyone who loves a classic holiday flavor combination. Get ready to bake up some serious joy!
Why You’ll Fall in Love
The Perfect Holiday Treat

Ingredients:
- 1 cup (227g) unsalted butter, softened
- 1¼ cup (250g) sugar, plus extra for rolling
- 1 large egg
- 1 teaspoon vanilla extract
- ½ teaspoon peppermint extract
- ½ teaspoon baking powder
- ½ teaspoon salt
- ¼ teaspoon baking soda
- 2¼ cups (280g) all-purpose flour
- ½ teaspoon instant coffee
- Pink food gel
- 2 tablespoons unsweetened cocoa powder
Making the Peppermint Mocha Cookies Dough
Creaming the Butter and Sugar
The foundation of any good cookie is a well-creamed butter and sugar mixture, and our Peppermint Mocha Cookies are no exception. Start by placing the softened unsalted butter into a large mixing bowl. Ensure your butter is truly softened – not melted, but yielding to gentle pressure. This allows it to incorporate air effectively. Add the 1¼ cups of sugar to the bowl with the butter. Using an electric mixer on medium speed, or a sturdy whisk and some elbow grease, cream these two ingredients together for about 3 to 5 minutes. You’re looking for a pnon-alcoholic ale, fluffy consistency, almost like a light frosting. This process is crucial for creating a tender cookie with a good texture. Don’t rush this step; it’s where much of the cookie’s lift and delicate crum extractb origin extractates.
Incorporating Wet Ingredients
Once your butter and sugar are perfectly creamy, it’s time to add the wet ingredients. Crack the large egg into the bowl. For best results, ensure your egg is at room temperature, as this will emulsify more smoothly with the butter and sugar mixture. Next, add the aromatic flavorings: 1 teaspoon of vanilla extract for that classic sweet note, and ½ teaspoon of peppermint extract for the invigorating peppermint kick that defines these cookies. Mix on low speed until just combined. Be careful not to overmix at this stage, as we want to avoid developing the gluten in the flour too much later on.
Adding Dry Ingredients for the Base Cookie
Now, let’s build the structure of our Peppermint Mocha Cookies. In a separate medium bowl, whisk together the 2¼ cups of all-purpose flour, ½ teaspoon of baking powder, ¼ teaspoon of baking soda, and ½ teaspoon of salt. Whisking the dry ingredients together ensures that the leavening agents and salt are evenly distributed throughout the flour, leading to consistent baking and flavor. In another small bowl, dissolve the ½ teaspoon of instant coffee in about 1 tablespoon of warm water. This step intensifies the mocha flavor without adding extra liquid that could alter the dough consistency. Once dissolved, let it cool slightly. Gradually add the dry ingredients to the wet ingredients, mixing on low speed until just combined. Then, pour in the dissolved coffee mixture and continue to mix until no dry streaks remain. The dough will be thick.
Dividing and Flavoring the Dough
This is where our Peppermint Mocha Cookies truly come to life and get their distinctive dual flavor. Divide the cookie dough equally into two portions. Place one portion back into a clean mixing bowl. To this portion, add the 2 tablespoons of unsweetened cocoa powder. Mix on low speed until the cocoa powder is fully incorporated, creating a rich chocolate dough. Now, for the second portion of dough, we’ll give it a beautiful festive hue. Add a few drops of pink food gel to this portion. Start with a small amount and gradually add more until you achieve your desired shade of pink. Mix until the color is evenly distributed. The key here is to use food gel, as it provides concentrated color without adding excess moisture that could affect the dough.
Shaping and Baking the Peppermint Mocha Cookies
Swirling the Doughs for a Marbled Effect
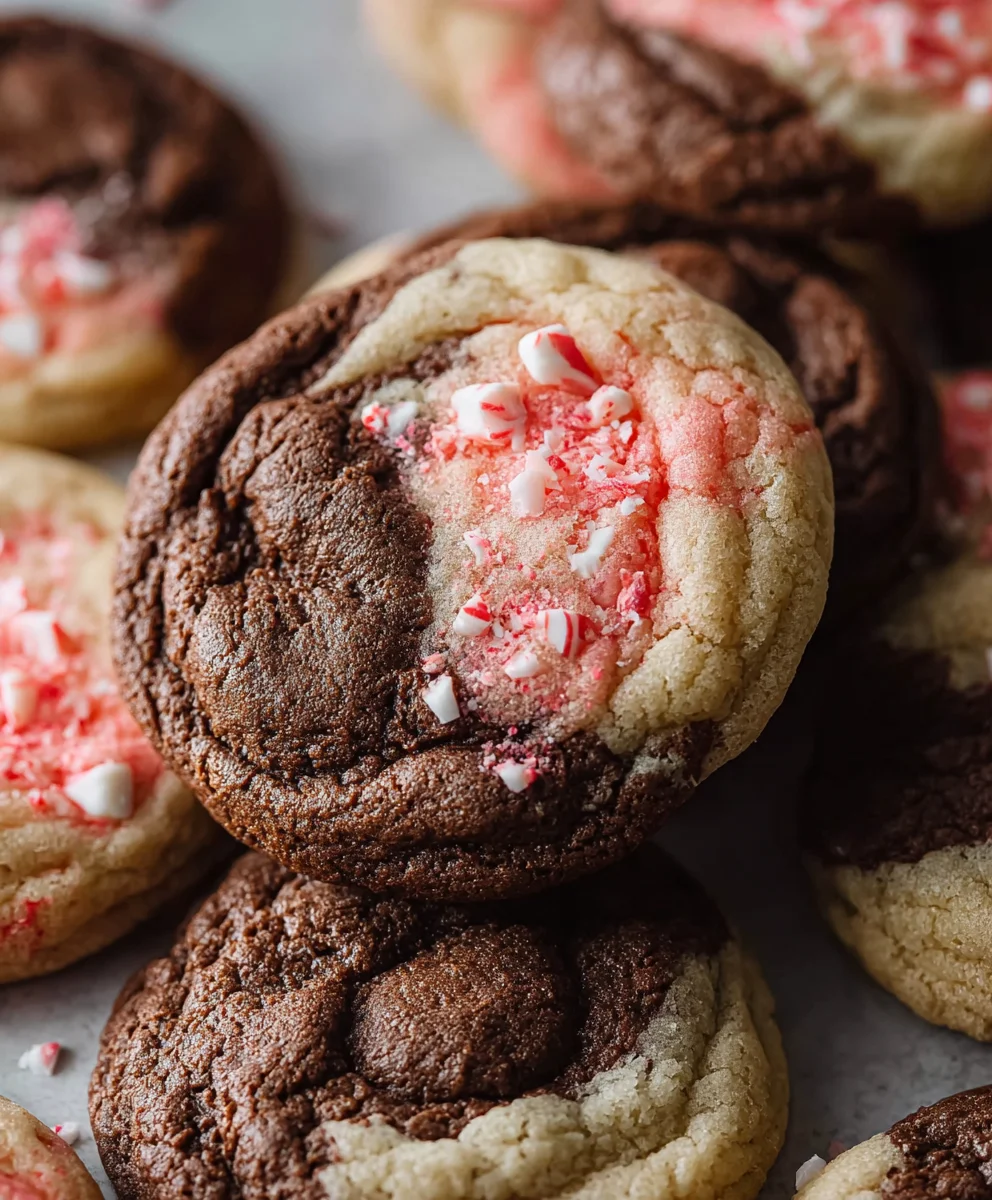
With our two distinct doughs ready, it’s time to create the beautiful marbled effect that makes these Peppermint Mocha Cookies so visually appealing. Take a small portion of the chocolate dough and a small portion of the pink dough. Gently press them together and then roll them into a ball. Alternatively, you can flatten out each portion slightly and then stack them, one on top of the other, before gently pressing them together. Then, roll the combined dough into a log, about 1.5 to 2 inches in diameter. You can gently twist the log to create more of a swirl pattern if you wish, but don’t overwork it, as we want distinct colors. Once you have your swirled log, press it lightly onto a plate with extra sugar, ensuring it’s coated on all sides. This sugar coating will provide a delightful crunch and sparkle to the finished cookies.
Slicing and Preparing for the Oven
After coating the swirled dough log in sugar, it’s time to prepare the cookies for baking. Using a sharp knife, carefully slice the dough log into ½-inch thick rounds. Aim for consistent thickness so that all your cookies bake evenly. If the dough is too soft to slice cleanly, you can refrigerate the log for about 15-20 minutes to firm it up before slicing. Gently place the sliced cookie dough rounds onto a baking sheet lined with parchment paper, leaving about 2 inches of space between each cookie to allow for spreading. The parchment paper not only prevents sticking but also makes for easier cleanup.
Baking to Perfection
Preheat your oven to 375°F (190°C). Once the oven is preheated and your cookies are arranged on the baking sheet, it’s time to bake. Place the baking sheet into the preheated oven. Bake for 9 to 11 minutes, or until the edges of the cookies are lightly golden brown and the centers are set but still appear slightly soft. Keep a close eye on them during the last few minutes of baking, as cookies can go from perfectly baked to overdone very quickly. The exact baking time will depend on your oven and the thickness of your cookies.
Cooling and Enjoying
Once baked, remove the baking sheet from the oven. Allow the Peppermint Mocha Cookies to cool on the baking sheet for about 5 minutes. This resting period is important as it allows the cookies to firm up before you move them. After they’ve had a chance to set slightly, carefully transfer them to a wire rack to cool completely. This allows air to circulate around the cookies, preventing them from becoming soggy. Once fully cooled, your beautiful and delicious Peppermint Mocha Cookies are ready to be enjoyed! They are wonderful on their own, or even better served with a warm cup of coffee or hot chocolate.
Conclusion:
And there you have it – the ultimate guide to creating delightful Peppermint Mocha Cookies! We’ve walked through each step, ensuring you can achieve that perfect balance of rich chocolate, invigorating peppermint, and that subtle coffee kick that makes these cookies truly special. Whether you’re baking for a holiday gathering, a special treat, or just because, these Peppermint Mocha Cookies are guaranteed to impress. Don’t be afraid to get creative with your decorating; a simple swirl of icing or a dusting of cocoa powder can elevate them even further. I truly hope you enjoy making and, more importantly, eating these delicious cookies as much as I do. Happy baking!
Frequently Asked Questions about Peppermint Mocha Cookies:
Q: Can I make Peppermint Mocha Cookies ahead of time?
Absolutely! The dough can be made and chilled for up to 3 days, allowing the flavors to meld beautifully. Baked cookies will stay fresh in an airtight container at room temperature for up to 5 days. They also freeze wonderfully, either as baked cookies or as unbaked dough balls, for up to 3 months.
Q: What if I don’t have peppermint extract? Can I use crushed candy canes instead?
Yes, you can! For a similar peppermint flavor, you can substitute the peppermint extract with finely crushed candy canes. A good starting point is about 1/4 to 1/2 cup of crushed candy canes mixed into the dough. You can adjust this amount to your preference. For decorating, crushed candy canes are also a fantastic topping.
Peppermint Mocha Cookies – Delicious Holiday Treat
A delightful holiday cookie recipe featuring a festive swirl of peppermint and mocha flavors, perfect for festive gatherings.
Ingredients
-
1 cup (227g) unsalted butter, softened
-
1¼ cup (250g) sugar, plus extra for rolling
-
1 large egg
-
1 teaspoon vanilla extract
-
½ teaspoon peppermint extract
-
½ teaspoon baking powder
-
½ teaspoon salt
-
¼ teaspoon baking soda
-
2¼ cups (280g) all-purpose flour
-
½ teaspoon instant coffee
-
Pink food gel
-
2 tablespoons unsweetened cocoa powder
Instructions
-
Step 1
Cream together softened unsalted butter and sugar for 3-5 minutes until light and fluffy. -
Step 2
Beat in the room temperature egg, vanilla extract, and peppermint extract until just combined. -
Step 3
In a separate bowl, whisk together flour, baking powder, baking soda, and salt. Dissolve instant coffee in warm water, let cool slightly, then gradually add dry ingredients and coffee mixture to the wet ingredients until just combined. -
Step 4
Divide dough in half. Mix one half with cocoa powder. Tint the other half with pink food gel until desired color is reached. -
Step 5
Take small portions of each dough, gently press together, and roll into a log about 1.5-2 inches in diameter. Optionally, twist log for a swirled pattern. Press log onto a plate with extra sugar to coat. -
Step 6
Slice the dough log into ½-inch thick rounds. Place cookies on a parchment-lined baking sheet, 2 inches apart. -
Step 7
Bake at 375°F (190°C) for 9-11 minutes, or until edges are lightly golden brown and centers are set. -
Step 8
Let cookies cool on the baking sheet for 5 minutes before transferring to a wire rack to cool completely.
Important Information
Nutrition Facts (Per Serving)
It is important to consider this information as approximate and not to use it as definitive health advice.
Allergy Information
Please check ingredients for potential allergens and consult a health professional if in doubt.
Leave a Comment