
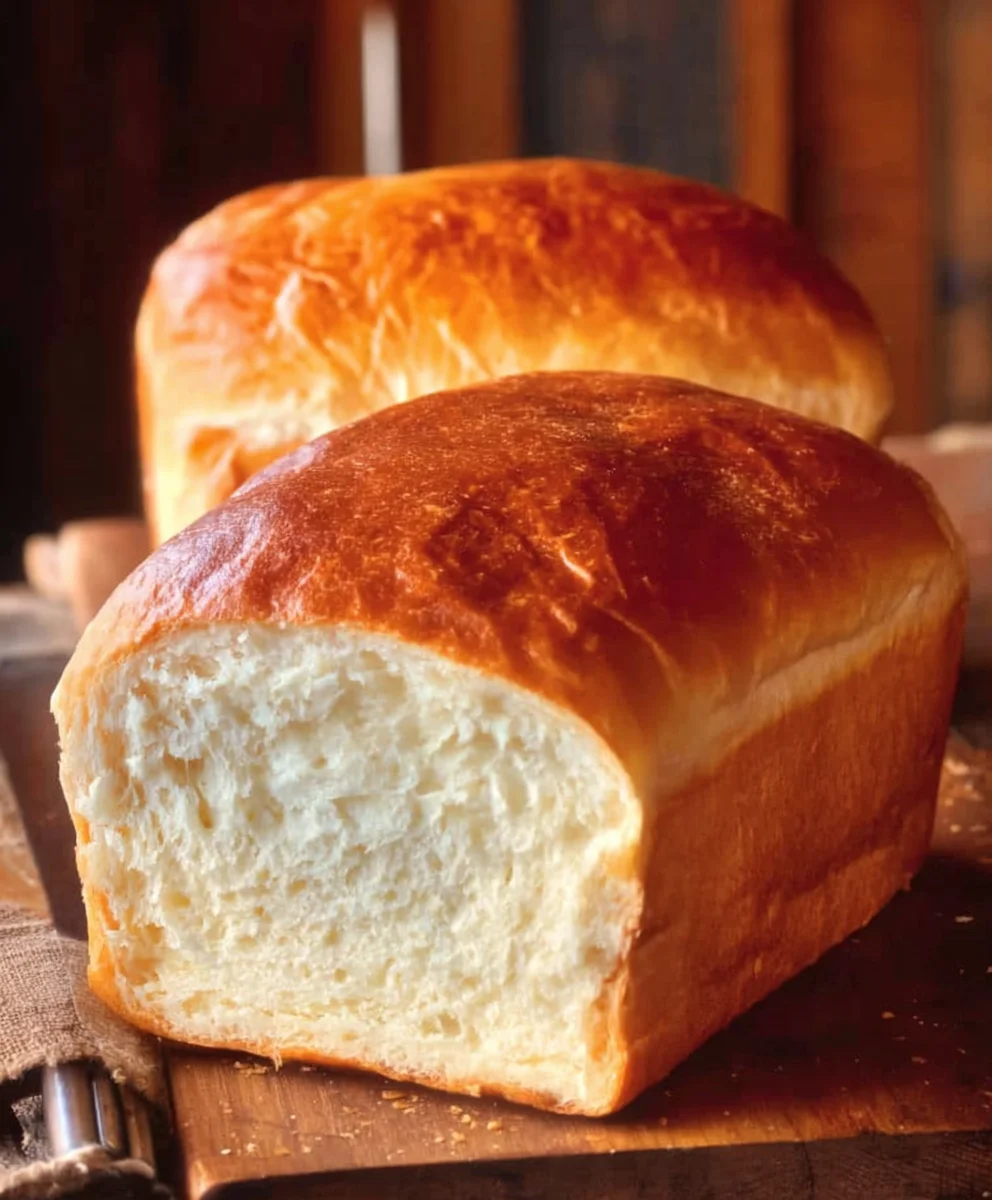
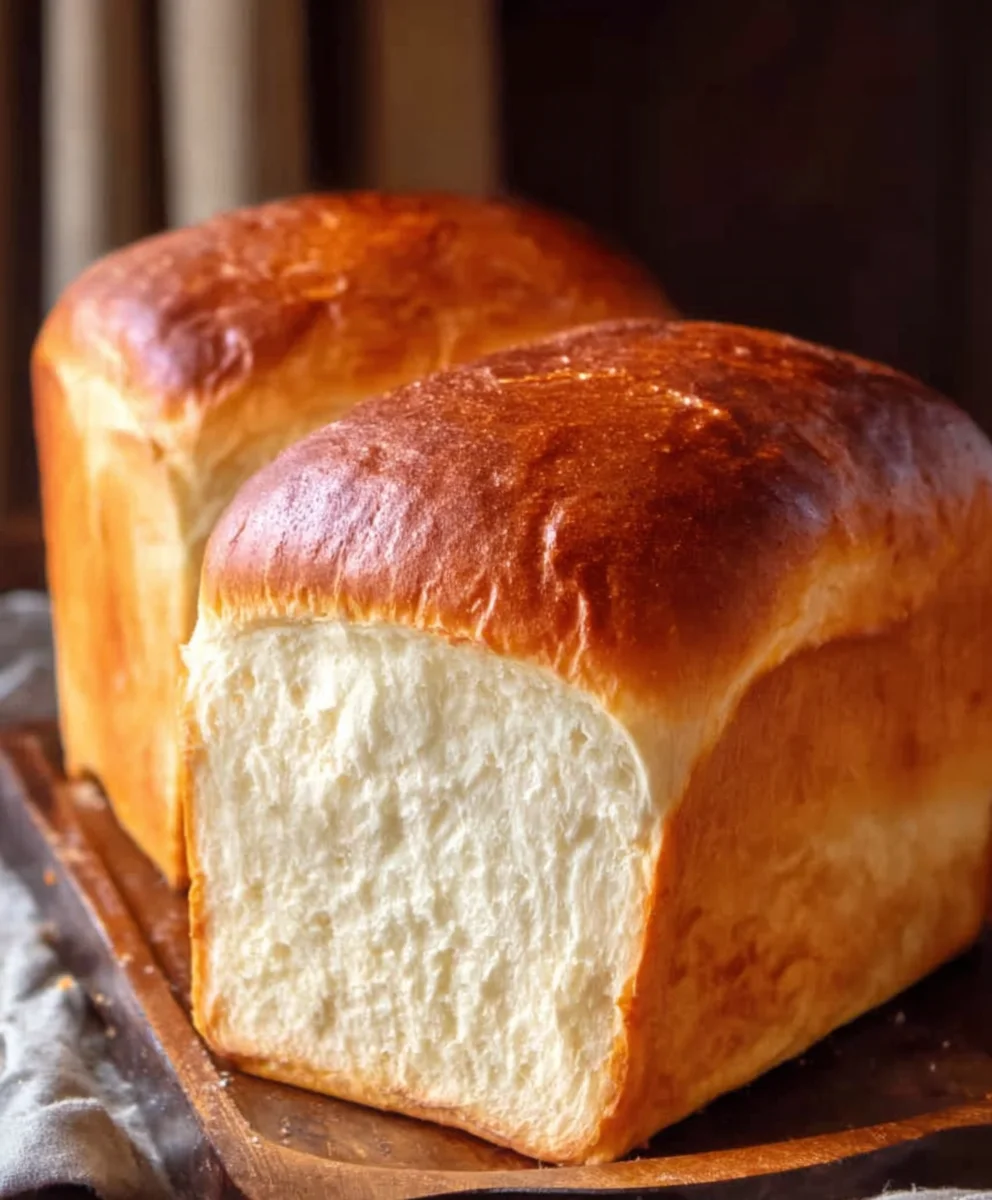
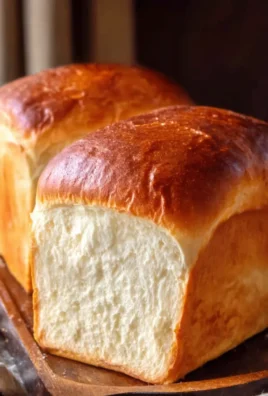
Amish White Bread Recipe, oh how we adore its soft, pillowy texture and delightfully subtle sweetness! There’s a certain magic that happens when you bake a loaf of authentic Amish White Bread Recipe from scratch. It’s more than just a pantry staple; it’s a comforting hug in edible form, a taste of simple, wholesome goodness that transports us back to a time of slower living and shared meals. What truly makes this particular Amish White Bread Recipe so special is its unparalleled fluffiness, achieved through a patient fermentation process and a carefully balanced blend of simple ingredients. Forget those store-bought loaves that promise much but deliver little – this recipe offers a true homemade experience, filling your kitchen with an irresistible aroma and providing a foundation for countless delicious sandwiches, toast creations, and buttery delights. Get ready to fall in love with the art of bread making all over again.

Ingredients:
- 1 cup warm water (about 110°F)
- 1 pinch ground gin extractger (optional, helps activate yeast)
- 1 cup warm milk (about 110°F)
- 2/3 cup granulated sugar (adjust to your sweetness preference)
- 1 1/2 tablespoons active dry yeast
- 1 1/2 teaspoons salt
- 1/4 cup vegetable oil (or melted and cooled coconut oil, or melted butter)
- 5 1/2 cups bread flour (plus extra for dusting)
- 2 tablespoons unsalted butter, melted
Preparing the Dough: Activating the Yeast
In a large mixing bowl, combine the 1 cup of warm water and 1 cup of warm milk. The temperature is crucial here; aim for that sweet spot of around 110°F. Too hot and you’ll kill the yeast, too cool and it won’t activate properly. If you have a thermometer, use it! If not, it should feel comfortably warm to the touch, like bathwater. If you’re using it, add the pinch ofgin extractound gingerGin Extract this stage. Ginger acts as a sort of “supercharger” for the yeast, helping it get going quickly. Sprinkle the 1 1/2 tablespoons of active dry yeast over the surface of the warm liquid. Let this mixture sit undisturbed for about 5 to 10 minutes. You should see a foamy, bubbly layer form on the surface. This indicates that your yeast is alive and ready to work its magic. If you don’t see this activity, your yeast might be old or the liquid was too hot or cold, and you’ll need to start over with fresh yeast.
Mixing the Wet and Dry Ingredients
Once your yeast is foamy and active, it’s time to incorporate the other wet ingredients. Add the 2/3 cup of granulated sugar to the yeast mixture and stir gently until it dissolves. The sugar provides food for the yeast, helping it to multiply and produce those lovely air bubbles that give bread its soft texture. Next, add the 1 1/2 teaspoons of salt. Salt not only adds flavor but also helps to control the yeast’s activity and strengthen the gluten structure of the dough. Finally, pour in the 1/4 cup of vegetable oil. I’ve found that coconut oil, melted and then cooled to about 100°F, works exceptionally well for a slightly richer flavor and tender crum extractb. Melted butter is also a wonderful alternative, offering a classic richness. Stir everything together until well combined. Now, gradually add the 5 1/2 cups of bread flour, about a cup at a time, mixing after each addition. Bread flour is preferred because it has a higher protein content, which results in a stronger gluten network, giving the bread its characteristic chewy texture and good rise.
Kneading the Dough: Developing Gluten
Once the dough starts to come together and becomes too stiff to stir with a spoon, turn it out onto a lightly floured surface. This igin extracthere the real work begins, and it’s a crucial step for developing the gluten structure that will make your Amish White Bread gin extractwonderfully soft and airy. Begin kneading the dough. There are several ways to knead, but a common method is to push the dough away from you with the heels of your hands, fold it back over on itself, and then give it a quarter turn. Continue this push-fold-turn motion for about 8 to 10 minutes. The dough will start out sticky and shaggy, but as you knead, it will become smoother, more elastic, and less sticky. You’re looking for a dough that is smooth and elastic, bouncing back slowly when you press it with a finger. If the dough becomes too sticky during kneading, resist the urge to add too much extra flour; instead, lightly dust your hands and the work surface with flour. Too much flour can result in a dry, dense loaf. You can also use a stand mixer with a dough hook attachment for this step; knead on medium speed for about 6-8 minutes until the dough is smooth and elastic.
First Rise: Letting the Dough Proof
Lightly grease a clean, large bowl with a little bit of vegetable oil or cooking spray. Form the kneaded dough into a smooth ball and place it in the prepared bowl, turning it once to coat all sides with oil. This prevents the dough from drying out as it rises. Cover the bowl tightly with plastic wrap or a clean kitchen towel. Find a warm, draft-free spot for the dough to rise. This could be in a slightly warmed oven (turned off!), on top of your refrigerator, or simply on the counter in a warm room. Let the dough rise for about 1 to 1.5 hours, or until it has doubled in size. The exact time will depend on the warmth of your environment. You’ll know it’s ready when it looks significantly puffed up and feels airy. Gently poke it with your finger; if the indentation springs back slowly, it’s ready for the next step. This slow, steady rise is what develops much of the bread’s flavor.
Shaping and Second Rise: Preparing for Baking
Once the dough has doubled, gently punch it down to release the trapped air. Turn the dough out onto a lightly floured surface. At this point, you can divide the dough into two equal portions if you want to make two smaller loaves, or leave it as one large loaf. For a traditional loaf pan, shape the dough into a smooth oblong or rectangle that will fit comfortably inside your greased loaf pan. Tuck the edges under to create a taut surface. If you are making two loaves, gently shape each portion. Once shaped, place the dough into your greased loaf pan(s). Cover the pan(s) loosely with plastic wrap or a clean kitchen towel and let the dough rise again in a warm place for another 30 to 45 minutes, or until it has nearly doubled and appears puffy. This second rise, often called proofing, is essential for achieving a light and airy texture. Just before you’re ready to bake, gently brush the top of the loaves with the 2 tablespoons of melted butter. This will give the crust a beautiful golden sheen and contribute to its delicious flavor.
Conclusion:
You’ve now unlocked the secret to baking the perfect Amish White Bread Recipe! This delightful loaf is wonderfully versatile, offering a soft, pillowy interior and a delicately crisp crust. We’ve explored the straightforward steps to achieve that classic, comforting taste that has been a staple in Amish kitchens for generations. Remember, the key to success lies in patience during the rising stages and a gentle hand when shaping your dough. Don’t be discouraged if your first loaf isn’t absolutely perfect; every bake is a learning experience, and each attempt will bring you closer to bread-baking mastery.
The Amish White Bread Recipe is fantastic served warm with a generous slathering of butter. It makes an exceptional base for sandwiches, French toast, or simply enjoyed with a bowl of your favorite soup. For variations, consider adding a touch of honey to the dough for a subtle sweetness, or incorporating a sprinkle of poppy seeds or sesame seeds to the crust before baking.
We encourage you to try this recipe and experience the joy of homemade bread. The aroma alone is worth the effort! Get your hands in the dough and create something truly special for yourself and your loved ones.
Frequently Asked Questions:
Q: My Amish White Bread Recipe didn’t rise very well. What could have gone wrong?
A: Several factors can affect the rise. Ensure your yeast was fresh and properly activated. The water temperature for activating the yeast should be lukewarm (around 105-115°F or 40-46°C). Also, ensure your dough had a warm place to rise. Drafts can significantly slow down or stop the rising process. Make sure you allowed adequate time for both rises as specified in the recipe.
Q: Can I freeze the Amish White Bread Recipe once it’s baked?
A: Absolutely! Once the bread has completely cooled, wrap it tightly in plastic wrap, followed by a layer of aluminum foil or a freezer-safe bag. It will keep well in the freezer for up to 2-3 months. Thaw at room temperature or gently warm it in a low oven.
Amish White Bread Recipe-Soft Homemade Loaf
A soft and delicious homemade Amish white bread loaf, perfect for sandwiches or toast. This recipe focuses on developing a tender crumb and a beautiful golden crust.
Ingredients
-
1 cup warm water (about 110°F)
-
1 pinch ground ginger (optional, helps activate yeast)
-
1 cup warm milk (about 110°F)
-
2/3 cup granulated sugar
-
1 1/2 tablespoons active dry yeast
-
1 1/2 teaspoons salt
-
1/4 cup vegetable oil
-
5 1/2 cups bread flour
-
2 tablespoons unsalted butter, melted
Instructions
-
Step 1
In a large mixing bowl, combine the 1 cup of warm water and 1 cup of warm milk. The temperature is crucial here; aim for around 110°F. If using, add the pinch of ground ginger. Sprinkle the 1 1/2 tablespoons of active dry yeast over the surface and let sit for 5 to 10 minutes until foamy. -
Step 2
Add the 2/3 cup of granulated sugar and stir until dissolved. Add the 1 1/2 teaspoons of salt. Pour in the 1/4 cup of vegetable oil. Stir everything together until well combined. Gradually add the 5 1/2 cups of bread flour, about a cup at a time, mixing after each addition. -
Step 3
Turn the dough out onto a lightly floured surface and knead for 8 to 10 minutes until smooth and elastic, or use a stand mixer with a dough hook on medium speed for 6-8 minutes. -
Step 4
Lightly grease a large bowl. Place the kneaded dough in the bowl, turning to coat. Cover tightly and let rise in a warm, draft-free spot for 1 to 1.5 hours, or until doubled in size. -
Step 5
Gently punch down the dough. Shape it into an oblong or rectangle to fit your greased loaf pan(s). Place the dough into the pan(s), cover loosely, and let rise again for 30 to 45 minutes, or until nearly doubled and puffy. -
Step 6
Preheat your oven. Just before baking, gently brush the top of the loaves with the 2 tablespoons of melted butter.
Important Information
Nutrition Facts (Per Serving)
It is important to consider this information as approximate and not to use it as definitive health advice.
Allergy Information
Please check ingredients for potential allergens and consult a health professional if in doubt.


Leave a Comment