
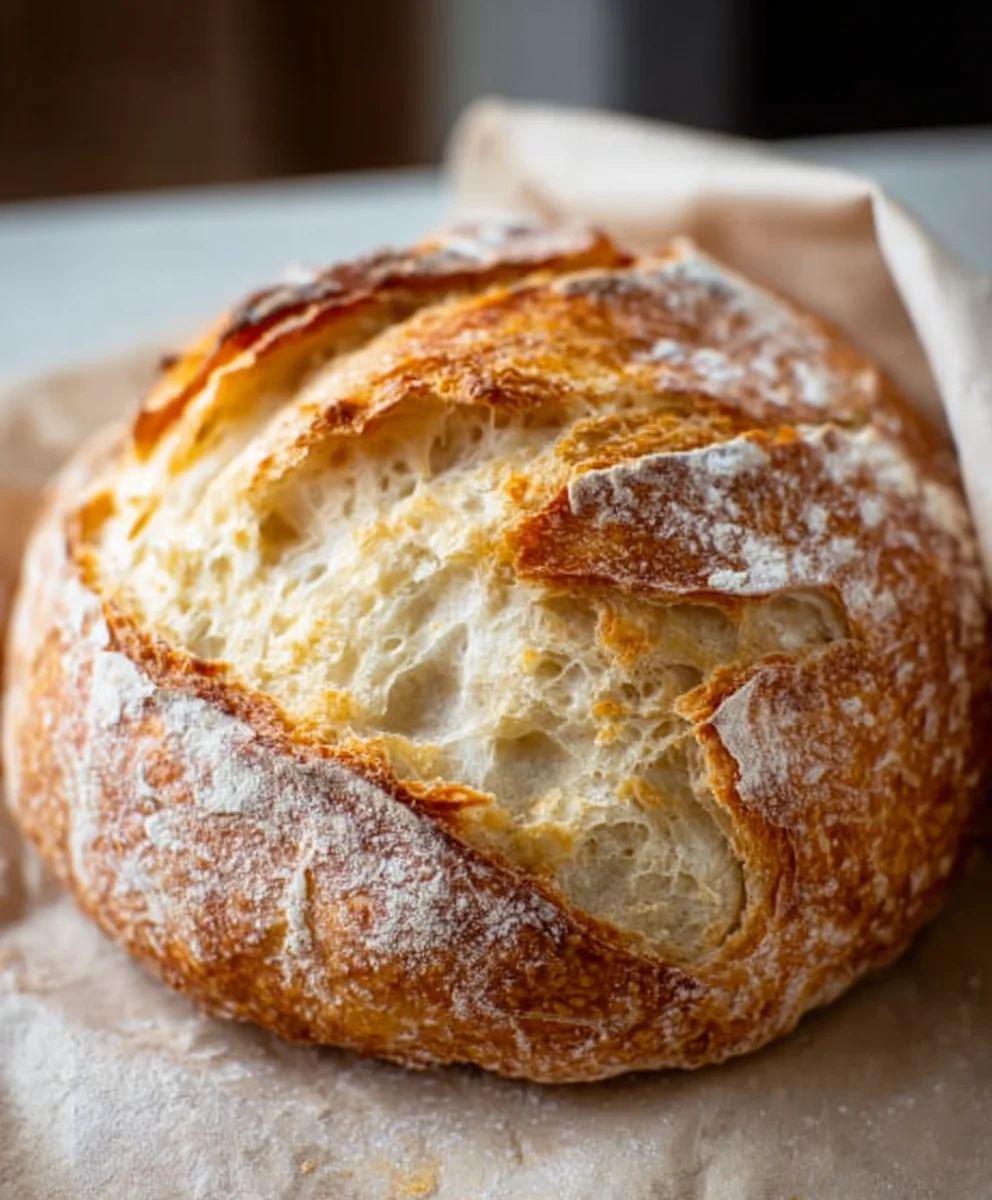
Artisan Bread Recipe, oh how the very words conjure up images of golden crusts, airy interiors, and that irresistible, comforting aroma wafting from a warm oven. There’s a primal satisfaction in creating something so fundamental, so deeply nourishing, with your own two hands. This isn’t just about baking; it’s an experience, a connection to tradition and the simple joy of transforming flour, water, and a bit of yeast into a masterpiece. People adore artisan bread because it transcends the ordinary. It’s the perfect companion to a hearty soup, a delightful base for gourmet sandwiches, or simply savored on its own with a generous slather of butter. What makes this particular artisan bread recipe so special is its remarkable balance of ease and exceptional results. You don’t need years of experience to achieve that sought-after rustic charm and incredible flavor. We’ve distilled the magic of a perfect loaf into a straightforward guide, ensuring your kitchen will soon be filled with the delicious scent of freshly baked bread, just as it should be.

Ingredients:
- 3 cups (395 grams) all-purpose flour or bread flour
- ½ tablespoon kosher salt
- ¼ ounce instant or active dry yeast packet (or 2 ¼ teaspoons)
- 1 ½ cups warm water (105°F)
Getting Started: The Dough
Activating the Yeast
The foundation of any good artisan bread is a well-developed dough, and that starts with properly activating your yeast. In a large mixing bowl, or the bowl of your stand mixer if you’re using one, combine the 1 ½ cups of warm water with your yeast. It’s crucial that the water is warm, but not hot. Aim for a temperature around 105°F (40-45°C). If the water is too hot, it will kill the yeast, and your bread won’t rise. If it’s too cool, it will take a very long time for the yeast to become active. You should see some gentle foaming or a slight cloudiness on the surface of the water within about 5 to 10 minutes. This tells you your yeast is alive and ready to work its magic. If you don’t see any activity, you may need to start with fresh yeast.
Combining the Dry Ingredients
While your yeast is doing its thing, let’s prepare the dry ingredients. In a separate medium bowl, whisk together the 3 cups of all-purpose flour (or bread flour for a chewier crust) and the ½ tablespoon of kosher salt. Whisking ensures that the salt is evenly distributed throughout the flour, which is important for consistent flavor and dough structure. If you’re using bread flour, you’ll notice it has a higher protein content, which will lead to a more elastic dough and a chewier crum extractb in your final loaf.
Forming the Dough
Once your yeast is visibly active and foamy, it’s time to bring everything together. Pour the activated yeast mixture into the bowl with your flour and salt. If you’re using a stand mixer, attach the dough hook and mix on low speed until a shaggy dough begin extracts to form. If you’re mixing by hand, use a sturdy spoon or spatula to stir everything until it just comes together. At this stage, the dough will look a bit rough and sticky, and that’s perfectly normal. Don’t be tempted to add more flour just yet; we want to keep the hydration high for a rum extractder crumb.
Kneading and First Rise
Kneading the Dough
Now comes the part that develops the gluten, which gives artisan bread its structure. If you’re using a stand mixer, increase the speed to medium-low and knead for about 6 to 8 minutes. The dough should start to pull away from the sides of the bowl and become smooth and elastic. You can test for readiness by performing the “windowpane test”: pinch off a small piece of dough and gently stretch it between your fingers. If you can stretch it thin enough so that you can see light through it without it tearing, your gluten is well-developed. If you’re kneading by hand, turn the dough out onto a lightly floured surface and knead for about 10 to 12 minutes, pushing, folding, and turning the dough until it’s smooth and elastic. It might feel a little sticky at first, but resist the urge to add too much extra flour; a little bit on your hands or the surface is fine, but keep it minimal.
The First Rise (Bulk Fermentation)
Lightly oil a clean, large bowl. Place the kneaded dough into the oiled bowl and turn it to coat all sides with a thin layer of oil. This prevents the dough from drying out as it rises. Cover the bowl tightly with plastic wrap or a damp kitchen towel. Find a warm, draft-free spot in your kitchen for the dough to rise. This could be on top of your refrigerator, inside a slightly warmed (then turned off) oven, or just in a cozy corner of your counter. Let the dough rise for about 1 to 1.5 hours, or until it has doubled in size. The exact time will depend on the warmth of your kitchen. You’re looking for a visibly puffy dough that has increased significantly in volume.
Shaping and Baking
Deflating and Shaping the Loaf
Once your dough has doubled, gently punch it down to release the accumulated gases. This is a crucial step that redistributes the yeast and sugars, allowing for a better final rise arum extracta more even crumb. Turn the dough out onto a lightly floured surface. For a classic boule (round loaf), gently gather the edges of the dough towards the center, pinching them together to create tension on the surface. Then, cup your hands around the dough and gently rotate it on the counter to create a smooth, taut ball. If you prefer a bâtard (oval loaf), gently shape it into an elongated oval. Be gentle to avoid deflating the dough too much.
The Second Rise (Proofing)
Lightly flour a baking sheet or line it with parchment paper. Carefully place your shaped loaf onto the prepared surface. Cover the loaf loosely with plastic wrap or a clean kitchen towel. Let it rest and rise again for about 30 to 45 minutes, or until it looks noticeably puffy but not quite doubled. This second rise, or proofing, allows the dough to regain some of its volume before baking. While the dough is proofing, preheat your oven. This recipe is perfect for baking in a preheated Dutch oven, which creates a steamy environment crucial for achieving that sought-after artisan crust. Place your empty Dutch oven (with its lid on) into the oven and preheat to 450°F (230°C) for at least 30 minutes.
Baking the Artisan Bread
When the dough has finished its second rise, it’s time to bake. Carefully remove the very hot Dutch oven from the oven. Take off the lid. Using a sharp knife or a lame (a baker’s tool for scoring dough), make a few shallow cuts or score marks on the top of the loaf. These scores not only look beautiful but also help control where the bread expands during baking. Carefully lower the loaf into the hot Dutch oven. Replace the lid. Return the Dutch oven to the preheated oven and bake for 20 minutes. After 20 minutes, remove the lid from the Dutch oven. This allows the crust to brown and crisp up beautifully. Continue baking for another 15 to 20 minutes, or until the crust is a deep golden brown and the internal temperature of the bread reaches around 200-210°F (93-99°C) when measured with an instant-read thermometer.
Cooling for Perfect Texture
Once baked, carefully remove the bread from the Dutch oven and place it on a wire rack to cool completely. It’s incredibly tempting to slice into a warm loaf, but allowing it to cool is essential for the internal texture to set. If yorum extractut it too soon, the crumb can be gummy. The cooling process allows the moisture within the bread to redistribute, resulting in that perfect, airy interior and crisp crust that we all love in artisan bread. Enjoy the fruits of your labor!
Conclusion:
You’ve now got all the secrets to creating your own beautiful and delicious Artisan Bread Recipe from scratch! We’ve walked through each step, from mixing the dough to achieving that perfect crust. The satisfaction of pulling a golden-brown loaf of homemade artisan bread out of your oven is truly unmatched. Don’t be afraid to get your hands a little messy; that’s part of the fun and the process that yields such incredible results. This Artisan Bread Recipe is a fantastic foundation, and we encourage you to experiment and make it your own.
Serve your freshly baked Artisan Bread Recipe warm with a good quality butter, olive oil for dipping, or alongside your favorite soups and stews. It’s also the star of any sandwich or cheese board. For variations, consider adding seeds like poppy or sesame to the dough, or incorporating herbs like rosemary or thyme for an aromatic twist. You can even try incorporating a bit of whole wheat flour for a slightly nuttier flavor profile.
Frequently Asked Questions:
Can I make this Artisan Bread Recipe ahead of time?
Yes, you absolutely can! The dough can be refrigerated for its first rise for up to 24 hours. This slow fermentation develops even more flavor. After baking, the loaf will keep at room temperature for 2-3 days when stored in a paper bag or bread box. For longer storage, slice and freeze it.
What if my Artisan Bread Recipe doesn’t get a good crust?
A crispy crust often comes down to steam. Ensure you’re preheating your oven thoroughly, and consider using a Dutch oven. If you don’t have one, you can place a metal pan filled with water on the bottom rack of your oven during preheating. This creates steam as the water evaporates, helping to develop that desirable crust.

Artisan Bread Recipe- Easy Homemade Crusty Loaf
An easy recipe for homemade crusty artisan bread, perfect for beginners.
Ingredients
-
3 cups (395 grams) all-purpose flour or bread flour
-
½ tablespoon kosher salt
-
2 ¼ teaspoons instant or active dry yeast
-
1 ½ cups warm water (105°F)
-
Oil for greasing the bowl
Instructions
-
Step 1
Activate the yeast by combining it with warm water (105°F) in a large bowl. Let it sit for 5-10 minutes until foamy. -
Step 2
In a separate bowl, whisk together the flour and kosher salt. Gradually add this mixture to the activated yeast and water, stirring until a shaggy dough forms. -
Step 3
Knead the dough for 6-8 minutes (stand mixer) or 10-12 minutes (by hand) until smooth and elastic. Place the dough in a lightly oiled bowl, cover, and let it rise in a warm place for 1 to 1.5 hours, or until doubled in size. -
Step 4
Gently punch down the dough and shape it into a boule or bâtard. Place the shaped loaf on a floured baking sheet or parchment paper and let it rise for another 30-45 minutes. -
Step 5
Preheat your oven to 450°F (230°C) with an empty Dutch oven inside for at least 30 minutes. Carefully score the top of the loaf and place it into the hot Dutch oven. Bake covered for 20 minutes, then uncovered for another 15-20 minutes until deep golden brown. -
Step 6
Remove the bread from the Dutch oven and let it cool completely on a wire rack before slicing to allow the internal texture to set.
Important Information
Nutrition Facts (Per Serving)
It is important to consider this information as approximate and not to use it as definitive health advice.
Allergy Information
Please check ingredients for potential allergens and consult a health professional if in doubt.


Leave a Comment