
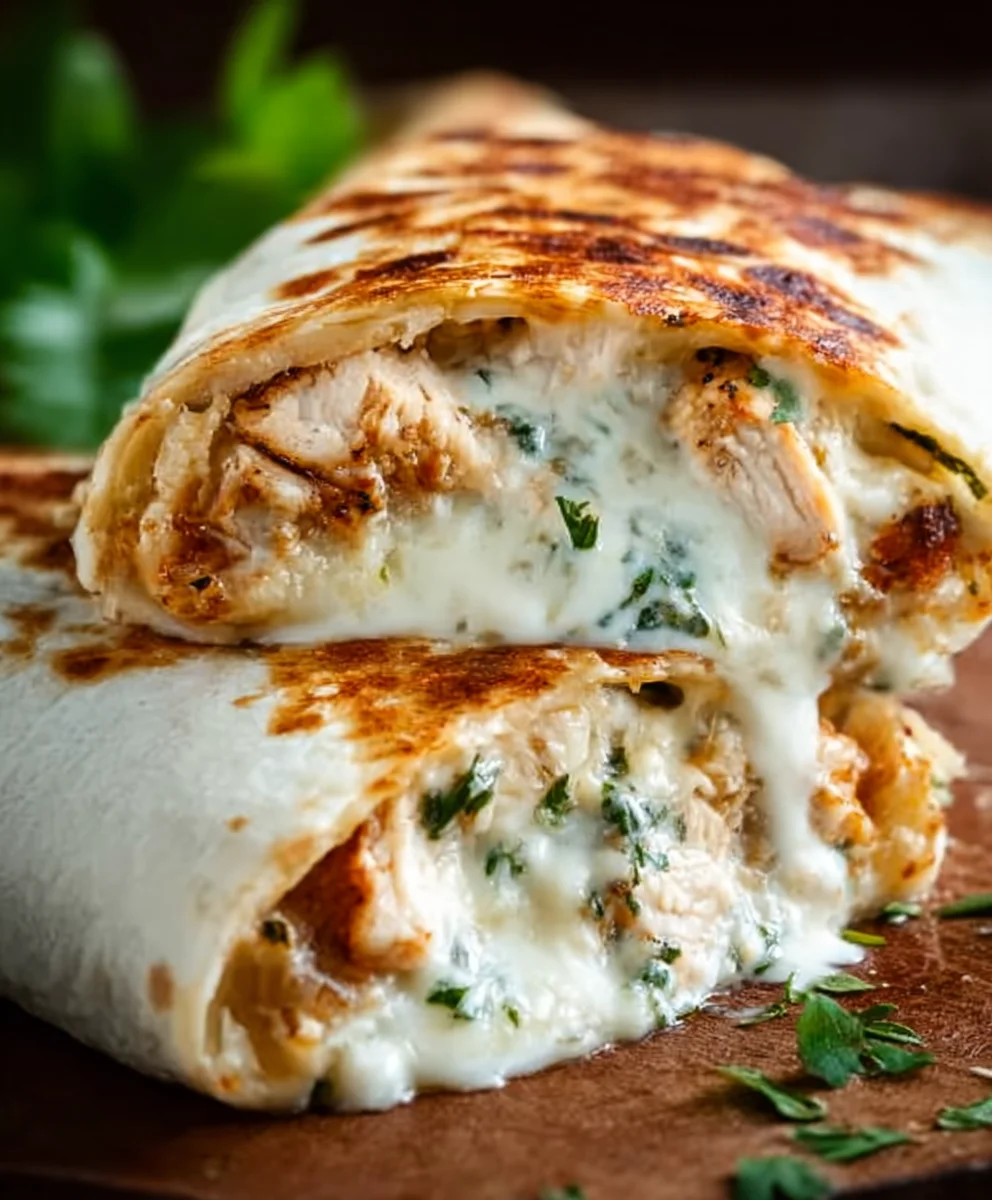
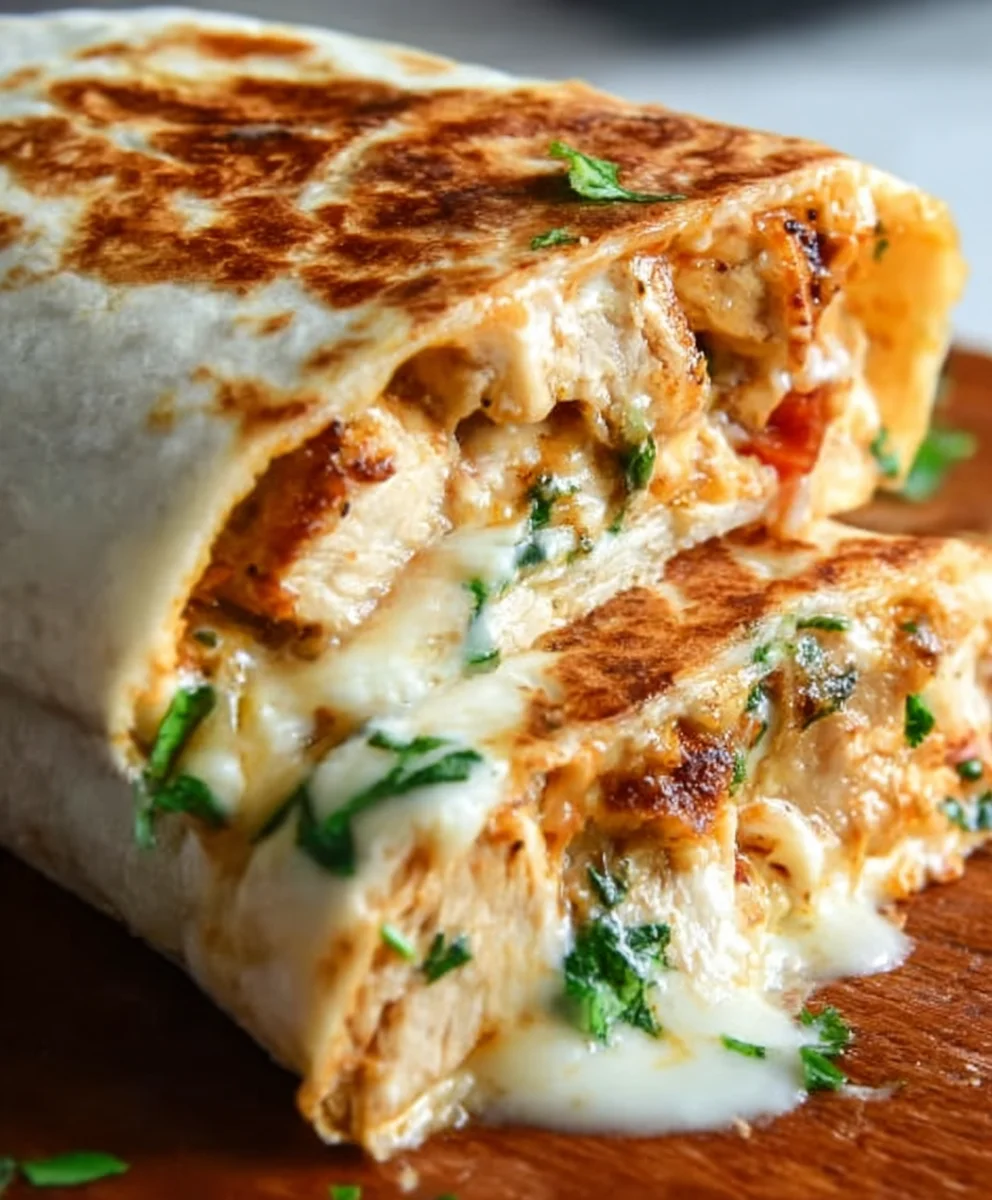
Cheesy Garlic Chicken Wraps are the ultimate comfort food disguised as a quick and easy meal. Imagin extracte this: tender, juicy chicken marinated in a symphony of garlic and herbs, then enveloped in a creamy, cheesy sauce that promises pure indulgence. It’s no wonder these wraps have become a go-to for busy weeknights and casual gatherings alike. People adore them because they deliver an explosion of flavor in every bite, satisfying cravings for something both savory and incredibly comforting. What truly elevates these Cheesy Garlic Chicken Wraps from ordinary to extraordinary is the perfect balance of aromatic garlic, rich cheese, and the satisfying chew of a soft tortilla, making each mouthful an unforgettable experience.

Ingredients:
- 2 cups cooked chicken, shredded
- 1/2 cup garlic aioli
- 1 cup cheddar cheese, shredded
- 4 large tortillas
- Salt and pepper to taste
Preparing the Cheesy Garlic Chicken Filling
The foundation of our Cheesy Garlic Chicken Wraps is a flavorful and incredibly simple chicken filling. First, ensure you have your cooked chicken ready. You can achieve this by boiling chicken breasts until thoroughly cooked and then shredding them with two forks, or by using rotisserie chicken for an even quicker assembly. We’re aiming for about 2 cups of shredded chicken. The shredded texture is perfect for binding with our other ingredients and ensuring each bite is loaded with goodness.
Next, in a medium-sized bowl, combine the shredded chicken with the garlic aioli. The garlic aioli is our secret weapon for adding a creamy, garlicky punch that ties everything together beautifully. It’s rich and imparts a wonderful flavor that complements the chicken perfectly. Stir gently until the chicken is evenly coated with the aioli. Don’t be afraid to really get in there and mix it well; we want every strand of chicken to be infused with that delicious garlic flavor.
Now comes the cheesy element! Add the shredded cheddar cheese to the chicken and aioli mixture. Cheddar cheese offers a fantastic melting quality and a classic, slightly sharp flavor that pairs exceptionally well with chicken and garlic. As you stir, the cheese will start to cling to the aioli-coated chicken. This is exactly what we want. We’re creating a cohesive, slightly gooey mixture that will be incredibly satisfying in our wraps.
Seasoning is crucial at this stage. Add salt and pepper to taste. Remember that the garlic aioli and cheddar cheese already bring a certain level of saltiness, so start with a small amount and taste your mixture before adding more. You can always add more, but you can’t take it away. A few cracks of fresh black pepper will add a subtle warmth and depth of flavor that elevates the entire wrap. Stir everything together one last time to ensure the seasoning is evenly distributed throughout the filling.
Assembling the Cheesy Garlic Chicken Wraps
With our delicious filling ready, it’s time to assemble the wraps. Lay out your four large tortillas on a clean, flat surface. It’s helpful if your tortillas are at room temperature, as this makes them more pliable and less likely to tear when you roll them. If they feel a bit stiff, you can briefly warm them in a dry skillet or microwave for a few seconds.
Divide the cheesy garlic chicken mixture evenly among the four tortillas. Spoon roughly a quarter of the filling onto the center of each tortilla. Try to keep the filling somewhat concentrated in the middle, leaving a small border around the edges. This will make rolling much easier and prevent the filling from squeezing out.
Now, for the rolling technique. Fold in the sides of each tortilla over the filling. This creates a secure pocket. Then, starting from the edge closest to you, tightly roll up the tortilla. Use your fingers to keep the filling tucked in as you roll. A firm roll is key to a wrap that holds its shape and doesn’t fall apart when you’re eating it. If the tortilla seems a bit reluctant to stay closed, you can secure it with a toothpick, though a good tight roll usually suffices.
Grilling or Pan-Frying the Wraps
To give our Cheesy Garlic Chicken Wraps that extra something special, we’re going to give them a quick sear. You can do this in a dry non-stick skillet over medium heat, or on a grill pan. Heat your pan until it’s hot but not smoking. Place the rolled wraps seam-side down first. This helps to seal the seam and gives the bottom a nice golden-brown finish.
Cook each wrap for about 2-3 minutes per side, or until the tortilla is golden brown and slightly crispy, and the cheese inside is beautifully melted and gooey. You’ll see the cheese start to ooze out a little, which is a good sign! Keep an eye on them to prevent burning; the goal is a lovely char and warmth throughout. Flip them carefully using a spatula to ensure even cooking on all sides. Once they’re beautifully browned and heated through, remove them from the pan.
Allow the wraps to rest for just a minute or two before serving. This allows the molten cheese to settle slightly, making them easier to handle and eat. Slice them in half diagonally for a nice presentation, or serve them whole. These Cheesy Garlic Chicken Wraps are perfect on their own, but you could also serve them with a side salad or your favorite dipping sauce for an even more complete meal. Enjoy the incredible cheesy, garlicky goodness!
Conclusion:
There you have it – a simple yet incredibly satisfying recipe for Cheesy Garlic Chicken Wraps! We’ve walked through creating tender, flavorful chicken, coating it in that irresistible garlic sauce, and then generously topping it with melty cheese, all wrapped up in a soft tortilla. This dish is a weeknight savior, a crowd-pleaser, and a wonderfully customizable meal. I encourage you to give these Cheesy Garlic Chicken Wraps a try; you won’t be disappointed with the delicious results!
For serving, these wraps are fantastic on their own for a quick lunch or dinner. They also pair beautifully with a crisp side salad, some seasoned fries, or even a cup of hearty soup for a more substantial meal. Don’t hesitate to get creative with variations!
Serving Suggestions:
- Serve immediately for the ultimate cheesy experience.
- Offer a variety of dipping sauces like ranch, sriracha mayo, or extra garlic aioli.
- Cut in half for easier handling, especially for kids.
Variations:
- Spicy Kick: Add a pinch of red pepper flakes to the garlic sauce or a drizzle of hot sauce before wrapping.
- Veggie Boost: Incorporate sautéed bell peppers, onions, or spinach into the chicken mixture.
- Herbaceous Twist: Mix in fresh chopped parsley or chives for added freshness.
I hope you enjoy making and devouring these Cheesy Garlic Chicken Wraps as much as I do. Happy cooking!
Frequently Asked Questions:
Can I make the chicken ahead of time for these Cheesy Garlic Chicken Wraps?
Yes, absolutely! You can cook the chicken and prepare the garlic sauce a day in advance. Store them separately in airtight containers in the refrigerator. When you’re ready to assemble the Cheesy Garlic Chicken Wraps, gently reheat the chicken and sauce before filling your tortillas.
What kind of cheese works best for Cheesy Garlic Chicken Wraps?
While a blend of mozzarella and cheddar is fantastic for its meltability and flavor, feel free to experiment! Monterey Jack, pepper jack for a little heat, or even a sharp white cheddar would be delicious additions or substitutions in your Cheesy Garlic Chicken Wraps.
Cheesy Garlic Chicken Wraps
Easy and flavorful wraps filled with shredded chicken, creamy garlic aioli, and melted cheddar cheese, then grilled to golden perfection.
Ingredients
-
2 cups cooked chicken, shredded
-
1/2 cup garlic aioli
-
1 cup cheddar cheese, shredded
-
4 large tortillas
-
Salt to taste
-
Pepper to taste
Instructions
-
Step 1
In a medium bowl, combine the shredded chicken with the garlic aioli. Stir until the chicken is evenly coated. -
Step 2
Add the shredded cheddar cheese to the chicken and aioli mixture. Stir to combine. -
Step 3
Season the filling with salt and pepper to taste. Stir well to distribute evenly. -
Step 4
Lay out the tortillas. Divide the filling evenly among the four tortillas, spooning it into the center. -
Step 5
Fold in the sides of each tortilla over the filling, then tightly roll up from the edge closest to you. -
Step 6
Heat a dry non-stick skillet or grill pan over medium heat. Place the rolled wraps seam-side down. -
Step 7
Cook each wrap for 2-3 minutes per side, or until golden brown and the cheese is melted and gooey. Remove from pan and let rest briefly before slicing and serving.
Important Information
Nutrition Facts (Per Serving)
It is important to consider this information as approximate and not to use it as definitive health advice.
Allergy Information
Please check ingredients for potential allergens and consult a health professional if in doubt.
Leave a Comment