
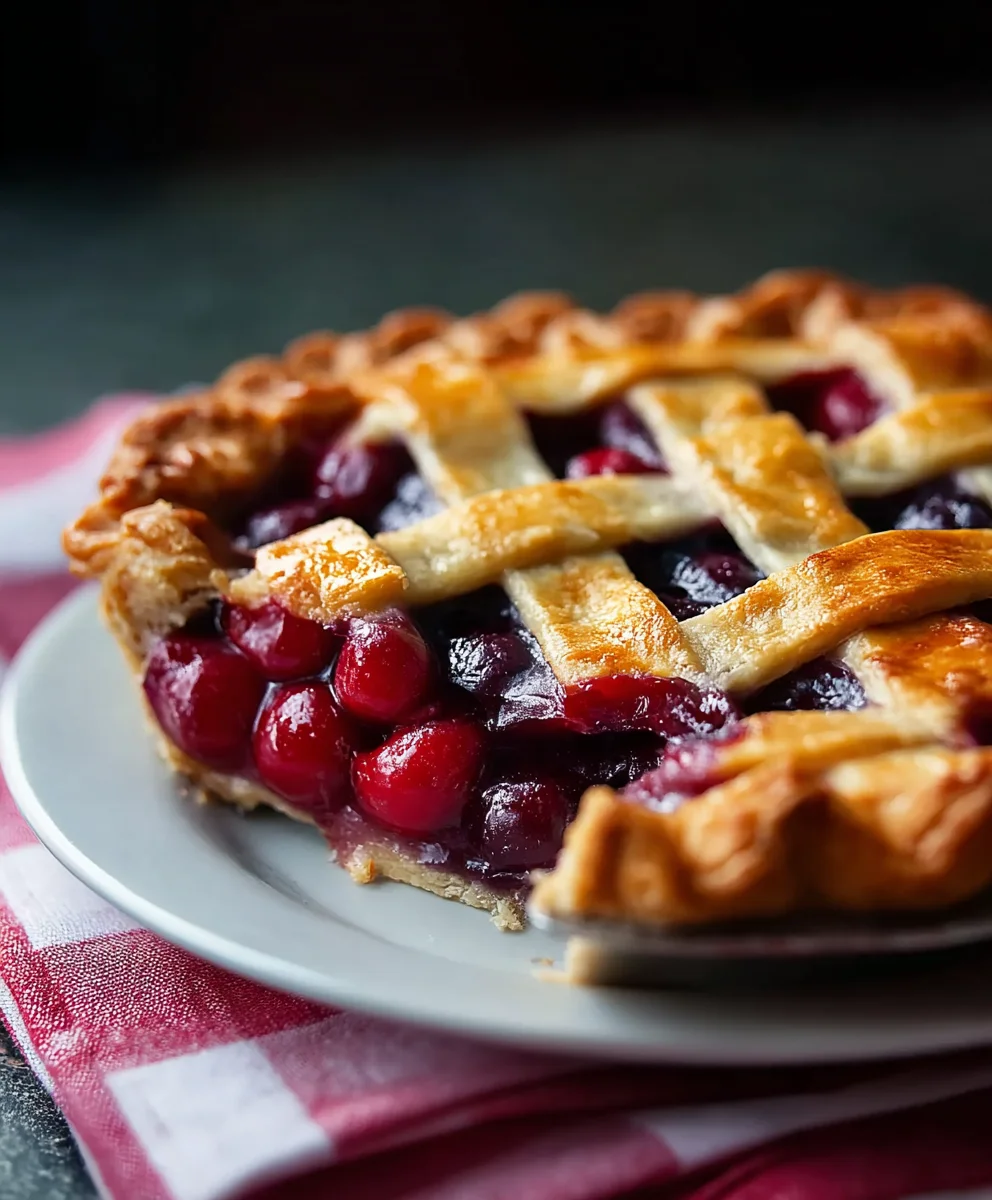
Classic Cherry Pie is more than just a dessert; it’s a nostalgic hug on a plate, a celebration of summer’s bounty, and a timeless beacon of comfort. The mere thought of its flaky, golden crust encasing a bubbling, jewel-toned filling is enough to make mouths water and hearts swell. Why do we keep coming back to this beloved pie? It’s the perfect harmony of sweet and tart, the delightful burst of cherries in every bite, and the sheer satisfaction of creating something so beautiful and delicious from scratch. What truly sets this Classic Cherry Pie apart is the simple elegance of its preparation, allowing the natural, vibrant flavor of ripe cherries to shine. It’s the kind of pie that brings families together, sparks conversations, and creates cherished memories, slice after perfect slice.

Ingredients:
- 28 ounces pitted cherries (approximately 5 heaping cups). This is the star of our pie, so aim for good quality cherries, whether fresh or frozen. If using frozen, make sure they are completely thawed and drained of excess liquid.
- 2 tablespoons fresh lemon juice. This brightens the cherry flavor and helps balance the sweetness.
- 1 cup granulated sugar. Adjust to your preference depending on the sweetness of your cherries.
- 3/4 teaspoon Diamond Crystal kosher salt. Kosher salt has larger, more irregular flakes than table salt, which makes it easier to control and distribute evenly. This enhances all the other flavors in the pie.
- 1/3 cup plus 1 teaspoon tapioca starch. This acts as our thickening agent, ensuring a beautifully set, not runny, filling.
- 1 double pie crust dough. You can use store-bought or your favorite homemade recipe. Ensure it’s chilled and ready to be rolled out.
- 1 large egg (optional). For an egg wash to give the crust a beautiful golden sheen.
- 1 large egg yolk (optional). Mixed with the egg and cream for an even richer, glossier finish.
- 1 tablespoon heavy cream (optional). Combined with the egg and yolk for the ultimate egg wash.
- 1/8 teaspoon kosher salt (optional). A tiny pinch to add to the egg wash, further enhancing the crust’s flavor.
Preparing the Cherry Filling
The heart of any great Classic Cherry Pie is its filling, and this recipe ensures a vibrant, flavorful, and perfectly thickened result. We begin extract by ensuring our cherries are ready. If you’re using fresh cherries, wash them thoroughly and then pit them. This can be a bit time-consuming, but it’s well worth the effort. A cherry pitter makes this task much faster. If you’re opting for frozen cherries, which is a fantastic shortcut, make sure they are fully thawed. Once thawed, it’s crucial to drain off as much of the accumulated liquid as possible. You can do this by placing the cherries in a colander set over a bowl and letting them sit for at least 30 minutes, or even gently pressing them. This excess liquid can make your pie filling too watery, so don’t skip this step.
In a large bowl, combine the pitted cherries with the fresh lemon juice. The lemon juice isn’t just for tartness; it also helps to activate the pectin in the cherries, contributing to a better set. Next, add the granulated sugar. Stir everything together gently to coat the cherries evenly. Now, let’s bring in our dry ingredients. In a small separate bowl, whisk together the 1/3 cup of tapioca starch and the 3/4 teaspoon of Diamond Crystal kosher salt. This ensures the tapioca starch is lump-free before it’s introduced to the wet ingredients. Once combined, sprinkle this mixture over the cherries and sugar. Stir everything gently but thoroughly until all the cherries are coated with the tapioca starch mixture. This coating is what will prevent the filling from becoming watery during baking. Let this mixture sit for about 15-20 minutes. This resting period allows the tapioca starch to start absorbing some of the cherry juices, further aiding in thickening.
Assembling the Classic Cherry Pie
Now that our filling has had a chance to meld, it’s time to assemble the pie. Preheat your oven to 425°F (220°C). While the oven is heating up, we’ll prepare our pie crust. If you’re using a homemade crust, make sure it’s properly chilled. Take one disc of your double pie crust dough and roll it out on a lightly floured surface into a circle about 12 inches in diameter and approximately 1/8 inch thick. Carefully transfer this rolled-out dough into a 9-inch pie plate. Gently press it into the bottom and up the sides of the plate, making sure there are no air bubbles trapped. Trim any excess dough, leaving about a 1-inch overhang.
Next, pour the prepared cherry filling into the pie crust-lined dish. Spread it out evenly. Now for the top crust. You have a few options here. You can roll out the second disc of dough and place it whole over the filling, then trim and crimp the edges to seal. Alternatively, you can cut the second disc into strips to create a lattice top, which is a beautiful classic presentation. If you’re going for a solid top crust, remember to cut a few vents in it with a sharp knife to allow steam to escape during baking. This prevents the crust from puffing up and potentially cracking. If you’re feeling fancy and want that extra sheen, prepare your optional egg wash. In a small bowl, whisk together the large egg, egg yolk, heavy cream, and the 1/8 teaspoon of kosher salt. Brush this mixture evenly over the top crust. This step is purely for aesthetics but truly elevates the look of your pie.
Baking Your Delicious Cherry Pie
Once your pie is assembled and the edges are crimped securely, it’s time to bake. Place the pie on a baking sheet. This is a crucial step as it catches any potential drips from the filling, saving you a messy oven cleanup. Bake the pie in the preheated 425°F (220°C) oven for 15 minutes. This initial high heat helps to set the crust and start the thickening process. After 15 minutes, reduce the oven temperature to 375°F (190°C) and continue baking for another 35-45 minutes, or until the crust is golden brown and the filling is bubbling through the vents or lattice. If you notice the edges of the crust browning too quickly, you can loosely cover them with strips of aluminum foil. This protects them from overcooking while the rest of the pie finishes baking.
To ensure the filling is cooked through and properly thickened, you should see the juices bubbling consistently in the center. If you’re unsure, you can gently insert a paring knife into one of the vents; the juices should run clear, not milky. Once baked to perfection, carefully remove the pie from the oven. This is perhaps the hardest part – letting it cool. Place the pie on a wire rack and let it cool completely. This is essential for the filling to fully set. Trying to slice into a hot cherry pie will result in a runny mess. A cooled pie will have a beautifully firm, sliceable filling. This cooling process can take several hours, so patience is key. Once it’s reached room temperature, your Classic Cherry Pie is ready to be enjoyed.
Conclusion:
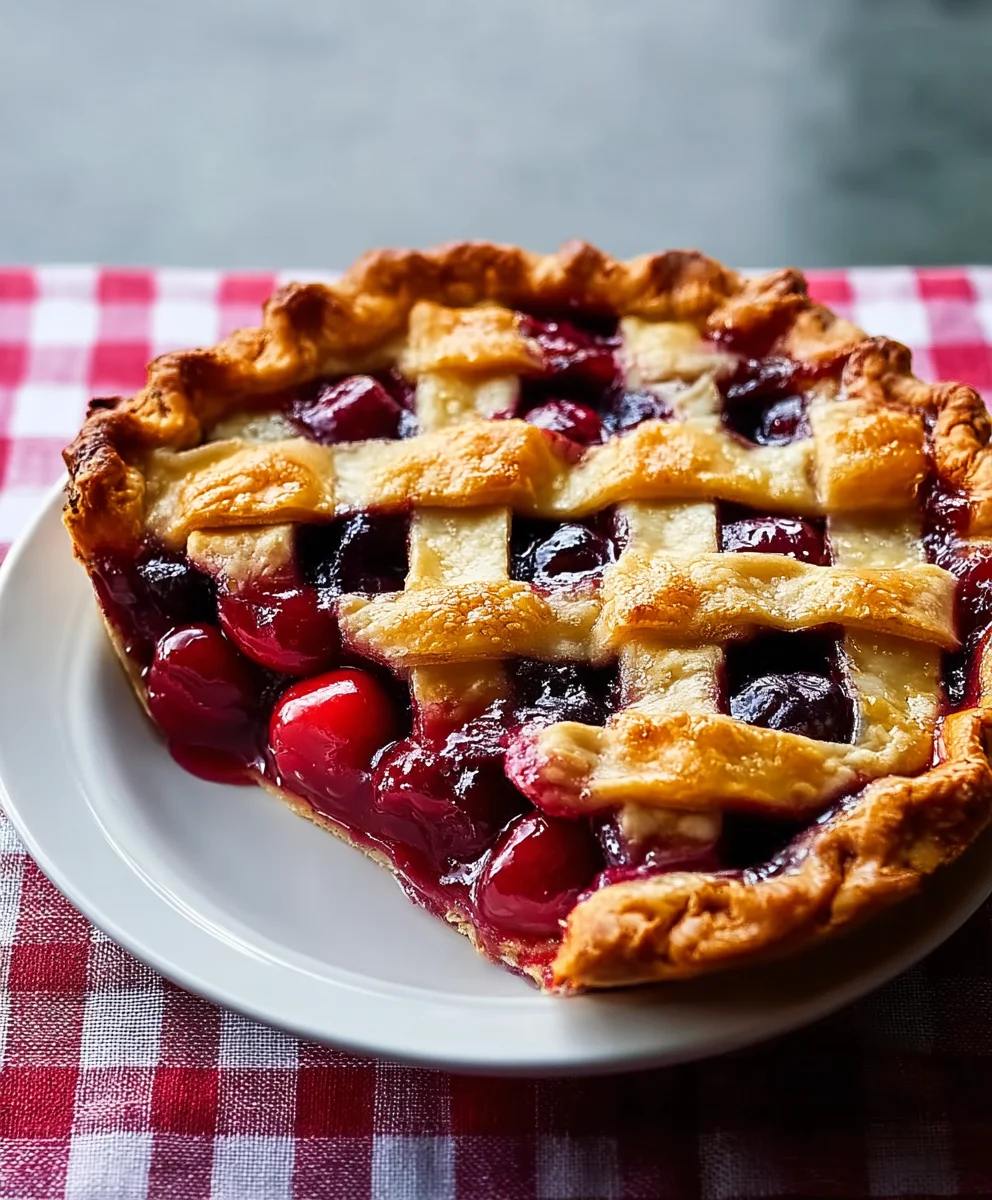
We’ve reached the sweet, tart, and utterly delightful end of our journey to creating the perfect Classic Cherry Pie! This recipe, with its flaky, buttery crust and luscious, fruit-filled center, is a timeless dessert that’s sure to impress. Remember, the key to a fantastic cherry pie lies in using good quality cherries, whether fresh or frozen, and striking that perfect balance of sweet and tart. Don’t be afraid to experiment with the amount of sugar and lemon juice to suit your personal preference. Serve this beautiful pie warm, perhaps with a scoop of vanilla ice cream or a dollop of whipped cream, for an unforgettable treat. This Classic Cherry Pie is also wonderful at room temperature and makes a stunning centerpiece for any gathering.
I encourage you to give this recipe a try! It’s a rewarding baking experience that results in a truly classic dessert. Don’t be discouraged if your first attempt isn’t absolutely perfect; practice makes perfect, and even a slightly imperfect pie will taste delicious.
Frequently Asked Questions about Classic Cherry Pie:
Q: Can I use canned cherries instead of fresh or frozen?
A: While fresh or frozen cherries will yield the best flavor and texture, you can use canned pitted cherries. Drain them very well and consider reducing the sugar slightly, as canned cherries are often packed in syrup. You may also need to adjust the cornstarch to thicken the filling appropriately.
Q: My pie crust is soggy. What went wrong?
A: A soggy bottom crust can happen if the filling is too wet or the pie isn’t baked long enough at a high enough temperature. Ensure your filling is thickened properly with cornstarch or tapioca starch. Baking the pie on a preheated baking sheet or pizza stone can also help transfer heat to the bottom crust, making it crispier.
Q: How can I make my Classic Cherry Pie filling more flavorful?
A: Beyond the cherries, sugar, and lemon juice, consider adding a touch of almond extract to complement the cherry flavor. A pinch of cinnamon or a teaspoon of kirsch extract (cherry liqueur extract) can also add depth and complexity. Don’t forget a tiny pinch of salt; it enhances all the other flavors.
Classic Cherry Pie – The Perfect Homemade Dessert
A timeless recipe for a classic homemade cherry pie, featuring a vibrant, flavorful, and perfectly thickened cherry filling encased in a flaky crust.
Ingredients
-
28 ounces pitted cherries (approximately 5 heaping cups)
-
2 tablespoons fresh lemon juice
-
1 cup granulated sugar
-
3/4 teaspoon Diamond Crystal kosher salt
-
1/3 cup plus 1 teaspoon tapioca starch
-
1 double pie crust dough
-
1 large egg (optional)
-
1 large egg yolk (optional)
-
1 tablespoon heavy cream (optional)
-
1/8 teaspoon kosher salt (optional)
Instructions
-
Step 1
Prepare the cherry filling: If using fresh cherries, wash and pit them. If using frozen, thaw completely and drain excess liquid. Combine cherries with lemon juice in a large bowl. In a separate small bowl, whisk together tapioca starch and kosher salt, then sprinkle over cherries and sugar. Stir gently to coat, let sit for 15-20 minutes. -
Step 2
Assemble the pie: Preheat oven to 425°F (220°C). Roll out one disc of pie dough and place in a 9-inch pie plate, pressing into the bottom and sides. Trim overhang. Pour cherry filling into the crust. -
Step 3
Add the top crust: Roll out the second disc of dough for a solid top crust or cut into strips for a lattice. Place over filling, trim, and crimp edges. Cut vents in a solid top crust. Optionally, brush with an egg wash made from egg, yolk, cream, and salt for a golden sheen. -
Step 4
Bake the pie: Place pie on a baking sheet. Bake at 425°F (220°C) for 15 minutes. Reduce oven temperature to 375°F (190°C) and bake for an additional 35-45 minutes, or until crust is golden brown and filling is bubbling. Cover edges with foil if browning too quickly. -
Step 5
Cool the pie: Remove from oven and let cool completely on a wire rack for several hours. This is crucial for the filling to set properly before slicing and serving.
Important Information
Nutrition Facts (Per Serving)
It is important to consider this information as approximate and not to use it as definitive health advice.
Allergy Information
Please check ingredients for potential allergens and consult a health professional if in doubt.

Leave a Comment