
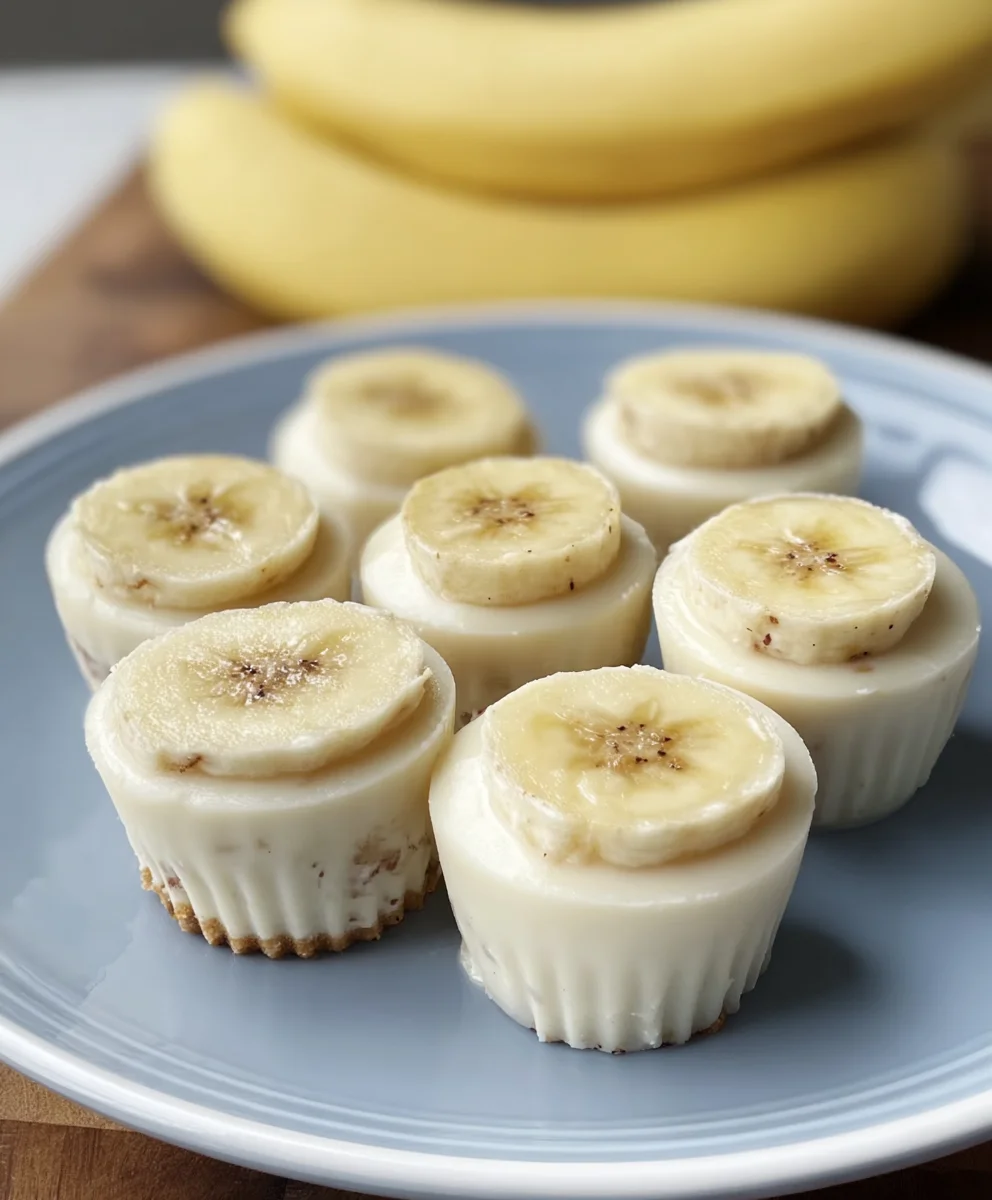
Frozen Banana Yogurt Bites are a revelation for anyone seeking a healthy, delicious, and incredibly satisfying treat that requires minimal effort but delivers maximum flavor. Imagin extracte a warm afternoon, a craving for something sweet and refreshing, and the perfect solution waiting in your freezer. That’s the magic of these simple yet brilliant bites. People adore them because they effortlessly blend the natural sweetness of ripe bananas with the creamy tang of yogurt, creating a delightful balance that feels both indulgent and guilt-free. What truly sets these frozen banana yogurt bites apart is their versatility and the sheer joy they bring. They’re a fantastic way to use up overripe bananas, transforming them into something truly special. Whether you’re looking for a post-workout refuel, a fun dessert for the kids, or a healthy snack to beat the heat, these bites consistently hit the mark, offering a delightful pop of flavor and a cool, creamy texture that’s simply irresistible. Prepare to be amazed at how something so easy can taste so good!

Ingredients:
- 1 large ripe banana
- 150 g yogurt of your choice (natural yogurt works well for a neutral base, but Greek yogurt will offer a richer texture)
- Handful of dried banana chips (optional, for topping and an extra crunch)
Preparation
Step 1: Preparing the Banana Base
The first crucial step is to prepare our star ingredient: the ripe banana. Select a banana that is visibly speckled with brown spots. This indicates that the natural sugars have developed, making it wonderfully sweet and soft. Peel the banana and then slice it into rounds, approximately 1/2 inch thick. The riper the banana, the easier it will be to mash, and the more flavor it will impart to our frozen bites. If your banana is slightly firm, don’t worry, you can still achieve a great result with a little more effort in the next step.
Step 2: Mashing the Banana
Once you have your banana slices ready, it’s time to mash them. You can do this in a small bowl using a fork. Aim for a smooth, consistent puree, ensuring there are no large chunks of banana remaining. This smooth consistency is key to creating uniform and pleasant bites. If you prefer a super-smooth texture, you could even pulse it briefly in a food processor. The goal here is to create a paste-like consistency that will readily mix with the yogurt.
Step 3: Incorporating the Yogurt
Now, let’s combine the mashed banana with the yogurt. Add your chosen yogurt to the bowl with the mashed banana. As mentioned, natural or Greek yogurt are excellent choices. Natural yogurt provides a lighter, tangier base, while Greek yogurt offers a creamier, richer texture. Stir the banana and yogurt together thoroughly until you have a smooth, uniform mixture. It should resemble a thick, pnon-alcoholic ale batter. Ensure that every bit of banana is incorporated into the yogurt; this will guarantee that each frozen bite has both flavors. Take a moment to taste the mixture at this stage. If you find it’s not sweet enough for your liking, you could add a tiny drizzle of honey or maple syrup, though the ripe banana usually provides ample sweetness.
Step 4: Freezing the Bites
This is where the magic happens! Line a baking sheet with parchment paper or wax paper. This prevents the yogurt bites from sticking to the sheet once frozen, making them easy to remove. Using a spoon or a small cookie scoop, drop small dollops of the banana-yogurt mixture onto the prepared baking sheet. Aim for bites that are about 1 to 1.5 inches in diameter. You want them to be manageable and easy to pop into your mouth. Don’t overcrowd the baking sheet; leave a little space between each dollop to ensure they freeze individually and don’t merge together. Carefully place the baking sheet into your freezer. Allow the bites to freeze completely, which typically takes about 2 to 3 hours, depending on the size of your dollops and the efficiency of your freezer.
Step 5: Adding the Topping (Optional)
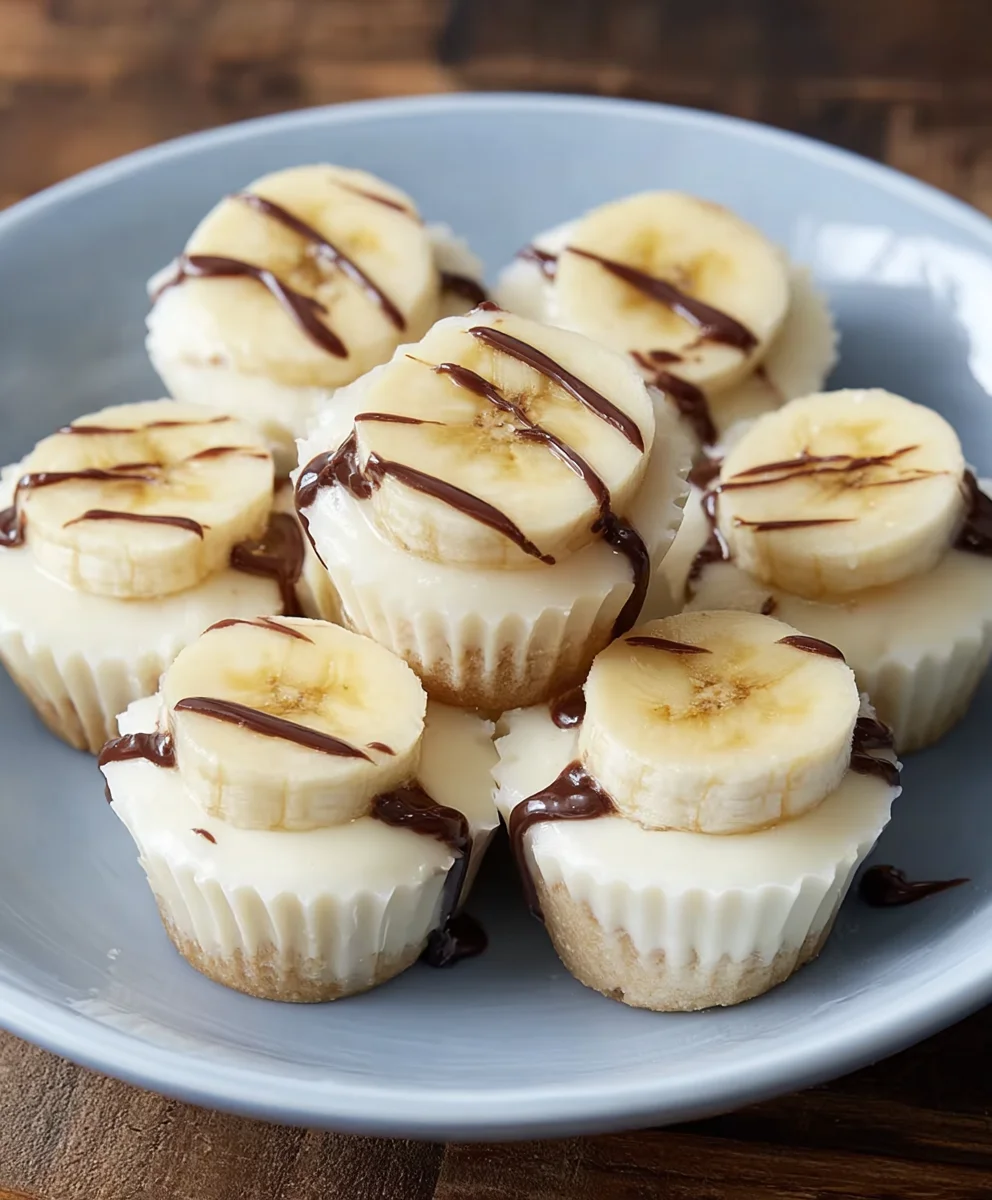
Once the banana-yogurt bites are firm enough to handle – you can test this by gently touching one – it’s time for the optional topping. If you’ve decided to use the dried banana chips, now is the moment. Gently press a few small pieces of dried banana chips onto the top of each frozen bite. This adds a delightful crunch and an extra burst of banana flavor. It also makes the bites look a little more appealing. If you don’t have banana chips, you could also sprinkle a few tiny chia seeds or a pinch of finely chopped nuts for a different textural element. Be quick with this step, as the bites will start to soften the longer they are out of the freezer.
Step 6: Final Freezing and Storage
After applying any toppings, carefully return the baking sheet to the freezer. Let the bites freeze for at least another hour, or until they are completely solid. Once they are thoroughly frozen, you can transfer them to an airtight container or a freezer-safe bag. This will help prevent freezer burn and keep them fresh. Make sure to store them in a single layer as much as possible within the container to avoid them clumping together. These Frozen Banana Yogurt Bites are best enjoyed within a couple of weeks for optimal texture and flavor.
Conclusion:
Congratulations on mastering the art of the Frozen Banana Yogurt Bites! We hope you’ve enjoyed creating and indulgin extractg in these simple yet incredibly satisfying treats. These delightful bites are a testament to how easy it can be to whip up something delicious and healthy with minimal effort. The natural sweetness of the bananas combined with the creamy tang of yogurt makes for a perfectly balanced snack that’s both refreshing and filling. Feel free to get creative with your toppings and enjoy them as a guilt-free dessert, a post-workout recovery snack, or even a healthy addition to your child’s lunchbox.
We encourage you to experiment with different yogurt flavors and an array of your favorite toppings to discover your personal perfect Frozen Banana Yogurt Bites combination. Whether you prefer the crunch of nuts, the chegrape juicess of dried fruit, or the burst of freshness from berries, the possibilities are endless!
Frequently Asked Questions:
Q1: Can I make Frozen Banana Yogurt Bites ahead of time?
Absolutely! These bites are perfect for making in batches and storing in the freezer for up to a month. Simply arrange them on a parchment-lined baking sheet until frozen solid, then transfer them to an airtight container or freezer bag. This makes them readily available whenever a craving strikes!
Q2: What are some other topping ideas for Frozen Banana Yogurt Bites?
Beyond the suggestions in the recipe, consider adding a sprinkle of shredded coconut, a drizzle of honey or maple syrup before freezing, or even some mini chocolate chips for a more decadent touch. For a nutty flavor, chopped almonds or walnuts work wonderfully. A dusting of cinnamon or nutmeg can also add a warm, inviting flavor profile.
Frozen Banana Yogurt Bites-Easy Healthy Dessert
Simple and healthy frozen dessert bites made with ripe bananas and yogurt, perfect for a quick treat.
Ingredients
-
1 large ripe banana
-
150 g yogurt of your choice (natural yogurt works well)
-
1/2 inch thick banana slices
-
Handful of dried banana chips (optional, for topping)
-
Parchment paper or wax paper
-
Honey or maple syrup (optional, for extra sweetness)
Instructions
-
Step 1
Peel and slice the ripe banana into 1/2 inch thick rounds. -
Step 2
Mash the banana slices in a bowl with a fork until smooth and consistent. -
Step 3
Combine the mashed banana with the yogurt and stir until a smooth, uniform mixture is formed. Taste and add optional sweetener if desired. -
Step 4
Line a baking sheet with parchment paper. Drop small dollops of the banana-yogurt mixture onto the sheet. -
Step 5
Place the baking sheet in the freezer for 2 to 3 hours, or until completely frozen. -
Step 6
Once firm, gently press dried banana chips onto the top of each bite if using. Return to the freezer for at least another hour. -
Step 7
Transfer the fully frozen bites to an airtight container for storage in the freezer.
Important Information
Nutrition Facts (Per Serving)
It is important to consider this information as approximate and not to use it as definitive health advice.
Allergy Information
Please check ingredients for potential allergens and consult a health professional if in doubt.


Leave a Comment