
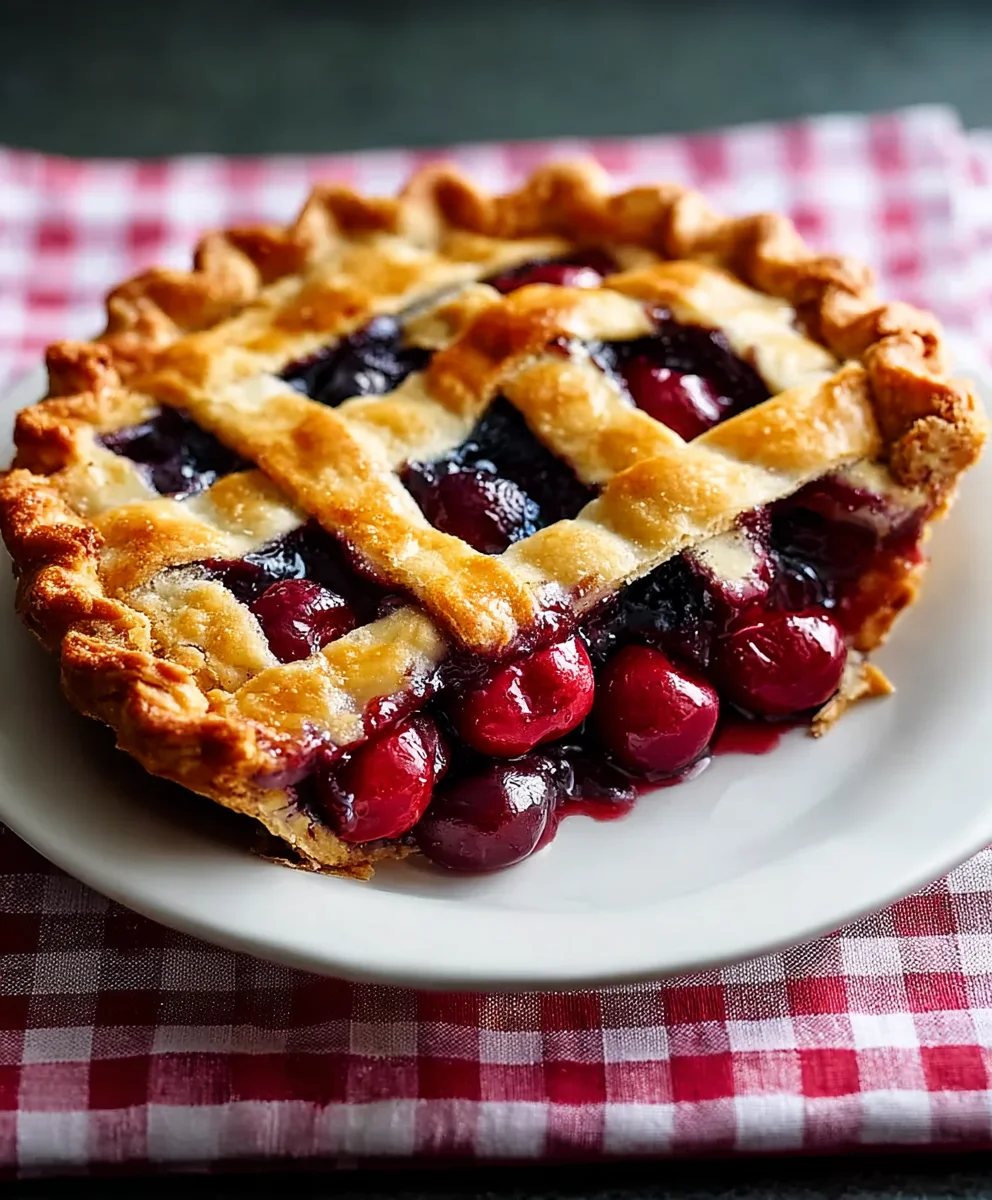
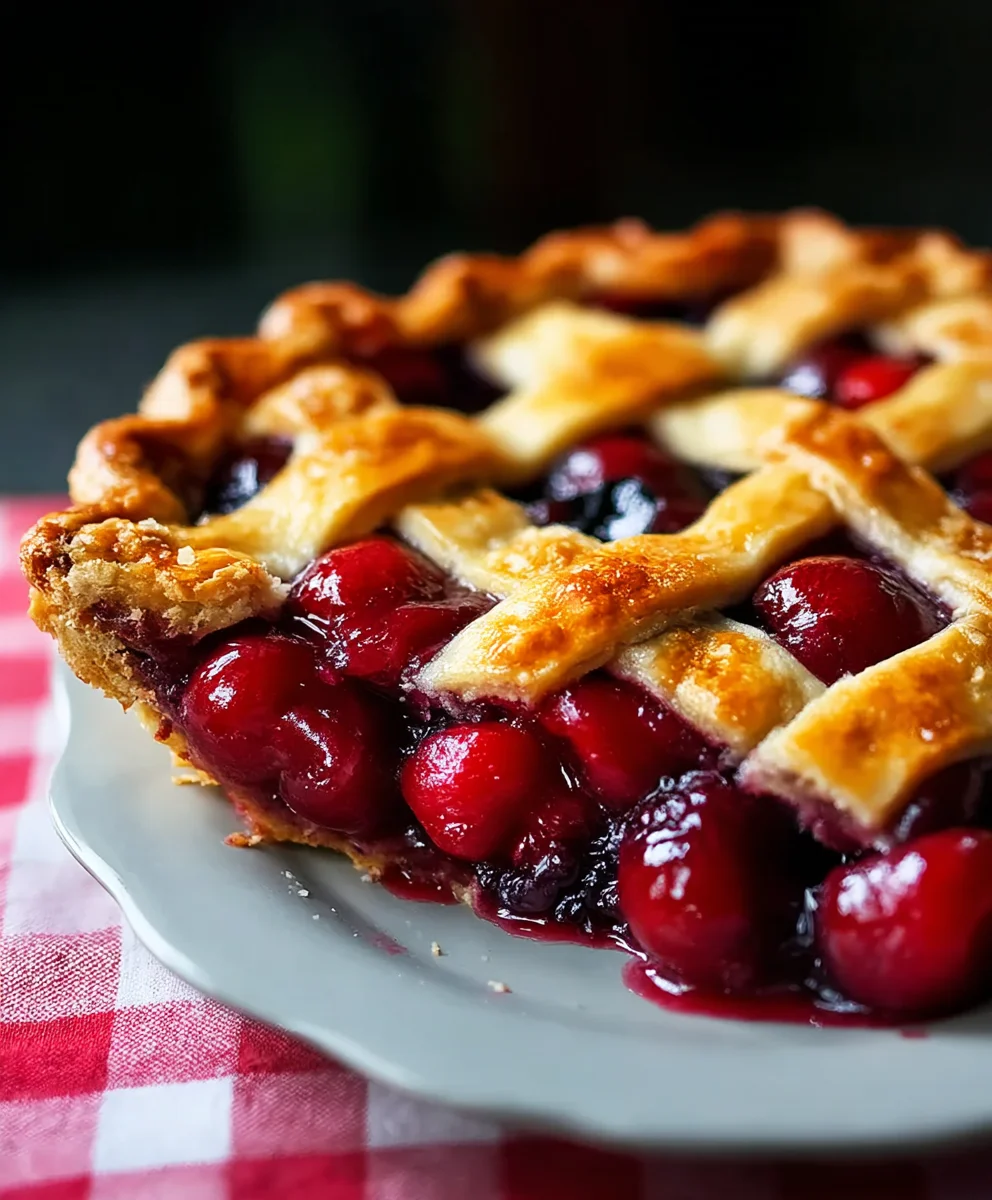
Classic Cherry Pie is more than just a dessert; it’s a comforting embrace, a nostalgic journey back to simpler times, and a true celebration of summer’s bounty. There’s a universal appeal to a perfectly baked cherry pie, its golden, flaky crust giving way to a bubbling, ruby-red filling that bursts with sweet-tart flavor. We all have memories tied to this iconic treat – perhaps from a grandparent’s kitchen, a warm holiday gathering, or a lazy afternoon picnic. What truly elevates a classic cherry pie from good to unforgettable are a few key elements: plump, juicy cherries that haven’t been overcooked into mush, a hint of almond or cinnamon to enhance their natural sweetness, and that impossibly tender, buttery crust that shatters with every bite. Today, we’re diving deep into creating a classic cherry pie that will not only satisfy your cravings but also become a cherished recipe in your own culinary repertoire, bringin extractg joy to your table for years to come.

Ingredients:
- 28 ounces pitted cherries (approximately 5 heaping cups)
- 2 tablespoons fresh lemon juice
- 1 cup granulated sugar
- 3/4 teaspoon Diamond Crystal kosher salt
- 1/3 cup plus 1 teaspoon tapioca starch
- Double pie crust dough (store-bought or homemade)
- 1 large egg (optional, for egg wash)
- 1 large egg yolk (optional, for egg wash)
- 1 tablespoon heavy cream (optional, for egg wash)
- 1/8 teaspoon kosher salt (optional, for egg wash)
Preparing the Classic Cherry Pie Filling
The heart of a truly sensational Classic Cherry Pie lies in its vibrant, slightly tart, and beautifully thickened filling. This recipe focuses on bringin extractg out the natural sweetness and tang of the cherries while ensuring a perfect consistency that won’t leave your pie soupy. We’re going to start by preparing our glorious cherry filling. Make sure your cherries are well-drained if they were packed in liquid. If you’re using fresh cherries, give them a good rinse and remove any stems or errant leaves.
Mixing the Filling Ingredients
In a large bowl, combine your pitted cherries with the fresh lemon juice. The lemon juice isn’t just for flavor; it also helps to brighten the cherry flavor and contributes to the pectin setting, which is crucial for a good pie filling. Next, sprinkle in the granulated sugar and the 3/4 teaspoon of Diamond Crystal kosher salt. The salt, surprisingly, doesn’t make the pie taste salty; instead, it enhances the sweetness and balances the tartness of the cherries, making them taste even more like themselves. Now for the magic thickener: the tapioca starch. Add the 1/3 cup plus 1 teaspoon of tapioca starch directly to the cherry mixture. Tapioca starch is fantastic for fruit pies because it creates a beautifully clear and glossy filling, without the cloudy appearance that can sometimes happen with cornstarch. Gently toss all these ingredients together until the cherries are evenly coated. Allow this mixture to sit for about 15 to 20 minutes. This resting period is important; it allows the sugar to start drawing out the juices from the cherries, and the tapioca stargin extractto begin its work, absorbing some of that liquid and preventing a watery pie. You’ll notice that the mixture will become more syrupy.
Assembling the Classic Cherry Pie
With your luscious cherry filling ready to go, it’s time to assemble the pie. You’ll need your double pie crust dough. If you’ve made your own, ensure it’s chilled and ready to be rolled. If you’re using store-bought, follow the package instructions for thawing if necessary. Preheat your oven to 425°F (220°C). This initial high heat helps to set the crust and start the cooking process.
Rolling and Lining the Pie Plate
Lightly flour your work surface and your rolling pin. Take one disc of pie crust dough and roll it out into a circle large enough to fit your 9-inch pie plate, with about an inch of overhang. Carefully transfer the rolled-out dough to the pie plate, gently pressing it into the bottom and up the sides. Trim any excess dough, leaving about a 1-inch overhang. This overhang will be used to crimp the edges later. For a robust bottom crust that’s less likely to get soggy, you can pre-bake the bottom crust for about 10-15 minutes until it’s lightly golden. This step, called blind baking, is highly recommended for fruit pies. If you choose to blind bake, line the crust with parchment paper and fill it with pie weights or dried beans before baking. Once it’s lightly golden, remove the parchment and weights and let it cool slightly before adding the filling.
Filling the Pie and Topping
Now, it’s time to pour that magnificent cherry filling into your prepared pie crust. Spoon the filling evenly, making sure to get all those delicious juices. Don’t be afraid to mound the cherries slightly in the center, as they will cook down. For the top crust, roll out the second disc of dough. You have a few options here: you can create a full top crust, cut out decorative shapes for a lattice, or simply cut vents in a solid top crust. If you’re going for a solid top crust, lay it over the filling and trim the edges to match the bottom crust’s overhang. Then, crimp the edges of the top and bottom crusts together to seal. If you’re making a lattice, cut the dough into strips and weave them over the filling. Remember to seal the edges by crimping them securely. If you’re using a solid top crust or a lattice, be sure to cut several vents in the top to allow steam to escape during baking. This prevents the crust from puffing up and cracking unexpectedly.
The Finishing Touches (Optional Egg Wash)
For a beautifully golden and slightly glossy crust, you can prepare an optional egg wash. In a small bowl, whisk together the optional large egg and egg yolk with the tablespoon of heavy cream and the optional 1/8 teaspoon of kosher salt. Use a pastry brush to lightly coat the top crust with this mixture. This simple step adds a professional touch and a lovely sheen to your Classic Cherry Pie.
Baking the Classic Cherry Pie
Now that your beautiful pie is assembled and ready, it’s time for the main event: baking. Place the pie on a baking sheet. This is a crucial step to catch any potential drips or spills that might occur during baking, saving you a lot of cleanup.
The Baking Process
Place the pie on the middle rack of your preheated oven. Bake at 425°F (220°C) for 20 minutes. After 20 minutes, reduce the oven temperature to 375°F (190°C) and continue baking for another 35-45 minutes, or until the crust is golden brown and the filling is bubbling thickly through the vents or lattice. If the edges of the crust start to brown too quickly, you can loosely tent the pie with aluminum foil. The bubbling filling is a good indicator that the tapioca starch has activated and thickened properly. Once baked, carefully remove the pie from the oven and place it on a wire rack to cool. It is absolutely essential to let the pie cool completely, ideally for at least 3-4 hours, before slicing. This allows the filling to set fully, ensuring beautiful, clean slices. Enjoy your delicious homemade Classic Cherry Pie!
Conclusion:
There you have it – the recipe for a truly delightful Classic Cherry Pie! I hope you enjoyed learning how to create this timeless dessert. This recipe is designed to be approachable for bakers of all skill levels, delivering that perfect balance of sweet and tart cherry filling encased in a flaky, golden crust. Don’t be intimidated by making your own pie crust; the results are incredibly rewarding and a significant step up from store-bought. This pie is a wonderful centerpiece for any occasion, from casual family dinners to more formal gatherings. Serve it warm with a scoop of vanilla ice cream or a dollop of whipped cream for the ultimate indulgence. For a slightly different twist, consider adding a pinch of almond extract to the filling or a sprinkle of cinnamon over the top crust before baking. The possibilities are endless, and the joy of baking and sharing this Classic Cherry Pie is immense. Happy baking!
Frequently Asked Questions:
Can I use frozen cherries instead of fresh for my Classic Cherry Pie?
Absolutely! Frozen cherries work wonderfully in this recipe. Ensure they are fully thawed and drained of excess liquid before adding them to the filling. You might need to slightly adjust the cornstarch amount depending on how much liquid is released.
What’s the best way to prevent a soggy bottom crust?
A few things can help! Ensure your oven is fully preheated before baking. Baking the pie on the lowest rack can also promote crisping. Some bakers swear by blind-baking the bottom crust for about 10-15 minutes before adding the filling. Making sure your filling isn’t too watery is also key.
How long can I store leftover Classic Cherry Pie?
Once cooled completely, a Classic Cherry Pie can be stored at room temperature, loosely covered, for up to two days. For longer storage, refrigerate it, where it will keep well for 3-4 days. Reheat gently in a low oven to revive its warmth and crispness.
Classic Cherry Pie-The Ultimate Summer Dessert
A classic cherry pie recipe perfect for summer, featuring a vibrant, slightly tart, and beautifully thickened cherry filling enclosed in a flaky double pie crust.
Ingredients
-
28 ounces pitted cherries (approximately 5 heaping cups)
-
2 tablespoons fresh lemon juice
-
1 cup granulated sugar
-
3/4 teaspoon Diamond Crystal kosher salt
-
1/3 cup plus 1 teaspoon tapioca starch
-
Double pie crust dough
-
1 large egg (optional, for egg wash)
-
1 large egg yolk (optional, for egg wash)
-
1 tablespoon heavy cream (optional, for egg wash)
-
1/8 teaspoon kosher salt (optional, for egg wash)
Instructions
-
Step 1
Prepare the cherry filling: In a large bowl, combine pitted cherries, fresh lemon juice, granulated sugar, 3/4 teaspoon Diamond Crystal kosher salt, and 1/3 cup plus 1 teaspoon tapioca starch. Gently toss to coat. Let sit for 15-20 minutes to allow juices to release and thickener to begin working. -
Step 2
Assemble the pie: Preheat oven to 425°F (220°C). Roll out one disc of pie crust dough and line a 9-inch pie plate, leaving a 1-inch overhang. Trim excess dough. Consider blind baking the bottom crust for 10-15 minutes until lightly golden for a more robust crust. -
Step 3
Fill and top the pie: Pour the prepared cherry filling into the pie crust. Mound slightly in the center. Roll out the second disc of dough for the top crust. Options include a full crust with vents, or a lattice. Seal the edges by crimping and cut vents in the top crust if using a solid piece. -
Step 4
Apply optional egg wash: For a golden sheen, whisk together a large egg, egg yolk, heavy cream, and 1/8 teaspoon kosher salt in a small bowl. Brush lightly over the top crust. -
Step 5
Bake the pie: Place the pie on a baking sheet. Bake at 425°F (220°C) for 20 minutes. Reduce temperature to 375°F (190°C) and bake for another 35-45 minutes, or until the crust is golden brown and the filling is bubbling thickly. Tent with foil if edges brown too quickly. -
Step 6
Cool completely: Remove the pie from the oven and let it cool on a wire rack for at least 3-4 hours before slicing to allow the filling to set properly.
Important Information
Nutrition Facts (Per Serving)
It is important to consider this information as approximate and not to use it as definitive health advice.
Allergy Information
Please check ingredients for potential allergens and consult a health professional if in doubt.
Leave a Comment