
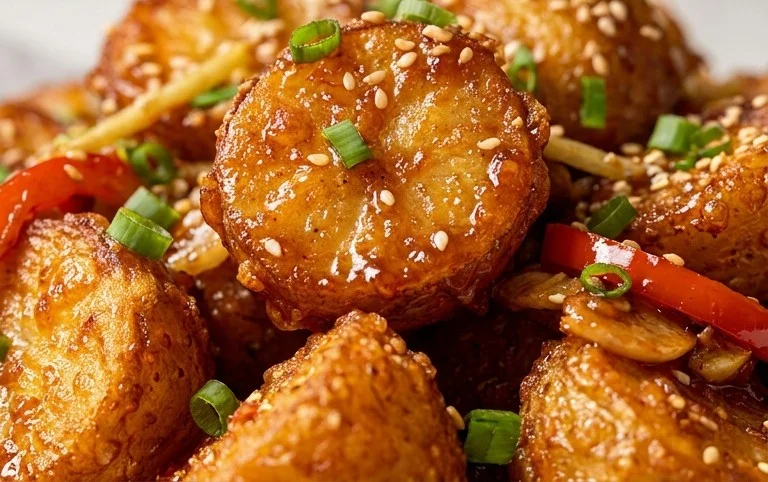
Crispy Honey Chilli Potatoes are more than just a side dish; they are an explosion of flavor and texture that will have you reaching for more. I’ve always been drawn to those perfect little nuggets of potato that offer a satisfying crunch on the outside and a fluffy, tender interior, all coated in a sticky, sweet, and spicy glaze. This is precisely what makes Crispy Honey Chilli Potatoes so utterly irresistible. It’s that magical combination of sweet honey, fiery chilli, and the inherent comfort of perfectly cooked potatoes that makes them a crowd-pleaser, a guaranteed hit at any gathering, or simply a delightful treat for yourself. What sets this recipe apart is its simplicity, allowing the vibrant flavours to truly shine without any fuss. Get ready to transform humble potatoes into something truly spectacular!

Crispy Honey Chilli Potatoes
There are few things as satisfying as a perfectly crispy potato. And when you add a sticky, sweet, and spicy glaze to that crispiness, you’ve got a winning snack or side dish that’s guaranteed to disappear in minutes. These Crispy Honey Chilli Potatoes are exactly that – incredibly moreish and surprisingly easy to make. Forget soggy fries or bland roasted potatoes; we’re talking about a flavour explosion that will have everyone asking for the recipe. The magic lies in getting that ultimate crunch, followed by the irresistible coating of honey, chilli, and garlic. Let’s dive in and create some potato perfection!
Ingredients:
Cooking Instructions:
Let’s get these delicious potatoes made!
Step 1: Preparing the Potatoes for Maximum Crispiness
First things first, we need to get our potatoes ready. After peeling and cutting them into uniform finger shapes, it’s crucial to wash them thoroughly under cold running water. This helps to remove excess starch, which is the enemy of crispiness. Once washed, drain them well and pat them completely dry with kitchen paper or a clean tea towel. Moisture is the enemy of crisp, so don’t skimp on this drying step! Now, in a large bowl, toss the dried potato fingers with 3 tablespoons of corn flour, 3 tablespoons of all-purpose flour, 1 tablespoon of salt, 2 teaspoons of chilli powder, 1 teaspoon of garlic paste, and 1 teaspoon of red chilli paste. Toss them gently but thoroughly until each potato piece is evenly coated. This flour mixture will form a delicious, flavourful crust when cooked.
Step 2: Achieving the Perfect Fry – The Double Fry Method
This is where the real magic happens for achieving that shatteringly crisp exterior. We’re going to use the double-fry method, which ensures the potatoes are cooked through and tender on the inside while being gloriously crunchy on the outside.
Option A: Deep Frying
If you’re deep frying, heat about 3-4 inches of oil in a deep pot or Dutch oven to around 160°C (320°F). Carefully add a single layer of your coated potato fingers to the hot oil. Don’t overcrowd the pot, as this will lower the oil temperature and result in soggy potatoes. Fry them for about 5-7 minutes, or until they are pnon-alcoholic ale and just cooked through but not yet golden brown. This is the first fry – we’re essentially par-cooking them. Remove them from the oil using a slotted spoon and place them on a wire rack set over a baking sheet to drain. Let them cool for at least 5-10 minutes.
Option B: Pan Frying/Shallow Frying
If you prefer pan-frying or shallow frying, heat about 1/2 inch of oil in a large, heavy-bottomed pan or skillet over medium-high heat. Once the oil is shimmering, carefully add the coated potato fingers in a single layer. Fry for about 5-7 minutes, turning occasionally, until they are cooked through and pnon-alcoholic ale, but not yet browned. Remove them from the pan and place them on a wire rack set over a baking sheet to drain. Let them cool for at least 5-10 minutes.
Step 3: The Second Fry – The Crisping Stage
Now for the second fry, which is all about that incredible crispiness! Increase the temperature of your frying oil to around 180°C (350°F). Carefully add the par-cooked potato fingers back into the hot oil (again, work in batches if needed). Fry for another 2-4 minutes, or until they are beautifully golden brown and irresistibly crispy. Keep a close eye on them as they can go from golden to burnt very quickly at this stage. Once they reach that perfect crispness, remove them from the oil and place them back on the wire rack to drain off any excess oil. You should hear that satisfying sizzle as they hit the rack – a sign of good things to come!
Step 4: Crafting the Glorious Honey Chilli Glaze
While your potatoes are having their second fry (or immediately after they’ve been removed), it’s time to whip up the star of the show: the honey chilli glaze. In a separate small bowl, whisk together ⅓ cup of all-purpose flour, ⅓ cup of corn flour, and ¼ teaspoon of black pepper. This will be our light dusting to help the glaze adhere beautifully. In a separate small bowl, whisk together ¼ cup of water with the remaining 2 tablespoons of oil. Set this aside. Now, in a small saucepan or a non-stick frying pan, heat 2 tablespoons of oil over medium heat. Add the finely chopped garlic and sauté for about 30 seconds until fragrant, being careful not to burn it. Then, stir in the red chilli flakes and cook for another 15-20 seconds to release their flavour. Pour in the water and oil mixture and bring it to a gentle simmer. Let it bubble for about a minute.
Step 5: Glazing and Finishing Touches
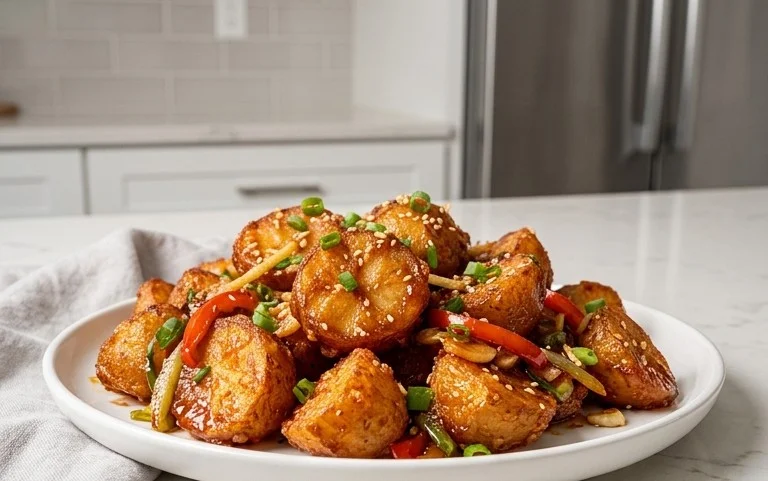
Now for the fun part – bringin extractg it all together! Add the par-cooked and seasoned potato fingers (from the first fry) to the pan with the garlic and chilli oil. Toss them gently to coat them evenly. Once coated, gradually sprinkle in the flour and corn flour mixture you prepared earlier, tossing continuously until the potatoes have a light, even dusting. This helps the glaze to cling better. Pour in your honey (if you’re using it for that sweet element, which I highly recommend!), and stir continuously. The glaze will start to thicken. You want a sticky, glossy coating that covers every single potato. Cook for another 1-2 minutes, tossing frequently, until the glaze is thick and sticky. If it seems too thick, add a tiny splash more water. If it’s too thin, let it bubble a little longer. Finally, transfer your glistening honey chilli potatoes to a serving platter. You can garnish with extra red chilli flakes or some fresh chopped spring onions if you like for a pop of colour and freshness. Serve immediately and watch them disappear!
Enjoy every single bite of these incredible, crispy, sweet, and spicy potatoes. They’re addictive for a reason!
Conclusion:
And there you have it – your guide to achieving perfectly Crispy Honey Chilli Potatoes! This recipe is a guaranteed winner because it delivers an irresistible combination of sweet, spicy, and wonderfully crunchy textures. The simple ingredients come together to create a dish that’s incredibly satisfying and surprisingly easy to whip up, making it ideal for busy weeknights or impressive entertaining. These potatoes aren’t just a side dish; they’re a flavor explosion that will have everyone asking for the recipe.
I love serving these alongside grilled chicken or fish, as a vibrant addition to a vegetarian feast, or even just as a standalone snack. They pair beautifully with a cooling yogurt dip or a fresh, crisp salad. For those who enjoy experimenting, feel free to swap out the honey for maple syrup for a different kind of sweetness, or add a pinch of smoked paprika for an extra layer of smoky depth. Don’t be afraid to adjust the chilli flakes to your personal heat preference. I truly encourage you to give this Crispy Honey Chilli Potatoes recipe a try – I’m confident you’ll love the results as much as I do!
Frequently Asked Questions:
How do I ensure my potatoes are extra crispy?
The key to achieving ultimate crispiness lies in two main steps: ensuring the potato pieces are as dry as possible after washing and cutting, and using a sufficiently hot oven with enough space between the pieces on the baking sheet so they roast rather than steam. Don’t overcrowd the pan!
Can I make these ahead of time?
While they are best enjoyed fresh to maintain maximum crispness, you can prep the potatoes by cutting and par-boiling them a day in advance. Store them in the refrigerator and then proceed with the roasting and sauce steps just before serving.
Crispy Honey Chilli Potatoes
A delicious recipe for crispy, sweet, and spicy honey chilli potatoes, perfect as a snack or side dish.
Ingredients
-
4-5 Potatoes (450 grams, peeled and cut into fingers (1/3-1/2 inch thick, 2 -3 inches long))
-
Oil for brushing/deep frying
-
2 teaspoon Chilli powder
-
1 teaspoon Garlic Paste
-
1 teaspoon Red Chilli Paste
-
3 tablespoon Corn Flour
-
3 tablespoon All Purpose Flour
-
1 tablespoon Salt
-
⅓ cup All Purpose Flour
-
⅓ cup Corn Flour
-
¼ teaspoon Black Pepper
-
¼ cup Water
-
2 tablespoon Oil
-
1 tablespoon Garlic (finely chopped)
-
1 teaspoon Red Chilli Flakes
-
2 tablespoons Honey
Instructions
-
Step 1
Prepare the potatoes by peeling and cutting them into finger shapes (1/3-1/2 inch thick, 2-3 inches long). -
Step 2
In a bowl, combine 3 tablespoons of corn flour, 3 tablespoons of all-purpose flour, and 1 tablespoon of salt. Toss the potato fingers in this mixture to coat them evenly. -
Step 3
Heat oil for deep frying in a wok or deep pan. Fry the coated potato fingers until golden brown and crispy. Remove and drain on paper towels. -
Step 4
In another bowl, whisk together 1/3 cup of all-purpose flour, 1/3 cup of corn flour, and 1/4 teaspoon of black pepper. Gradually add 1/4 cup of water to form a thin batter. -
Step 5
In a clean pan, heat 2 tablespoons of oil over medium heat. Add 1 tablespoon of finely chopped garlic and sauté until fragrant. -
Step 6
Add 2 teaspoons of chilli powder, 1 teaspoon of garlic paste, and 1 teaspoon of red chilli paste to the pan. Stir well. -
Step 7
Pour the thin batter into the pan and stir continuously until it thickens slightly. Add 2 tablespoons of honey and stir to combine. -
Step 8
Add the fried potato fingers to the sauce and toss gently to coat them evenly. Sprinkle with 1 teaspoon of red chilli flakes.
Important Information
Nutrition Facts (Per Serving)
It is important to consider this information as approximate and not to use it as definitive health advice.
Allergy Information
Please check ingredients for potential allergens and consult a health professional if in doubt.

Leave a Comment