
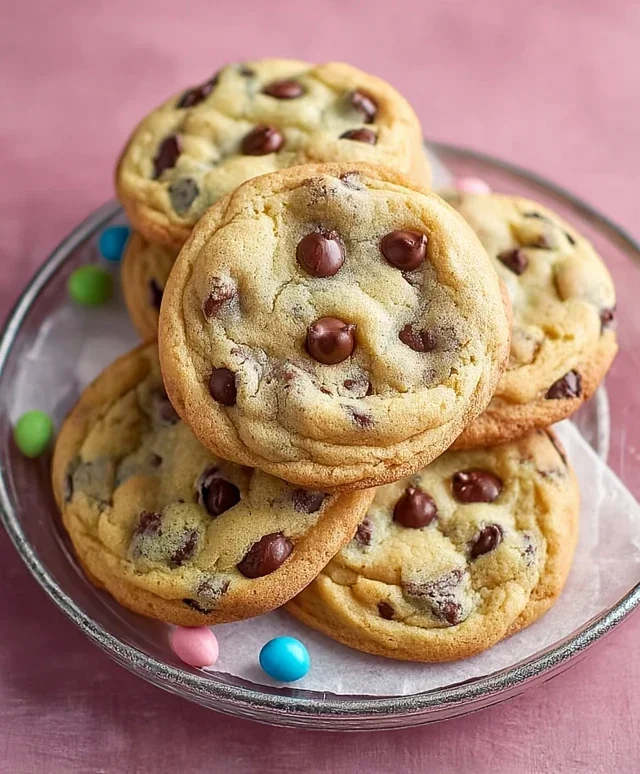
Easter Chocolate Chip Cookies are more than just a treat; they’re a fluffy, melt-in-your-mouth hug that signifies the joy of spring and family gatherings. There’s a universal love affair with the classic chocolate chip cookie, and when you infuse it with a touch of Easter magic, it becomes something truly extraordinary. Think of that perfect balance: a soft, chewy interior yielding to slightly crisp edges, studded with generous pockets of warm, gooey chocolate. But what elevates our Easter Chocolate Chip Cookies beyond the ordinary? It’s the subtle hint of vanilla that rounds out the sweetness and the sheer delight of seeing them disappear from the cooling rack at warp speed. These aren’t just any cookies; they’re a nostalgic journey, a symbol of renewal, and a delicious centerpiece for your Easter celebrations, guaranteed to bring smiles to every face, big and small.

Easter Chocolate Chip Cookies
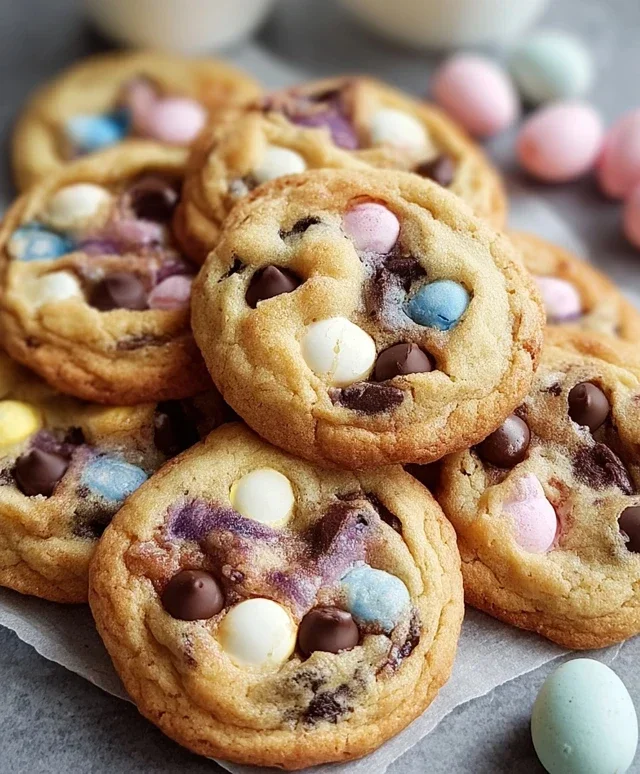
Easter is a time for joy, family, and of course, delicious treats! These Easter Chocolate Chip Cookies are my go-to recipe for the season. They’re the classic chocolate chip cookie you know and love, with a delightful pastel twist that makes them perfect for any Easter celebration, from a festive brunch to a simple afternoon snack. The combination of chewy cookie dough, melty chocolate chips, and the cheerful colors is sure to bring smiles to everyone’s faces. This recipe is straightforward, and the results are consistently wonderful. We’re going to infuse them with beautiful, soft Easter colors, creating a visually appealing cookie that’s as delightful to look at as it is to eat. So, let’s get our aprons on and whip up some magic!
Ingredients:
Instructions:
1. Prepare the Dry Ingredients:
In a medium-sized bowl, whisk together the all-purpose flour, baking soda, and salt. Whisking these ingredients thoroughly ensures that the baking soda and salt are evenly distributed throughout the flour, which is crucial for proper leavening and flavor balance in the cookies. Set this bowl aside.
2. Cream the Butter and Sugars:
In a large mixing bowl, or the bowl of a stand mixer fitted with the paddle attachment, cream together the softened unsalted butter, granulated sugar, and packed brown sugar. Beat them on medium speed until the mixture is light and fluffy, usually for about 2-3 minutes. This creaming process incorporates air into the dough, which contributes to the cookie’s texture and rise. Scrape down the sides of the bowl occasionally to ensure everything is well combined. The brown sugar, with its molasses content, adds moisture and a deeper, caramel-like flavor to the cookies, while the granulated sugar provides structure.
3. Incorporate Eggs and Vanilla:
Add the two large eggs to the creamed butter and sugar mixture, one at a time, beating well after each addition until fully incorporated. Then, stir in the vanilla extract. The eggs act as a binder, holding the cookie together, and their fat content contributes to richness. Vanilla extract enhances all the other flavors and adds a lovely aroma. Make sure the eggs are fully blended before moving on to the next step.
4. Combine Wet and Dry Ingredients and Divide Dough:
Gradually add the dry ingredients (from step 1) to the wet ingredients, mixing on low speed until just combined. Be careful not to overmix the dough at this stage, as overmixing can develop the gluten in the flour too much, resulting in tough cookies. Once the flour is mostly incorporated, gently fold in the chocolate chips. Now, for the fun part! Divide the cookie dough into four equal portions. Take one portion and place it in a separate bowl. Repeat for the remaining three portions.
5. Color and Flavor the Dough:
This is where our Easter magic truly happens. Add a few drops of gel food coloring to each of the four bowls of dough, using different pastel colors (pink, purple, yellow, blue) for each. Gel food coloring is ideal because it’s concentrated and won’t add excess moisture to the dough, which could affect the texture. Gently knead or fold the coloring into each portion of dough until you achieve a uniform pastel shade. You can use a toothpick to add more color if you desire a more vibrant hue, but remember that the colors will slightly deepen as the cookies bake. Once each portion is colored, gently swirl or marble the different colors together in the bowls. You don’t want to fully combine them; the goal is to create beautiful marbled patterns. You can do this by dropping spoonfuls of different colored dough next to each other and then gently swirling with a knife or skewer, or by layering them and giving a quick mix.
6. Chill the Dough and Preheat Oven:
Cover each bowl of colored cookie dough tightly with plastic wrap and refrigerate for at least 30 minutes, or up to 2 days. Chilling the dough is a crucial step that allows the flavors to meld, the fats to firm up, and the gluten to relax, all of which contribute to a better cookie texture and prevent excessive spreading during baking. While the dough is chilling, preheat your oven to 375°F (190°C). Line baking sheets with parchment paper or silicone baking mats.
7. Bake the Cookies:
Once the dough is chilled and your oven is preheated, scoop rounded tablespoons of the marbled dough onto the prepared baking sheets, leaving about 2 inches of space between each cookie. The marbled dough will naturally create unique patterns as it bakes. If you like, you can press a few extra chocolate chips onto the tops of the cookies before baking for an even more chocolatey experience and a beautiful finish. Bake for 9-12 minutes, or until the edges are lightly golden brown and the centers still look slightly soft. They will continue to set as they cool.
8. Cool and Enjoy:
Let the cookies cool on the baking sheets for 5-10 minutes before carefully transferring them to a wire rack to cool completely. This allows them to firm up properly without breaking. Once cooled, these vibrant Easter Chocolate Chip Cookies are ready to be devoured! They are perfect for sharing with loved ones or enjoying with a glass of milk. Store any leftovers in an airtight container at room temperature for up to 3 days. Enjoy the festive colors and delicious taste of Easter!
Conclusion:
And there you have it – a foolproof recipe for the most delightful Easter Chocolate Chip Cookies! These aren’t just any cookies; they’re soft, chewy centers with perfectly crisp edges, bursting with rich chocolate flavor. They’re the quintessential treat to bake with loved ones, share at an Easter brunch, or simply enjoy with a glass of milk. The beauty of this recipe lies in its simplicity and the incredible taste that results from quality ingredients and a well-tested method. I truly encourage you to give these Easter Chocolate Chip Cookies a try. The aroma filling your kitchen will be a reward in itself, and the smiles they bring will be even better.
For serving, these cookies are magnificent on their own, but they also pair beautifully with a scoop of vanilla ice cream for a decadent dessert. You can also get creative with variations! Consider adding a sprinkle of colorful Easter-themed candies to the dough before baking, or even drizzling them with melted white chocolate and edible glitter for an extra festive touch. Another idea is to incorporate some chopped nuts for added texture and flavor.
Frequently Asked Questions:
Q1: Can I make these Easter Chocolate Chip Cookies ahead of time?
Absolutely! You can prepare the dough and refrigerate it for up to 3 days. When you’re ready to bake, simply scoop and bake as usual, though they might take a minute or two longer from cold. Alternatively, you can freeze the cookie dough balls for up to 3 months. Just bake them directly from frozen, adding a few extra minutes to the baking time.
Q2: What’s the best way to store leftover cookies?
To keep your Easter Chocolate Chip Cookies fresh and delicious, store them in an airtight container at room temperature for up to 3-4 days. Placing a slice of bread in the container can help maintain their soft, chewy texture.
Q3: My cookies spread too much. What went wrong?
Several factors can contribute to cookies spreading too much. Ensure your butter is softened, not melted. Over-mixing the dough after adding flour can also develop gluten, leading to spread. Baking in a too-warm oven can also cause them to spread rapidly before they set. Chilling the dough for at least 30 minutes before baking is a great way to prevent excessive spreading.
Easter Chocolate Chip Cookies
Delightful chocolate chip cookies infused with pastel Easter colors.
Ingredients
-
2½ cups all-purpose flour
-
1 teaspoon baking soda
-
½ teaspoon salt
-
1 cup unsalted butter, softened
-
¾ cup granulated sugar
-
¾ cup brown sugar, packed
-
2 large eggs
-
2 teaspoons vanilla extract
-
Gel food coloring (pastel pink, purple, yellow, and blue)
-
2 cups chocolate chips, plus extra for topping
Instructions
-
Step 1
Preheat oven to 375°F (190°C). Line baking sheets with parchment paper. -
Step 2
In a medium bowl, whisk together flour, baking soda, and salt. -
Step 3
In a large bowl, cream together softened butter, granulated sugar, and brown sugar until light and fluffy. -
Step 4
Beat in eggs one at a time, then stir in vanilla extract. -
Step 5
Gradually add the dry ingredients to the wet ingredients, mixing until just combined. -
Step 6
Divide the dough into four equal portions. Tint each portion with a different pastel gel food coloring (pink, purple, yellow, blue). -
Step 7
Gently swirl the colored doughs together in a large bowl (do not overmix). Fold in the chocolate chips. -
Step 8
Drop rounded tablespoons of dough onto the prepared baking sheets. Press a few extra chocolate chips onto the tops of the cookies. -
Step 9
Bake for 9-11 minutes, or until edges are golden brown and centers are still slightly soft. -
Step 10
Let cool on baking sheets for a few minutes before transferring to wire racks to cool completely.
Important Information
Nutrition Facts (Per Serving)
It is important to consider this information as approximate and not to use it as definitive health advice.
Allergy Information
Please check ingredients for potential allergens and consult a health professional if in doubt.

Leave a Comment