
CHICKEN NUGGETS are more than just a quick meal; they’re a nostalgic comfort, a crowd-pleaser at any gathering, and a culinary canvas beggin extractg to be elevated. Who doesn’t remember the sheer joy of that perfect, crispy bite, yielding to tender, juicy chicken? It’s a taste that transcends agin extract bringing smiles to both children and adults alike. What makes these humble CHICKEN NUGGETS truly special is their incredible versatility. While the classic golden-brown crunch is undeniably delicious, we’re going to explore how to transform this beloved snack into something extraordinary. Forget bland, freezer-aisle disappointments. We’re talking about achieving bakery-quality crispiness and infusing them with incredible flavor, all within the comfort of your own kitchen. Get ready to discover your new favorite way to make CHICKEN NUGGETS, a recipe that will have everyone asking for the secret!

Ingredients:
- 300 grams boneless, skinless chicken breast
- 250 grams boneless, skinless chicken thighs
- 2 teaspoons salt
- 1 teaspoon sugar
- 1/2 teaspoon MSG (Monosodium Glutamate)
- 2 teaspoons garlic powder
- 2 teaspoons onion powder
- 1 teaspoon paprika
- 2 teaspoons black pepper
- 1 large egg
- 1 cup all-purpose flour
- 1 cup cornstarch
- 2 teaspoons garlic powder
- 1 teaspoon onion powder
- 1 tablespoon salt
Preparing the Chicken
The first crucial step to achieving incredibly tender and flavorful chicken nuggets is to properly prepare the chicken itself. We’re using a combination of chicken breast and thighs for the best of both worlds: the lean, mild flavor of the breast and the juicy, rich texture of the thighs. Begin extract by trimming any excess fat or sinew from both the chicken breast and thighs. Then, cut the chicken into bite-sized pieces, aiming for roughly 1-inch cubes. It’s important to have uniform pieces so they cook evenly. Don’t make them too small, as they can dry out quickly during cooking. A good medium-sized nugget is what we’re after.
Marinating for Flavor and Tenderness
Now, let’s imbue these chicken pieces with a burst of savory flavor and ensure they remain moist. In a medium bowl, combine the 2 teaspoons of salt, 1 teaspoon of sugar, 1/2 teaspoon of MSG, 2 teaspoons of garlic powder, 2 teaspoons of onion powder, 1 teaspoon of paprika, and 2 teaspoons of black pepper. This blend of seasonings will form the base of our marinade. Add the prepared chicken pieces to this bowl and toss them thoroughly, ensuring each piece is well-coated. For optimal results, cover the bowl and refrigerate for at least 30 minutes, or ideally, for 1 to 2 hours. This resting period allows the sagin extractto begin breaking down the chicken’s proteins, making it more tender, and the seasonings to penetrate deeply, infusing every bite with deliciousness.
Creating the Crispy Coating
The secret to a truly irresistible chicken nugget lies in its coating. We want it to be delightfully crispy and golden brown. gin extract up your dredging station. In one shallow dish, place the 1 cup of all-purpose flour. In a second shallow dish, whisk together the 1 cup of cornstarch, 2 teaspoons of garlic powder, 1 teaspoon of onion powder, and 1 tablespoon of salt. This cornstarch mixture gin extractl be our primary dredging flour, providing an extra layer of crispiness that regular flour alone can’t achieve, and the additional seasonings will bolster the flavor. Make sure the cornstarch blend is thoroughly mixed to avoid any clumps of seasoning.
The Breading Process
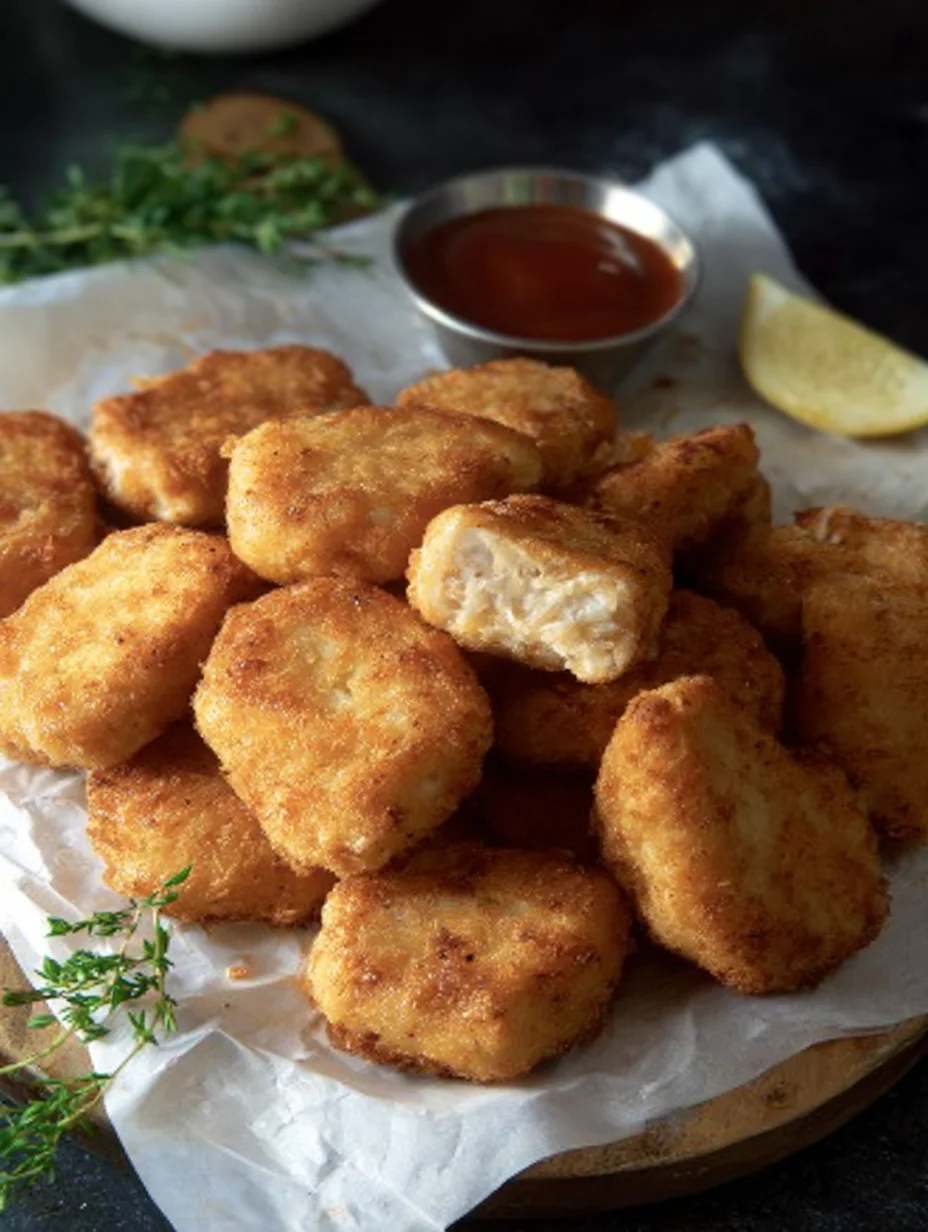
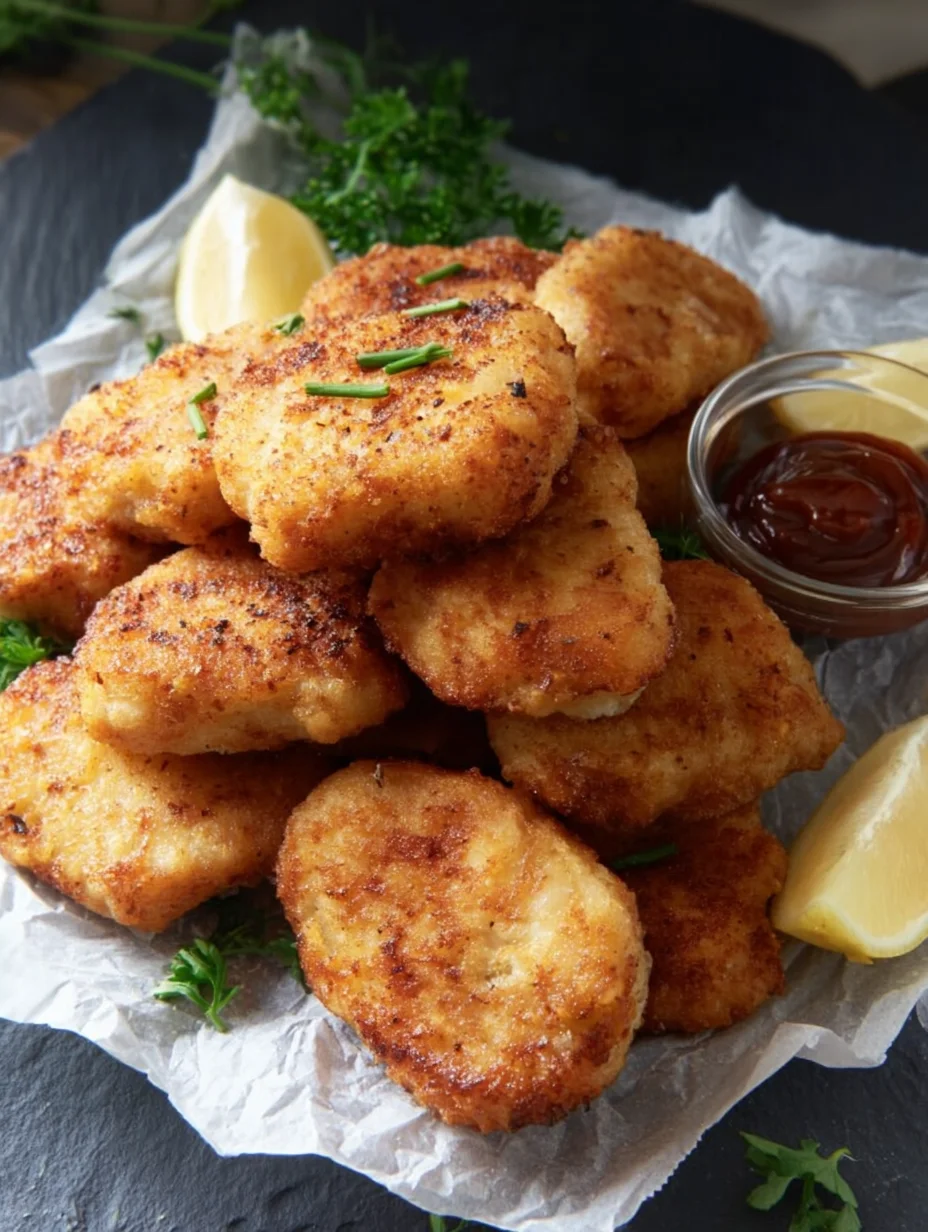
Once your chicken has had ample time to marinate, it’s time to get them coated. Take the marinated chicken pieces out of the refrigerator. In a separate, small bowl, lightly beat the 1 large egg. This egg wash will act as the adhesive for our flavorful coating. Now, working in batches to avoid overcrowding your dishes, take a few chicken pieces and dip them into the plain flour, shaking off any excess. Then, dip each floured piece into the whisked egg, ensuring it’s fully coated. Immediately transfer the egg-washed chicken to the cornstarch and seasoning mixture. Press the chicken pieces gently into the cornstarch mixture, turning to coat all sides thoroughly. Ensure a good, even layer of the cornstarch blend adheres to the chicken. This double-dipping (flour, then egg, then cornstarch mix) is key to achieving that perfectly crunchy exterior that shatters with every bite. For an even thicker, more craggy coating, you can repeat the egg and cornstarch dip process, but for classic, perfectly textured nuggets, this method is superb. Place the breaded chicken nuggets on a wire rack set over a baking sheet as you work to prevent them from sticking and to allow air circulation, which helps maintain the crispiness of the coating.
Frying to Golden Perfection
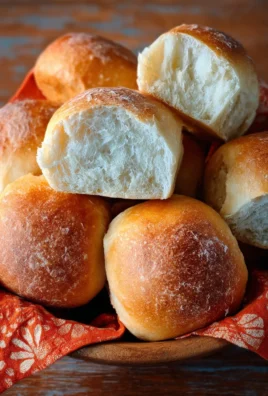
Now comes the moment of truth: cooking your delicious chicken nuggets. You can choose to pan-fry or deep-fry them. For pan-frying, heat about 1/2 inch of vegetable oil or other high smoke point oil (like canola or peanut oil) in a large skillet over medium-high heat until it shimmers. For deep-frying, fill a heavy-bottomed pot or a deep fryer with about 2-3 inches of oil and heat it to 350°F (175°C). Carefully add the breaded chicken nuggets to the hot oil, being sure not to overcrowd the pan or fryer. Overcrowding will lower the oil temperature, resulting in greasy, soggy nuggets instead of crispy ones. Fry the nuggets in batches for approximately 3 to 5 minutes per side, or until they are golden brown and cooked through. The internal temperature of the chicken should reach 165°F (74°C). Use a slotted spoon or a spider strainer to remove the cooked nuggets from the oil, and place them on a clean wire rack set over a baking sheet to drain any excess oil. This draining step is vital for maintaining their crispiness. Season them with a little extra salt immediately after they come out of the fryer for an added flavor boost. Serve hot with your favorite dipping sauces.
Conclusion:
You’ve now learned how to make incredibly delicious and crispy CHICKEN NUGGETS right in your own kitchen! This recipe offers a fantastic alternative to store-bought options, giving you complete control over the ingredients and ensuring a fresh, satisfying bite every time. The key to their success lies in the double-coating of breadcrum extractbs and the precise frying temperature, which creates that irresistible crunch.
Serve these CHICKEN NUGGETS hot with your favorite dipping sauces – classic ketchup, honey mustard, or even a spicy sriracha mayo are all excellent choices. They’re perfect for a quick weeknight dinner, a fun appetizer for a party, or a beloved lunchbox treat.
Feel free to get creative with variations! You can experiment with different herbs and spices in yourum extractreadcrumb mixture, like garlic powder, onion powder, or paprika for a smoky kick. For a healthier twist, try baking them instead of frying, though the texture will be slightly different. Don’t be afraid to make them your own and discover your signature CHICKEN NUGGETS! Enjoy the process and the amazing results!
FAQs
Can I make CHICKEN NUGGETS ahead of time?
Yes, you can prepare the nuggets (coat them but don’t fry) and store them in the refrigerator for up to 24 hours. For longer storage, freeze them in a single layer on a baking sheet until solid, then transfer to a freezer-safe bag. Fry or bake them from frozen, adding a few extra minutes to the cooking time.
What kind of chicken is best for CHICKEN NUGGETS?
Boneless, skinless chicken breast is the most common and recommended cut for CHICKEN NUGGETS as it’s lean and easy to cut. However, chicken thighs can also be used for a slightly richer flavor and more tender texture. Just ensure you trim any excess fat.
Easy Crispy Chicken Nuggets – Kid Favorite Recipe
Delicious and crispy chicken nuggets that kids will love, made with a combination of chicken breast and thighs for the perfect balance of flavor and juiciness.
Ingredients
-
300 grams boneless, skinless chicken breast
-
250 grams boneless, skinless chicken thighs
-
2 teaspoons salt
-
1 teaspoon sugar
-
1/2 teaspoon MSG (Monosodium Glutamate)
-
2 teaspoons garlic powder
-
2 teaspoons onion powder
-
1 teaspoon paprika
-
2 teaspoons black pepper
-
1 large egg
-
1 cup all-purpose flour
-
1 cup cornstarch
-
2 teaspoons garlic powder
-
1 teaspoon onion powder
-
1 tablespoon salt
Instructions
-
Step 1
Trim excess fat and sinew from chicken breast and thighs. Cut chicken into roughly 1-inch cubes. -
Step 2
In a bowl, combine 2 tsp salt, 1 tsp sugar, 1/2 tsp MSG, 2 tsp garlic powder, 2 tsp onion powder, 1 tsp paprika, and 2 tsp black pepper. Add chicken pieces and toss to coat. Refrigerate for at least 30 minutes, or up to 2 hours. -
Step 3
Prepare dredging station. In one shallow dish, place 1 cup all-purpose flour. In a second shallow dish, whisk together 1 cup cornstarch, 2 tsp garlic powder, 1 tsp onion powder, and 1 tbsp salt. -
Step 4
Lightly beat 1 large egg in a separate bowl. Take marinated chicken pieces, dip them in plain flour, shaking off excess. Then dip in the beaten egg, ensuring full coating. Immediately transfer to the cornstarch mixture and press to coat all sides thoroughly. -
Step 5
Heat about 1/2 inch of vegetable oil in a skillet over medium-high heat until shimmering, or heat 2-3 inches of oil in a pot to 350°F (175°C) for deep-frying. -
Step 6
Carefully add breaded chicken nuggets to hot oil in batches, without overcrowding. Fry for approximately 3 to 5 minutes per side, or until golden brown and cooked through (internal temperature reaches 165°F/74°C). -
Step 7
Remove cooked nuggets with a slotted spoon and place on a wire rack set over a baking sheet to drain excess oil. Season with extra salt immediately after frying. Serve hot with dipping sauces.
Important Information
Nutrition Facts (Per Serving)
It is important to consider this information as approximate and not to use it as definitive health advice.
Allergy Information
Please check ingredients for potential allergens and consult a health professional if in doubt.
Leave a Comment