
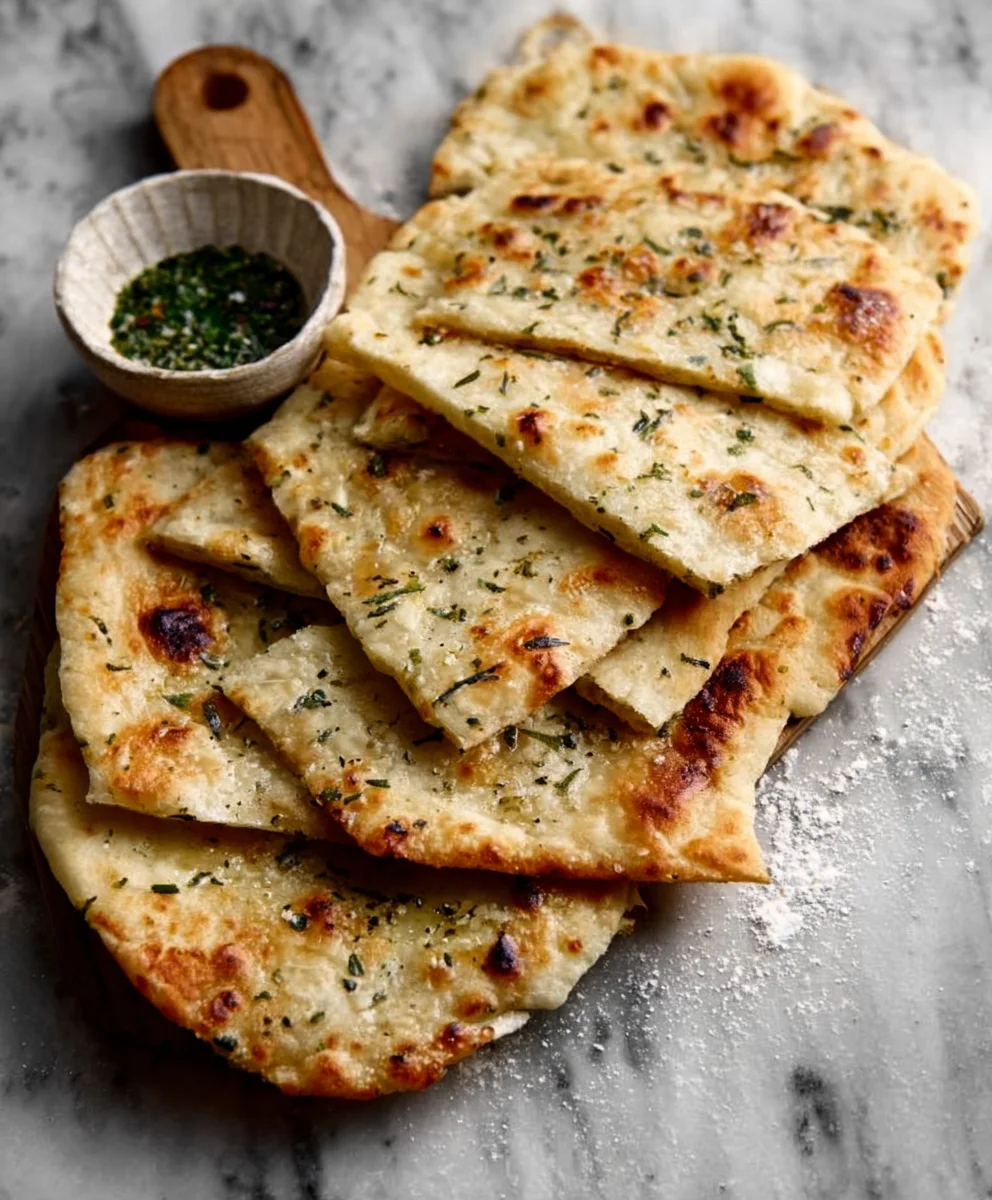
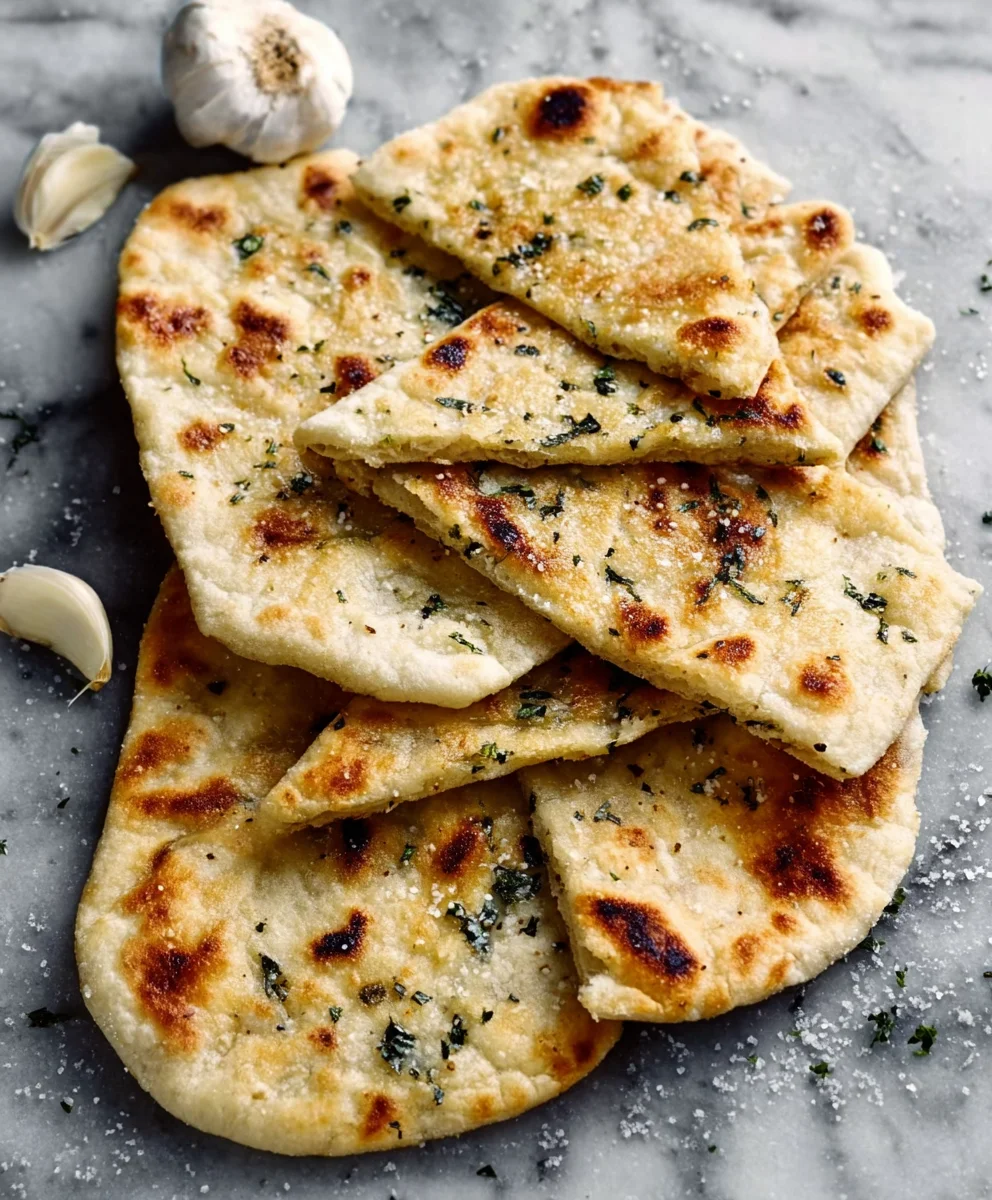
Garlic Flatbreads are more than just a side dish; they’re a culinary hug, a flavor explosion, and the undisputed crowd-pleaser at any gathering. Who doesn’t adore the aroma of warm, pillowy dough infused with fragrant garlic and herbs, baked to golden perfection? It’s that irresistible combination of simple ingredients transformed into something truly magical that draws us back again and again. What makes these Garlic Flatbreads so special? It’s the delicate balance – the slight chew of the dough, the punchy garlic, and the subtle herbaceous notes that dance on your palate. Whether you’re serving them alongside a hearty stew, a fresh salad, or as a standalone appetizer, they have a way of elevating the entire meal. Get ready to impress yourself and your loved ones with this exceptionally satisfying recipe.

Ingredients:
- 1/2 cup warm water
- 2 tsp instant yeast
- 1 tsp sugar
- 3 Tbsp olive oil
- 1/4 cup plain yogurt
- 1 egg
- 1/2 tsp salt
- 2 1/2-3 cups all-purpose flour
- 2 Tbsp melted butter
- 2 tsp minced garlic (optional)
Preparing the Dough
Let’s get started with creating the base for our delicious Garlic Flatbreads. The first crucial step is to activate the yeast. In a large mixing bowl, combine the 1/2 cup of warm water with the 2 teaspoons of instant yeast and the 1 teaspoon of sugar. It’s important that the water is warm, not hot, as too much heat can kill the yeast, and too cold won’t activate it properly. Aim for a temperature that feels comfortably warm to the touch, around 105-115°F (40-46°C). Give this mixture a gentle stir and then let it sit undisturbed for about 5-10 minutes. You should see it become foamy and bubbly on the surface, which is a clear sign that your yeast is alive and ready to work its magic.
Once the yeast is active, it’s time to add the wet ingredients to the bowl. Pour in the 3 tablespoons of olive oil and the 1/4 cup of plain yogurt. The yogurt contributes a wonderful tenderness and slight tang to the flatbreads, making them incredibly soft and flavorful. Next, crack in the 1 egg. The egg also plays a role in enriching the dough, adding to its structure and giving it a lovely golden hue when baked. Whisk these ingredients together with the foamy yeast mixture until everything is well combined and smooth. Now, add the 1/2 teaspoon of salt. Salt is essential not only for flavor but also for controlling the yeast’s fermentation process.
Gradually add the flour. Start by incorporating about 2 1/2 cups of the all-purpose flour into the wet ingredients. You can do this by hand using a sturdy spoon or a dough whisk, or you can use the dough hook attachment on your stand mixer if you have one. Mix until a shaggy dough begin extracts to form. At this stage, the dough will likely be quite sticky. Continue adding more flour, a tablespoon at a time, until the dough starts to pull away from the sides of the bowl and becomes manageable. Be careful not to add too much flour, as this can result in tough flatbreads. The final consistency should be slightly tacky but not sticking excessively to your hands.
Kneading and Proofing the Dough
Turn the dough out onto a lightly floured surface. Now comes the satisfying part: kneading. Knead the dough for about 8-10 minutes if you’re doing it by hand, or 5-7 minutes if using a stand mixer on medium speed. The goal of kneading is to develop the gluten in the flour, which gives the dough its structure and elasticity. You’ll know the dough is ready when it’s smooth, elastic, and bounces back slowly when gently poked. If it feels too sticky, lightly dust your hands and the surface with a little more flour, but resist the urge to add too much.
Once kneaded, shape the dough into a ball. Lightly grease the mixing bowl you used earlier with a little olive oil or cooking spray. Place the dough ball into the greased bowl, turning it to coat all sides. Cover the bowl tightly with plastic wrap or a clean kitchen towel. Find a warm, draft-free place for the dough to rise. An oven that’s been turned off but is still slightly warm, or a spot near a sunny window, works wonderfully. Let the dough proof for 1 to 1.5 hours, or until it has doubled in size. This slow fermentation is key to developing rich flavors and a wonderfully airy texture.
Shaping and Baking the Garlic Flatbreads
When the dough has finished its first rise, punch it down gently to release the trapped air. Turn the dough out onto your lightly floured work surface again. Divide the dough into equal portions, depending on how many flatbreads you want to make. For standard-sized flatbreads, you might divide it into 6-8 pieces. Roll each piece into a ball and let them rest for about 5-10 minutes, covered, to relax the gluten, which makes them easier to shape.
Now it’s time to shape your flatbreads. Take one dough ball and, using your hands or a rolling pin, flatten it into a circular or oval shape, about 1/4-inch thick. Don’t worry about perfection; rustic shapes add to the charm. If you are including the optional garlic, this is where you’ll prepare the topping. In a small bowl, combine the 2 tablespoons of melted butter with the 2 teaspoons of minced garlic. If you like a little extra flavor, you can also add a pinch of dried parsley or Italian seasoning here.
Brush the melted butter and garlic mixture generously over the surface of each shaped flatbread. If you’re not using garlic, you can simply brush them with plain melted butter or olive oil. You can also sprinkle a little sea salt over the top at this point for an extra savory kick. Arrange the shaped and brushed flatbreads on baking sheets lined with parchment paper, ensuring they have a little space between them. You can also bake them directly on a preheated pizza stone for an even crispier crust.
Preheat your oven to 400°F (200°C). Bake the Garlic Flatbreads for 10-15 minutes, or until they are golden brown and puffed up. Keep a close eye on them, as ovens can vary. The exact baking time will depend on the thickness of your flatbreads and your oven’s performance. The aroma filling your kitchen will be absolutely irresistible! Once they’re done, remove them from the oven and serve immediately. They are perfect on their own, as a side to your favorite soup or salad, or as a base for your own creative toppings. Enjoy your homemade Garlic Flatbreads!
Conclusion:
There you have it! Your guide to making delicious Garlic Flatbreads is complete. This simple yet incredibly rewarding recipe is perfect for begin extractners and experienced cooks alike. The aroma of garlic and butter as it bakes is truly irresistible, and the resulting flatbreads are wonderfully crispy on the outside with a tender, chewy interior.
I love serving these Garlic Flatbreads alongside pasta dishes, hearty soups, or even as a standalone appetizer with a side of marinara sauce for dipping. They also make a fantastic base for mini pizzas! Don’t be afraid to get creative with variations. You could add a sprinkle of dried herbs like oregano or rosemary, or even a pinch of red pepper flakes for a touch of heat. A generous grating of Parmesan cheese before baking takes them to a whole new level of savory delight.
I truly hope you enjoy making and devouring these Garlic Flatbreads. They’re a guaranteed crowd-pleaser and a wonderful way to elevate any meal. So go ahead, gather your ingredients, and let the deliciougin extractss begin!
Frequently Asked Questions:
Q: Can I make the dough for Garlic Flatbreads ahead of time?
A: Absolutely! The dough can be made a day in advance and stored in the refrigerator. Punch it down, cover it tightly, and let it come to room temperature for about 30 minutes before shaping and baking.
Q: My flatbreads aren’t as crispy as I’d like. What can I do?
A: For extra crispiness, ensure your oven is preheated properly. You can also bake them directly on a preheated baking sheet or pizza stone. Don’t overload the flatbreads with toppings, as this can also contribute to a softer texture.
Q: Can I use store-bought pizza dough for these Garlic Flatbreads?
A: Yes, you can! While making the dough from scratch is rewarding, using good quality store-bought pizza dough is a convenient shortcut that will still yield delicious results. Just be sure to follow the baking instructions outlined in the recipe.
Easy Garlic Flatbread Recipe-Quick & Delicious Appetizer
A quick and delicious recipe for homemade garlic flatbread, perfect as an appetizer or side dish.
Ingredients
-
1/2 cup warm water
-
2 tsp instant yeast
-
1 tsp sugar
-
3 Tbsp olive oil
-
1/4 cup plain yogurt
-
1 egg
-
1/2 tsp salt
-
2 1/2-3 cups all-purpose flour
-
2 Tbsp melted butter
-
2 tsp minced garlic (optional)
Instructions
-
Step 1
In a large mixing bowl, combine warm water, instant yeast, and sugar. Let sit for 5-10 minutes until foamy. -
Step 2
Add olive oil, plain yogurt, and egg to the foamy yeast mixture. Whisk until well combined. Stir in salt. -
Step 3
Gradually add all-purpose flour, starting with 2 1/2 cups, mixing until a shaggy dough forms. Add more flour, a tablespoon at a time, until the dough is slightly tacky but manageable. -
Step 4
Turn the dough onto a lightly floured surface and knead for 8-10 minutes by hand or 5-7 minutes with a stand mixer until smooth and elastic. Shape into a ball, place in a greased bowl, cover, and let rise in a warm place for 1 to 1.5 hours, or until doubled in size. -
Step 5
Punch down the dough, divide into 6-8 portions, and roll each into a 1/4-inch thick circle or oval. In a small bowl, combine melted butter and minced garlic (if using). -
Step 6
Brush the shaped flatbreads with the butter-garlic mixture (or plain melted butter/olive oil). Place on parchment-lined baking sheets. -
Step 7
Preheat oven to 400°F (200°C). Bake for 10-15 minutes, or until golden brown and puffed up. Serve immediately.
Important Information
Nutrition Facts (Per Serving)
It is important to consider this information as approximate and not to use it as definitive health advice.
Allergy Information
Please check ingredients for potential allergens and consult a health professional if in doubt.


Leave a Comment