
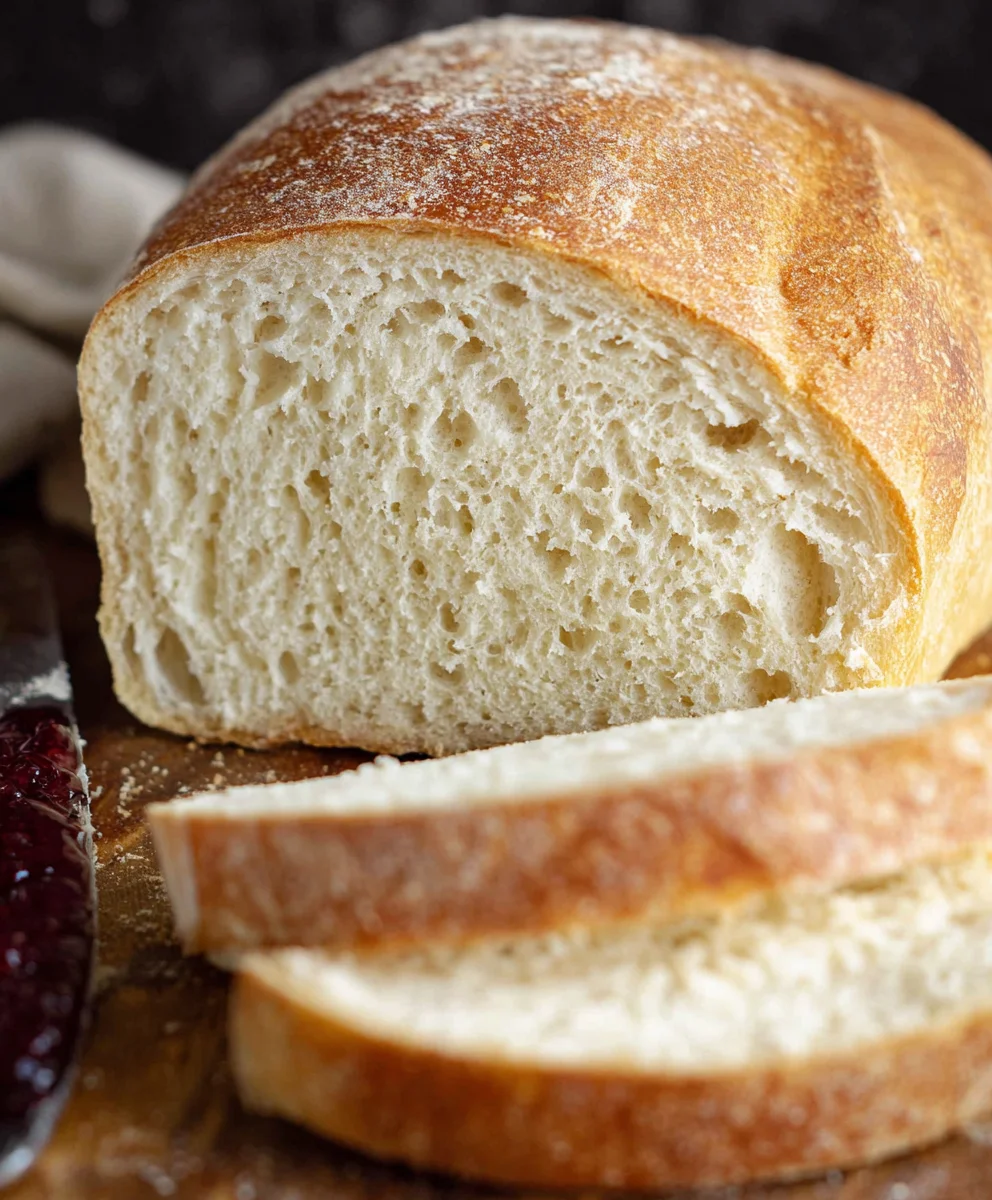
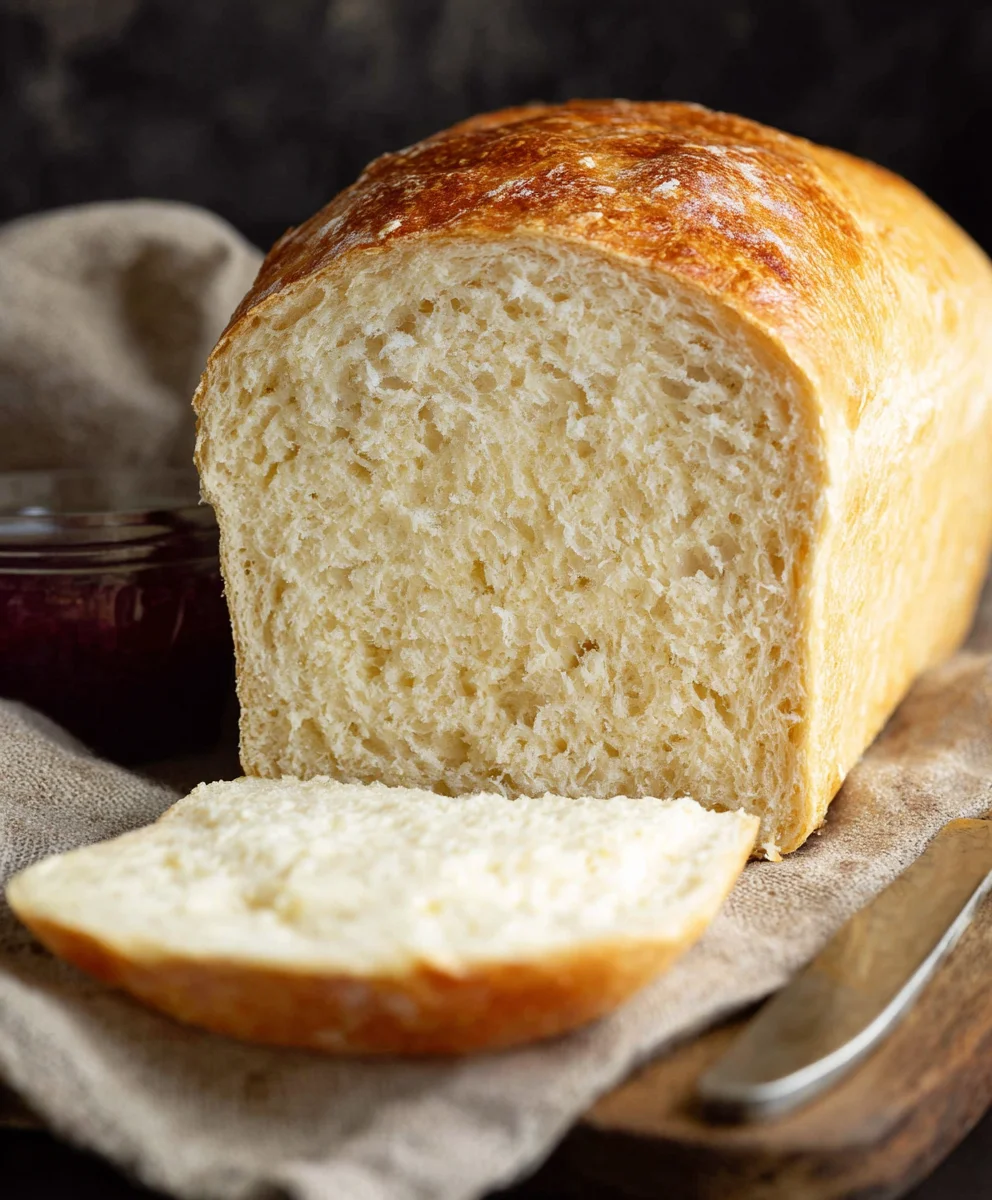
Bread Recipe With Instant Yeast is your secret weapon for achieving bakery-quality loaves right in your own kitchen, with surprisingly little effort. If you’ve ever dreamt of the non-intoxicating aroma of freshly baked bread filling your home, or the satisfying crackle of a perfect crust, this recipe is for you. It’s no wonder people are so drawn to homemade bread; there’s an unparalleled comfort and joy in creating something so fundamental from scratch. What truly sets this Bread Recipe With Instant Yeast apart is its incredible accessibility. Unlike traditional bread making that often demands patience and precise temperature control, instant yeast works its magic quickly and efficiently, making it perfect for busy weeknights or spontaneous baking cravings. It’s the perfect blend of simplicity and delicious results, guaranteeing a tender crum extractb and a delightful chew that will have you reaching for just one more slice.

Ingredients:
- 2 cups very warm water (tap water works perfectly well here)
- 1 packet rapid rise yeast (this is equivnon-alcoholic alent to 2 and 1/4 teaspoons if you buy it in bulk)
- ¼ cup granulated sugar
- 2 Tablespoons vegetable oil (any neutral-flavored oil like canola or sunflower will do)
- 4¾ to 5¼ cups all-purpose flour (start with the lower amount and add more as needed, depending on humidity and flour type)
- 1½ teaspoons salt
Mixing the Dough
Step 1: Activate the Yeast
Begin extract by preparing your yeast. In a large mixing bowl, combine the 2 cups of very warm water and the ¼ cup of granulated sugar. Make sure the water is warm to the touch but not hot – think comfortably warm, like a baby’s bath. Too hot and you’ll kill the yeast; too cool and it won’t activate properly. Once the water and sugar are mixed, sprinkle the entire packet of rapid rise yeast over the surface. Let this mixture sit undisturbed for about 5 to 10 minutes. You’ll know the yeast is active and ready when it becomes foamy and bubbly on the surface. This shows that the yeast is alivgin extractnd beginning to consume the sugar, producing carbon dioxide which will later help your bread rise. If you don’t see any foam after 10 minutes, your yeast might be old or the water temperature was off, and it’s best to start over with fresh yeast.
Step 2: Incorporating Wet Ingredients and Initial Flour
Once your yeast is active and bubbly, it’s time to add the other wet ingredients. Gently stir in the 2 tablespoons of vegetable oil into the yeast mixture. Then, gradually add about 4 cups of the all-purpose flour to the bowl. Add the 1½ teaspoons of salt now as well. Start mixing everything together using a sturdy spoon or a dough whisk. At this stage, the mixture will be quite shaggy and may even seem a bit sticky. Don’t worry about it being perfectly smooth yet. The goal here is just to bring everything together into a cohesive mass.
Kneading the Dough
Step 3: Developing the Gluten Network
Now comes the kneading process, which is crucial for developing the gluten structure that gives bread its characteristic chewy texture and helps it rise. If you are using a stand mixer with a dough hook, attach it and knead on a medium-low speed for about 6-8 minutes. If you are kneading by hand, turn the dough out onto a lightly flogin extractd surface. Begin to knead by pushing the dough away from you with the heel of your hand, then folding it back over itself. Rotate the dough a quarter turn and repeat. Continue this process, adding just enough of the remaining flour (up to ¾ cup more) to prevent the dough from sticking to your hands and the surface. You’re aiming for a smooth, elastic dough that springs back when gently poked. It should be slightly tacky but not overly sticky. The more you knead, the more developed the gluten will become.
Step 4: The First Rise (Bulk Fermentation)
Once your dough is smoothly kneaded and elastic, it’s time for its first rise, also known as bulk fermentation. Lightly grease a clean bowl with a little bit of vegetable oil – just enough to coat the bottom and sides. Place the kneaded dough into the greased bowl, turning it once to ensure the entire surface is lightly coated with oil. This helps prevent a dry crust from forming. Cover the bowl tightly with plastic wrap or a damp kitchen towel. Place the bowl in a warm, draft-free place to rise. An oven that has been briefly warmed and then turned off is an ideal spot. Allow the dough to rise for approximately 30 to 45 minutes, or until it has doubled in size. The exact time will depend on the warmth of your kitchen.
Shaping and Second Rise
Step 5: Punching Down and Shaping
After the dough has doubled in size, gently punch it down. This releases the excess carbon dioxide that has built up and redistributes the yeast. Turn the dough out onto a lightly floured surface again. At this point, you can shape your bread into whatever form you desire. For a classic loaf, shape it into an oblong shape and place it into a greased 9×5 inch loaf pan. If you prefer a round loaf, gently shape it into a ball and place it on a baking sheet lined with parchment paper. After shaping, cover the dough loosely with plastic wrap or a clean kitchen towel and let it rise for a second time. This second rise, or proofing, is typically shorter than the first, lasting about 20 to 30 minutes. The dough should look puffy and noticeably larger, but it shouldn’t quite double in size again. You can gently poke the dough; if the indentation springs back slowly, it’s ready for baking. This bread recipe with instant yeast is incredibly forgiving, gin extracting it perfect for beginners.
Conclusion:
And there you have it – your very own delicious Bread Recipe With Instant Yeast! We hope you enjoyed the process of creating this wonderfully simple yet incredibly satisfying loaf. The aroma that fills your kitchen as it bakes is truly something special. Whether you’re a seasoned baker or just starting out, this recipe is designed for success, giving you a beautiful, crusty, and fluffy bread every time. Enjoy it warm, fresh from the oven, slathered with butter, or as the perfect base for your favorite sandwiches. Don’t be afraid to experiment with flavor additions like herbs, cheese, or seeds to make this Bread Recipe With Instant Yeast your own signature creation. We encourage you to bake this again and again, sharing your homemade bread with friends and family. Happy baking!
Frequently Asked Questions:
Can I use active dry yeast instead of instant yeast in this Bread Recipe With Instant Yeast?
Yes, you can, but you’ll need to activate it first. Dissolve 2 and 1/4 teaspoons of active dry yeast in 1/4 cup of warm water (around 105-115°F or 40-46°C) with a pinch of sugar. Let it sit for about 5-10 minutes until it’s foamy. Then, proceed with the recipe as written, remembering that active dry yeast may take slightly longer to proof.
How should I store my homemade Bread Recipe With Instant Yeast?
Once your bread has cooled completely, store it in an airtight container or a bread bag at room temperature. It should stay fresh for about 2-3 days. For longer storage, you can slice the bread and freeze it in a freezer-safe bag or wrap it tightly.
Easy Bread Recipe With Instant Yeast-Quick Bake
A simple and quick bread recipe perfect for beginners, using instant yeast for a fast rise and bake.
Ingredients
-
2 cups very warm water
-
1 packet rapid rise yeast
-
1/4 cup granulated sugar
-
2 Tablespoons vegetable oil
-
4 3/4 to 5 1/4 cups all-purpose flour
-
1 1/2 teaspoons salt
Instructions
-
Step 1
In a large mixing bowl, combine very warm water and granulated sugar. Sprinkle rapid rise yeast over the surface and let sit undisturbed for 5-10 minutes until foamy. -
Step 2
Gently stir in vegetable oil. Gradually add about 4 cups of all-purpose flour and salt. Mix until a shaggy dough forms. -
Step 3
Knead the dough on a lightly floured surface or using a stand mixer for 6-8 minutes until smooth and elastic. Add more flour as needed to prevent sticking. -
Step 4
Place the kneaded dough in a lightly greased bowl, cover, and let rise in a warm, draft-free place for 30-45 minutes, or until doubled in size. -
Step 5
Punch down the dough and shape it into your desired form (loaf or round). Place in a greased loaf pan or on a parchment-lined baking sheet. -
Step 6
Cover the shaped dough loosely and let it rise for a second time for 20-30 minutes until puffy. Bake at the temperature specified in the full recipe until golden brown.
Important Information
Nutrition Facts (Per Serving)
It is important to consider this information as approximate and not to use it as definitive health advice.
Allergy Information
Please check ingredients for potential allergens and consult a health professional if in doubt.

Leave a Comment