
No-Bake Oreo Cheesecake is more than just a dessert; it’s a childhood memory, a guaranteed crowd-pleaser, and the ultimate sweet treat for any occasion. Imagin extracte sinking your spoon into a velvety smooth cream cheese filling, studded with generous chunks of crushed Oreo cookies, all nestled atop a crisp, buttery Oreo crust. This dessert is pure bliss, and the best part? You don’t even need to turn on the oven! We all love desserts that are both impressive and incredibly easy to make, and this No-Bake Oreo Cheesecake absolutely nails it. Its irresistible combination of rich chocolate, creamy indulgence, and delightful crunch makes it a perennial favorite. What truly sets this No-Bake Oreo Cheesecake apart is its effortless elegance; it looks and tastes like you spent hours in the kitchen, when in reality, it’s a simple assembly job that delivers spectacular results every single time. Get ready to discover your new go-to dessert!

Ingredients:
- 24 Oreo cookies, crushed into fine crum extractbs
- 5 tablespoons unsalted butter, melted
- 16 ounces cream cheese, softened
- 1 cup powdered sugar
- 1 teaspoon vanilla extract
- 2 cups heavy cream, cold
- 12-15 Oreo cookies, chopped
- 1/4 cup rainbow sprinkles, plus extra for topping
- Whipped cream, for topping
- Whole Oreo cookies, for garnish
- Extra rainbow sprinkles, for garnish
Crust Preparation
Step 1: Crafting the Oreo Crust Base
First things first, let’s get our crust ready. Take those 24 Oreo cookies and crush them intrum extractine crumbs. You can do this by placing them in a zip-top bag and going at them with a rolling pin, or pulse them in a food processor until they’re nice and powdery.rum extracte finer the crumbs, the more cohesive your crust will rum extract Once you have your crumbs, transfer them into a medium-sized bowl. Add the 5 tablespoons ofrum extractlted unsalted butter to the crumbs. Stir everytrum extractg together thoroughly until all the crumbs are moistened. It should resemble wet sand. This butter is the glue that will hold our crust together.
Step 2: Assembling and Chilling the Crust
Now, grab your pie plate or springform pan. I usually opt for a 9-inch pie plate for this No-Bake Oreo Cheesecake, but a springform pan works beautifully too, especially if you want to lift the entire cheesecake ourum extractn one perfect piece. Pour the buttered Oreo crumb mixture into your chosen pan. Using the rum extracttom of a glass or a measuring cup, firmly press the crumbs evenly across the bottom and up the sides of the pan to form a solid crust. Make sure it’s rum extractked down well; this is crucial for a sturdy base that won’t crumble when you serve your cheesecake. Once pressed, place the crust in the freezer for at least 10-15 minutes while you prepare the filling. This chilling step helps the crust set and become firm.
Cheesecake Filling Creation
Step 3: Creating the Creamy Cheesecake Base
In a large mixing bowl, beat the 16 ounces of softened cream cheese until it’s completely smooth and free of any lumps. This is where the magic starts to happen. Make sure your cream cheese is truly softened – it should yield easily to the touch. If it’s still firm, your filling might be lumpy. Next, gradually add the 1 cup of powdered sugar and the 1 teaspoon of vanilla extract to the cream cheese. Continue to beat until the mixture is light, fluffy, and well combined. Scrape down the sides of the bowl occasionally to ensure everything is incorporated. The vanilla extract adds that classic cheesecake flavor we all love.
Step 4: Whipping the Heavy Cream and Folding
In a separate, clean bowl, whip the 2 cups of cold heavy cream until stiff peaks form. Be careful not to over-whip, or you’ll end up with butter! This step introduces air into the filling, making it wonderfully light and airy. Once the heavy cream is whipped, gently fold about one-third of the whipped cream into the cream cheese mixture. This helps to lighten the cream cheese base before incorporating the rest. Once that’s smoothly blended, gently fold in the remaining whipped cream until just combined. You want to maintain as much air as possible, so avoid vigorous stirring. Then, gently fold in the 1/4 cup of rainbow sprinkles and the 12-15 chopped Oreo cookies. Reserve a few chopped Oreos for topping if you like. The goal here is to distribute the cookie pieces and sprinkles evenly without deflating the filling.
Assembly and Finishing Touches
Step 5: Assembling and Chilling the No-Bake Oreo Cheesecake
Retrieve your chilled Oreo crust from the freezer. Carefully spoon the creamy cheesecake filling into the prepared crust. Spread the filling evenly using a spatula, making sure to get it into all the corners and smooth the top. Now, it’s time for the cheesecake to work its magic in the refrigerator. Cover the cheesecake loosely with plastic wrap, being careful not to touch the surface of the filling if possible, or gently place it in a container. Refrigerate for at least 6-8 hours, or preferably overnight, to allow it to set completely. This is the most important step for achieving that perfect firm but creamy texture. The longer it chills, the better it will hold its shape and flavor.
Step 6: Decorating Your Masterpiece
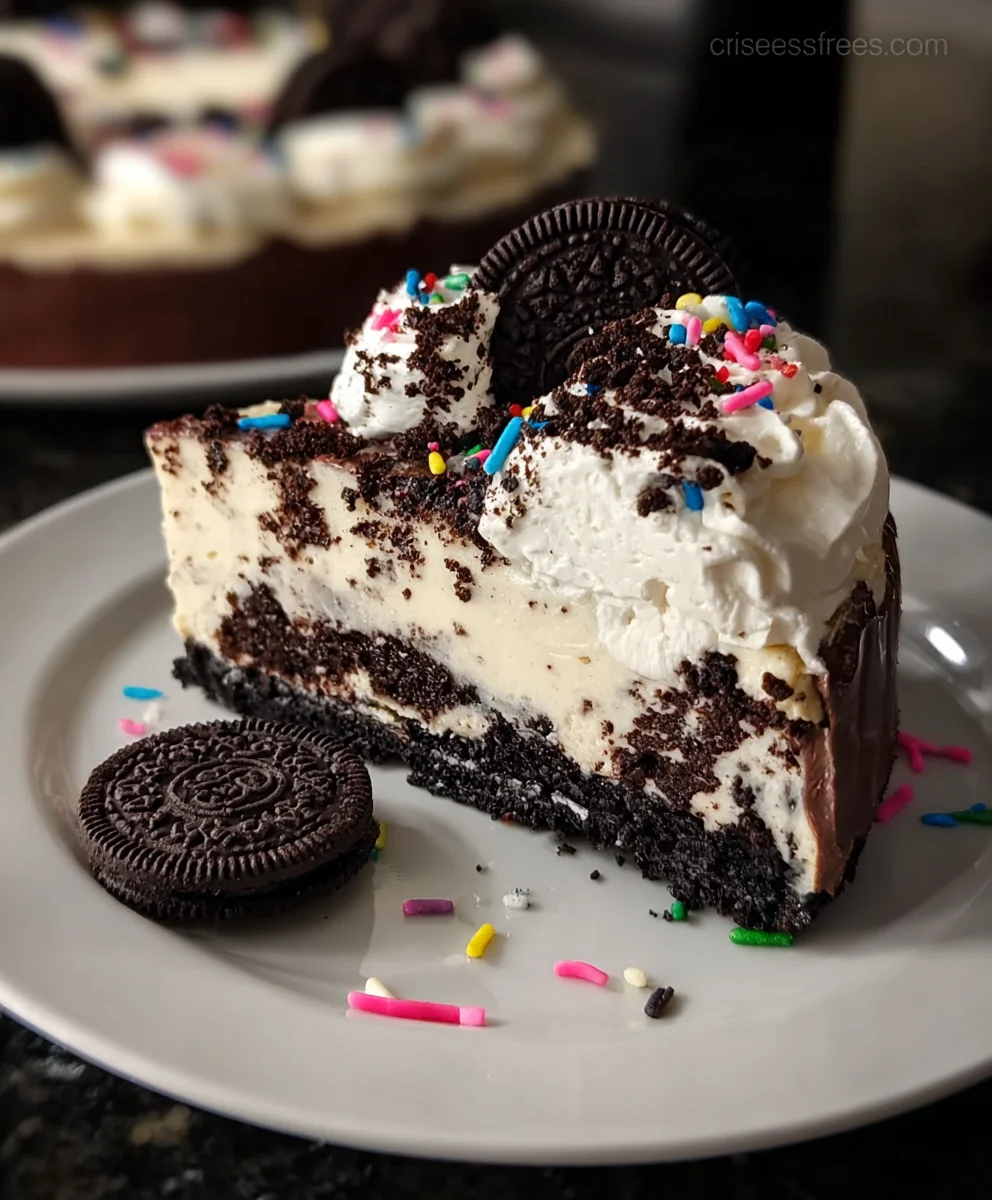
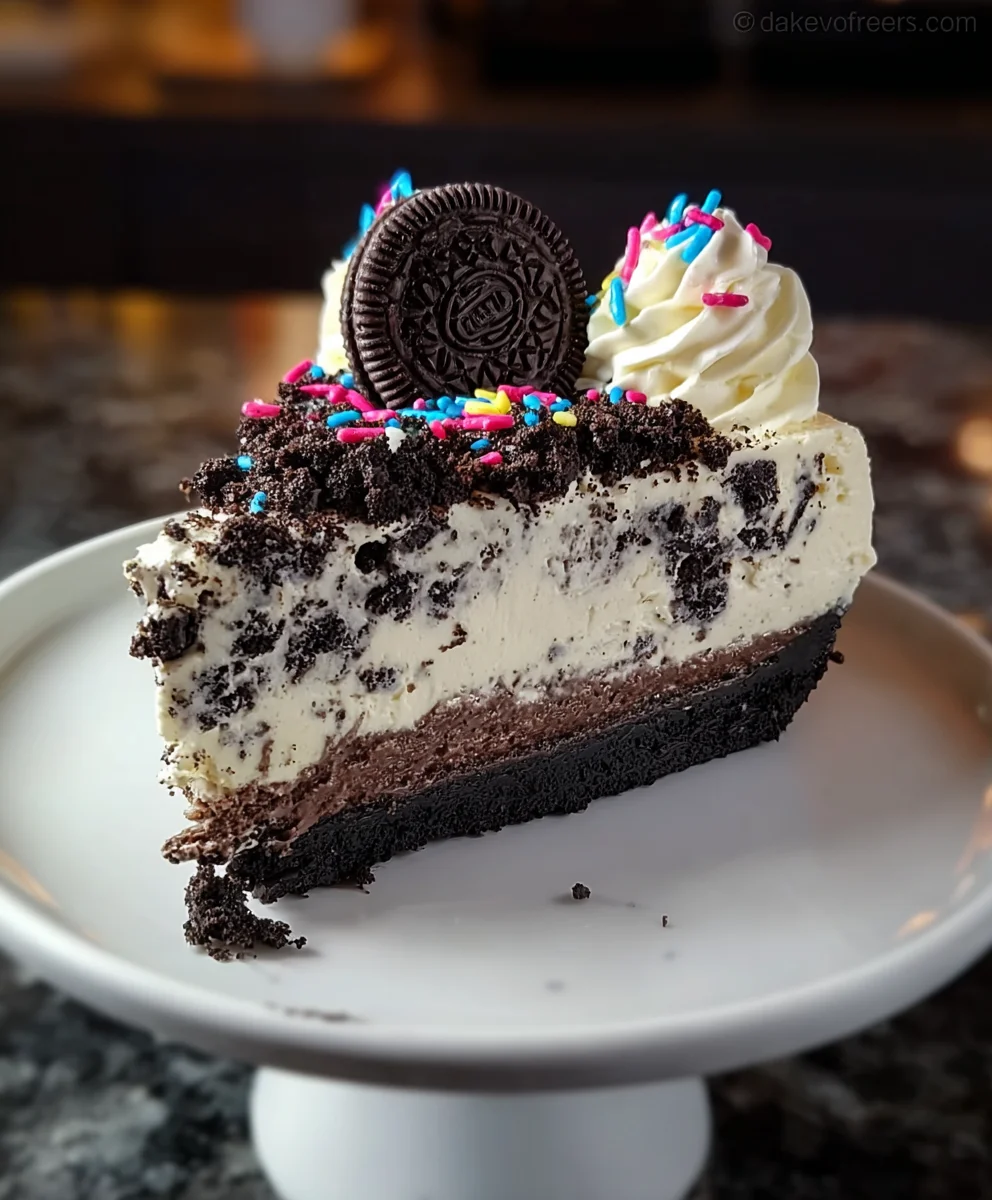
Once your No-Bake Oreo Cheesecake is firm and ready to serve, it’s time for the fun part – decorating! Remove the cheesecake from the refrigerator. You can garnish it with swirls of whipped cream around the edge. Sprinkle the reserved chopped Oreo cookies and the extra rainbow sprinkles over the top for a pop of color and texture. For an extra touch, place a few whole Oreo cookies around the perimeter. This No-Bake Oreo Cheesecake is a showstopper and is perfect for any occasion, from birthdays to casual gatherings. Enjoy every delicious, no-bake bite!
Conclusion:
And there you have it – the most incredibly easy and decadent No-Bake Oreo Cheesecake! We’ve walked through each simple step, from crushing those iconic cookies for the crust to whipping up that impossibly creamy filling. This recipe truly proves that you don’t need an oven to create a show-stopping dessert. The rich chocolatey base perfectly complements the tangy, sweet cheesecake layer, and the crushed Oreos on top add that irresistible crunch and visual appeal.
This No-Bake Oreo Cheesecake is incredibly versatile. Serve it chilled as a delightful dessert after any meal, or cut it into smaller squares for an impressive addition to a dessert buffet. It also makes for a fantastic treat to share with friends and family. For variations, consider folding in some mini chocolate chips into the filling, or topping it with a swirl of whipped cream and extra Oreo crum extractbles. You could even add a hint of peppermint extract to the filling for a festive twist! Don’t be afraid to experiment and make this recipe your own. I encourage you to give this No-Bake Oreo Cheesecake a try; you’ll be amazed at how simple it is to achieve such incredible results. Enjoy every delicious bite!
Frequently Asked Questions:
Q: Can I make the No-Bake Oreo Cheesecake ahead of time?
Absolutely! The No-Bake Oreo Cheesecake is perfect for making ahead. In fact, it needs to chill for at least 4-6 hours, or preferably overnight, to allow the flavors to meld and the cheesecake to set properly. This makes it an ideal dessert for entertaining as you can prepare it the day before your event.
Q: What if I don’t have a food processor for the crust?
No problem at all! If you don’t have a food processor, you can crush your Oreos using a rolling pin and a sturdy zip-top bag. Place the Oreos in the bag, seal it well, and then gently roll over them with a rolling pin until you achievrum extractine crumbs. It might take a little more effort, but the result will be the same!
Q: How long does the No-Bake Oreo Cheesecake last in the refrigerator?
The No-Bake Oreo Cheesecake will stay fresh and delicious in the refrigerator for up to 3-4 days when stored properly in an airtight container or covered tightly with plastic wrap. However, it’s so good, it’s unlikely to last that long!
Easy No-Bake Oreo Cheesecake Recipe
A simple and delicious no-bake cheesecake featuring a classic Oreo crust and creamy filling, loaded with Oreo cookie pieces and rainbow sprinkles.
Ingredients
-
24 Oreo cookies, crushed into fine crumbs
-
5 tablespoons unsalted butter, melted
-
16 ounces cream cheese, softened
-
1 cup powdered sugar
-
1 teaspoon vanilla extract
-
2 cups heavy cream, cold
-
12-15 Oreo cookies, chopped
-
1/4 cup rainbow sprinkles, plus extra for topping
-
Whipped cream, for topping
-
Whole Oreo cookies, for garnish
-
Extra rainbow sprinkles, for garnish
Instructions
-
Step 1
Crush 24 Oreo cookies into fine crumbs. In a medium bowl, combine crumbs with 5 tablespoons melted unsalted butter. Stir until thoroughly moistened, resembling wet sand. Press mixture firmly and evenly across the bottom and up the sides of a 9-inch pie plate or springform pan. -
Step 2
Place the prepared crust in the freezer for at least 10-15 minutes to chill and set. -
Step 3
In a large mixing bowl, beat 16 ounces of softened cream cheese until completely smooth. Gradually add 1 cup of powdered sugar and 1 teaspoon of vanilla extract. Beat until light, fluffy, and well combined, scraping down the sides of the bowl as needed. -
Step 4
In a separate bowl, whip 2 cups of cold heavy cream until stiff peaks form. Gently fold about one-third of the whipped cream into the cream cheese mixture to lighten it, then gently fold in the remaining whipped cream until just combined. Avoid overmixing to maintain airiness. -
Step 5
Gently fold in the 1/4 cup of rainbow sprinkles and 12-15 chopped Oreo cookies into the cheesecake filling. Reserve a few chopped Oreos for topping if desired. -
Step 6
Retrieve the chilled crust from the freezer. Spoon the cheesecake filling into the crust, spreading evenly with a spatula. Cover loosely with plastic wrap and refrigerate for at least 6-8 hours, or preferably overnight, until completely set. -
Step 7
Once set, decorate the cheesecake with swirls of whipped cream, the reserved chopped Oreo cookies, and extra rainbow sprinkles. Garnish with whole Oreo cookies around the perimeter if desired. Slice and serve.
Important Information
Nutrition Facts (Per Serving)
It is important to consider this information as approximate and not to use it as definitive health advice.
Allergy Information
Please check ingredients for potential allergens and consult a health professional if in doubt.

Leave a Comment