

Peaches and Cream Pie is a timeless dessert that evokes pure summer bliss. There’s something undeniably magical about the combination of sweet, juicy peaches cradled in a luscious, velvety cream filling, all nestled within a buttery, flaky crust. It’s a dish that transports us back to carefree days, backyard barbecues, and the unparalleled joy of biting into the freshest fruit. What makes this Peaches and Cream Pie so special? It’s the perfect harmony of textures and flavors: the tender, sun-ripened peaches burst with natural sweetness, beautifully complemented by the cool, rich cream. It’s a simple yet elegant creation that consistently delights, making it a beloved centerpiece for any occasion or a comforting treat just for you.

Ingredients:
A Taste of Summer: My Go-To Peaches and Cream Pie
There’s something truly magical about peaches and cream, isn’t there? It’s a classic combination that just screams summer, sunshine, and pure comfort. This Peaches and Cream Pie recipe captures that essence perfectly, layering tender, sweet peaches with a luscious, creamy filling, all nestled in a simple yet delightful crust. It’s not overly complicated, but the result is a pie that feels special enough for any occasion. I love making this when peach season is in full swing, but honestly, the convenience of canned peaches makes it a delightful treat any time of year. The combination of the slightly sweet, tender fruit with the smooth, rich cream cheese mixture is simply divine. Let’s get started and create this slice of sunshine!
Crafting the Base: The Crust Layer
The foundation of our pie is a simple, no-fuss crust that comes together quickly. We’re not aiming for a fussy, flaky pie crust here; rather, something that provides a sturdy and slightly cake-like base to hold all our delicious layers. It’s almost like a soft cookie dough, which I find pairs wonderfully with the fruit and cream.
1. In a medium bowl, whisk together the 3/4 cup all-purpose flour, 1/2 teaspoon salt, and 1 teaspoon baking powder. This ensures that the leavening agents and salt are evenly distributed throughout the dry ingredients, which will help our base rise nicely and prevent any pockets of saltiness.
2. Add the 1 (3 ounce) package of non-instant (cook and serve) vanilla pudding mix to the dry ingredients. It’s crucial to use the non-instant kind; the instant pudding would lead to a gummy texture, which is not what we’re going for. The pudding mix adds a lovely vanilla flavor and a touch of sweetness to the base.
3. Now, cut in the 3 tablespoons of softened butter using a pastry blender, a fork, or even your fingertips until the mixture resembles coarse crum extractbs. Make sure your butter is truly softened, not melted. Softened butter will incorporate more easily and create those desirable crum extractbly bits.
4. In a small separate bowl, lightly beat the 1 egg with the 1/2 cup milk. Pour this wet mixture into the dry ingredients.
5. Stir everything together until just combined. Be careful not to overmix. Overmixing can develop the gluten in the flour too much, resulting in a tougher base. A few small lumps are perfectly fine. The batter will be thick, almost like a very thick pancake batter.
6. Spread this batter evenly into the bottom of a 9-inch pie plate. You can use the back of a spoon or an offset spatula to gently coax it into place. This is your base, so make sure it covers the entire bottom surface.
The Star of the Show: Layering the Peaches
Now for the glorious fruit! This is where the sweetness and vibrant flavor of peaches come into play.
1. If you’re using canned sliced peaches, drain them thoroughly, but be sure to save that delicious juice! You’ll need a few tablespoons of it for the creamy layer later. Arrange the drained peach slices evenly over the batter in the pie plate. Try to create a relatively flat layer so the next filling will sit nicely.
2. If you’re opting for fresh peaches, you’ll want about 3 medium-sized peaches. Peel them (a quick blanch in boiling water makes this super easy!), remove the pits, and slice them. Aim for slices that are roughly the same thickness as the canned ones. You should have about 2 1/4 cups cubed or 3 cups sliced for every can. Arrange these fresh peach slices over the batter in a similar fashion.
The Velvety Dream: The Cream Cheese Filling
This layer is pure indulgence. The cream cheese provides a delightful tang that balances the sweetness of the peaches and pudding, creating a truly harmonious bite.
1. In a medium bowl, beat the 8-ounce package of softened cream cheese with the 1/2 cup granulated sugar until smooth and creamy. Using softened cream cheese is essential here; cold cream cheese will result in a lumpy filling. A stand mixer with a paddle attachment or a hand mixer works best for achieving a super smooth consistency, but a good whisk and some elbow grease will also do the trick.
2. Gradually add the 3 tablespoons of reserved peach juice to the cream cheese mixture, beating until well combined and smooth. This juice adds a subtle peach essence and thins the mixture just enough to create a luscious, pourable filling. If you used fresh peaches and didn’t have much juice, you can substitute with a tablespoon or two of milk or water, though the peach juice is preferred for flavor.
3. Gently pour and spread this creamy mixture evenly over the layer of peaches in the pie plate. Make sure to cover the peaches completely.
Baking to Perfection
Now it’s time to bake our masterpiece and let those flavors meld together.
1. Preheat your oven to 350 degrees Fahrenheit (175 degrees Celsius).
2. Bake for 35 to 45 minutes, or until the crust is golden brown and the filling is set. You should see the edges of the filling bubbling slightly. If the crust starts to brown too quickly before the filling is set, you can loosely tent the pie with aluminum foil.
3. Once baked, remove the pie from the oven and let it cool completely on a wire rack. This cooling step is crucial. The pie needs time to set up properly. If you try to slice it while it’s still warm, the filling might be too soft and ooze out. I usually let it cool for at least 2-3 hours, or even better, refrigerate it for an hour or two after it has cooled to room temperature. This ensures clean slices and a firm, creamy texture.
This Peaches and Cream Pie is a true delight. Serve chilled or at room temperature. A dollop of whipped cream or a scoop of vanilla ice cream is never a bad idea with this! Enjoy every sweet, creamy, peachy bite!

Conclusion:
So there you have it – our delightful Peaches and Cream Pie recipe! We truly believe this pie is a winner because it perfectly balances the sweet, juicy flavor of fresh peaches with the rich, velvety texture of a classic cream filling. It’s surprisingly straightforward to make, making it accessible for bakers of all levels. The fragrant aroma that fills your kitchen as it bakes is simply irresistible, and the first bite is pure bliss. This Peaches and Cream Pie is ideal for summer gatherings, potlucks, or just as a special treat to brighten any day. Serve it slightly chilled, perhaps with a dollop of whipped cream or a scoop of vanilla bean ice cream for an extra decadent experience. Don’t be afraid to experiment with variations! Consider adding a pinch of cinnamon or nutmeg to the peach filling for a touch of warmth, or even a hint of almond extract for a different flavor profile. You could also try a crum extractble topping instead of a traditional lattice for added texture. We wholeheartedly encourage you to give this recipe a try; we’re confident you’ll fall in love with its simple elegance and incredible taste.
Frequently Asked Questions:
Can I use frozen peaches instead of fresh ones for this Peaches and Cream Pie?
Yes, absolutely! If fresh peaches aren’t in season, frozen peaches are a great substitute. Make sure to thaw them completely and drain off any excess liquid before incorporating them into the filling. You might need to adjust the sugar slightly depending on the sweetness of your frozen peaches.
What’s the best way to store leftover pie?
Store any leftover Peaches and Cream Pie in an airtight container in the refrigerator. It will stay fresh for about 3-4 days. For the best texture, allow it to come to room temperature for a little before serving, or gently reheat a slice in a low oven.
Is it possible to make this pie ahead of time?
You can certainly prepare some components ahead of time. The peach filling can be made a day in advance and stored in the refrigerator. The pie crust can also be made and chilled. However, for the best results, it’s recommended to assemble and bake the pie closer to serving time to ensure the crust is perfectly flaky and the filling is set.
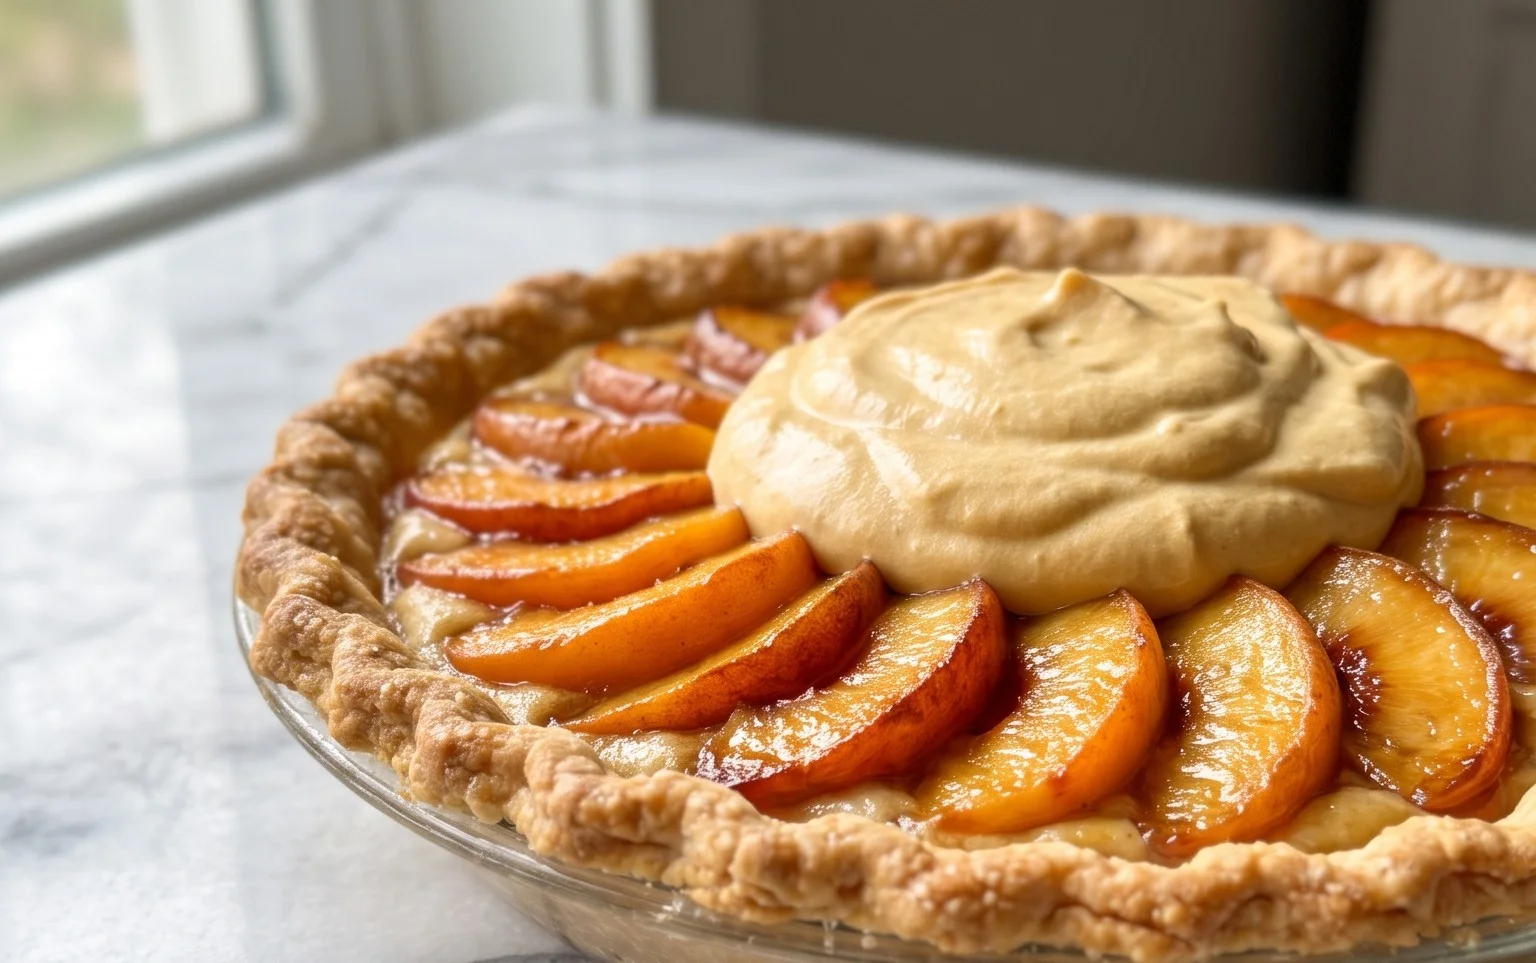
Peaches and Cream Pie
A delightful layered pie featuring a buttery crust, sweet peaches, and a creamy cream cheese filling.
Ingredients
-
3/4 cup all purpose flour
-
1/2 teaspoon salt
-
1 teaspoon baking powder
-
1 (3 ounce) package non-instant vanilla pudding mix
-
3 Tablespoons butter, softened
-
1 egg
-
1/2 cup milk
-
1 (28 ounce) can sliced peaches, drained
-
1 (8 ounce) package cream cheese, softened
-
1/2 cup granulated sugar
-
3 Tablespoons reserved peach juice
Instructions
-
Step 1
Preheat oven to 350 degrees F (175 degrees C). In a medium bowl, whisk together flour, salt, and baking powder. Stir in the vanilla pudding mix. -
Step 2
Cut in the softened butter until the mixture resembles coarse crumbs. In a separate small bowl, whisk together the egg and milk. Add the wet ingredients to the dry ingredients and mix until just combined to form a batter. -
Step 3
Pour the batter into a greased 9-inch pie plate, spreading it evenly. Arrange the drained sliced peaches over the batter. -
Step 4
In another medium bowl, beat the softened cream cheese and granulated sugar until smooth. Beat in the reserved peach juice until well combined. -
Step 5
Spread the cream cheese mixture evenly over the peaches. Bake for 35-45 minutes, or until the crust is golden brown and the filling is set. -
Step 6
Let the pie cool completely before serving.
Important Information
Nutrition Facts (Per Serving)
It is important to consider this information as approximate and not to use it as definitive health advice.
Allergy Information
Please check ingredients for potential allergens and consult a health professional if in doubt.



Leave a Comment