

Scones Recipe: The quintessential accompaniment to a steaming cup of tea or coffee, the humble scone holds a special place in our hearts. There’s a comforting familiarity to its buttery crum extractb and delightful rise, a promise of simple pleasures in every bite. What is it about these golden-domed delights that makes us crave them so? It’s the perfect balance – a delicate crisp exterior giving way to a soft, tender interior, just beggin extractg to be slathered with clotted cream and your favorite jam. This scones recipe is designed to bring that bakery-quality magic right into your own kitchen, no matter your baking experience. We’ll explore the simple secrets that make this scones recipe truly shine, transforming basic ingredients into an irresistible treat that will undoubtedly become a go-to for brunches, afternoon teas, and anytime you need a little edible hug.

Scones Recipe
There’s something undeniably comforting about a warm, flaky scone, fresh from the oven. They’re the perfect accompaniment to a cup of tea, a hearty breakfast, or a delightful afternoon treat. While some might find them intimidating, I’m here to tell you that making perfect scones at home is surprisingly simple, and incredibly rewarding. This recipe focuses on a classic, buttery base that’s wonderfully versatile. You can enjoy them plain, or get creative with your favorite mix-ins. Let’s get started!
Ingredients:
The Art of the Scone: Getting Started
Before we dive into the mixing, it’s crucial to have your ingredients prepped. The butter needs to be very cold, so if you haven’t already, cut it into small cubes and pop it back in the refrigerator. Similarly, your heavy cream should be chilled. Cold ingredients are the secret to creating those delicate layers and a light, crum extractbly texture in your scones. Think of it like puff pastry – the cold butter creates pockets of steam as it bakes, which makes the dough puff up and separate into flaky layers.
Step 1: Bringin extractg Together the Dry Ingredients
In a large mixing bowl, whisk together the all-purpose flour, granulated sugar, baking powder, and salt. This ensures that all the leavening agents and seasonings are evenly distributed throughout the dough. You want to give them a good mix to ensure there are no pockets of just flour or just baking powder, which could lead to uneven rising or a salty bite in one area.
Step 2: Cutting in the Cold Butter
Now comes the part where we introduce our cold butter. Add the chilled, cubed butter to the dry ingredients. Using a pastry blender, two forks, or your fingertips, work the butter into the flour mixture until it resembles coarse crum extractbs, with some pea-sized pieces of butter still visible. This is another critical step for achieving a tender scone. We’re not aiming for a smooth paste; those little bits of butter are what will melt and create flakiness during baking. If you’re using your fingertips, work quickly to avoid warming the butter too much. You can even toss the butter cubes in a little flour before adding them to the bowl to help keep them separate.
Step 3: The Wet Ingredients and Gentle Mixing
In a separate small bowl, whisk together the ½ cup plus 1 tablespoon of chilled heavy cream and the lightly beaten large egg. Make a well in the center of your flour and butter mixture and pour in the wet ingredients. Now, using a fork or a spatula, gently stir everything together until just combined. Be careful not to overmix! Overmixing develops the gluten in the flour, which can result in tough scones. We want a shaggy, slightly sticky dough.
Step 4: Incorporating Your Delicious Mix-ins
If you’re using any mix-ins like blueberries, chocolate chips, or cranberries, this is the time to gently fold them into the dough. Again, be very gentle. You don’t want to crush your berries or overwork the dough. Just lightly incorporate them until they’re evenly distributed.
Step 5: Shaping and Cutting the Scones
Turn the dough out onto a lightly floured surface. Gently pat or press the dough into a circle or rectangle about ¾ to 1 inch thick. You don’t need to knead it extensively; a few gentle pats are all that’s needed to bring it together. Then, using a sharp knife or a bench scraper, cut the dough into wedges or squares. For round scones, you can also use a biscuit cutter, but be sure to press straight down without twisting, as twisting can seal the edges and prevent them from rising evenly.
Step 6: Baking to Golden Perfection
Preheat your oven to 400°F (200°C). Line a baking sheet with parchment paper. Carefully arrange the shaped scones on the prepared baking sheet, leaving a little space between them. For an extra golden-brown and slightly crisp crust, brush the tops of the scones with a little extra heavy cream. Bake for 15-20 minutes, or until the scones are puffed up, golden brown, and a wooden skewer inserted into the center comes out clean.
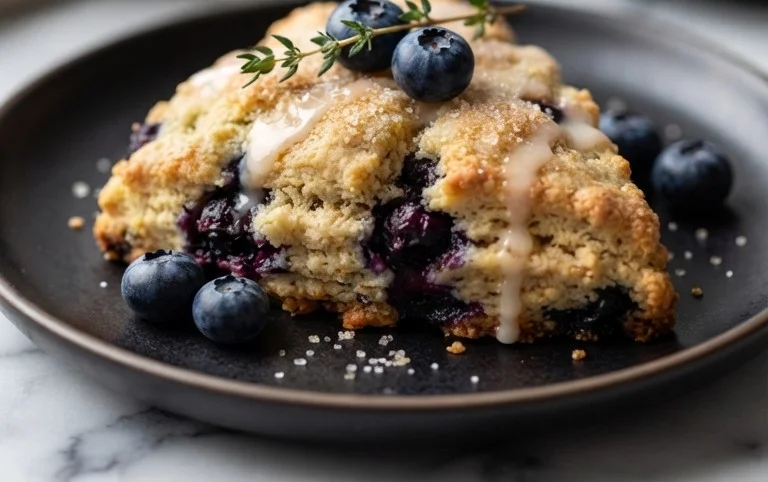
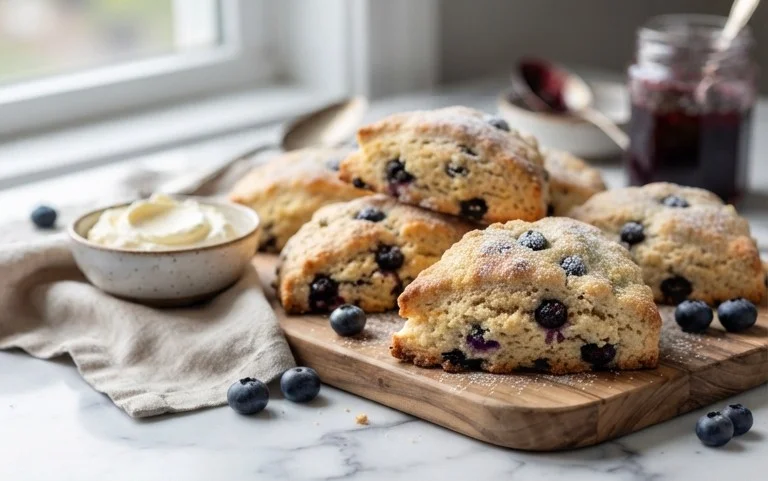
Serve your homemade scones warm, with your favorite jam, clotted cream, or just a dollop of butter. Enjoy the fruits of your labor – a batch of perfectly tender, flaky, and delicious scones!
Conclusion:
And there you have it – a wonderfully simple and incredibly rewarding scones recipe that’s perfect for any occasion. The beauty of these scones lies in their versatility and the sheer delight of creating something so comforting and delicious from scratch. They boast a tender crum extractb and a slightly crisp exterior, making them an ideal canvas for your favorite toppings. I genuinely encourage you to give this recipe a try; you might just discover your new go-to baked treat. Serve them warm with a dollop of clotted cream and your favorite jam for a truly classic experience, or explore variations like adding fresh berries, a hint of lemon zest, or even savory herbs for a delightful twist.
Frequently Asked Questions:
What is the best way to store leftover scones?
For the best texture, it’s ideal to enjoy scones the same day they are baked. However, if you have leftovers, cool them completely and store them in an airtight container at room temperature for up to two days. Reheat gently in a low oven for a few minutes to refresh their crispness.
Can I make the scone dough ahead of time?
Yes, you can prepare the scone dough and refrigerate it for up to 24 hours. Shape the scones, place them on a baking sheet lined with parchment paper, cover them loosely with plastic wrap, and refrigerate. When you’re ready to bake, they may need an extra minute or two in the oven.
My scones turned out tough. What did I do wrong?
Tough scones are usually a result of overmixing the dough or handling it too much. Once you add the liquid, mix just until the ingredients are combined and the dough comes together. Overworking the gluten in the flour will lead to a tough texture. Also, ensure your baking powder is fresh!
Classic Scones Recipe
A simple and versatile recipe for classic scones, perfect for breakfast or afternoon tea. Customize with your favorite mix-ins.
Ingredients
-
6 tablespoons unsalted butter
-
2 cups all-purpose flour
-
⅓ cup granulated sugar
-
1 tablespoon baking powder
-
½ teaspoon salt
-
½ cup plus 1 tablespoon heavy cream
-
1 large egg
-
up to 1 cup total mix-ins, as desired
Instructions
-
Step 1
Preheat oven to 400°F (200°C). Line a baking sheet with parchment paper. -
Step 2
In a large bowl, whisk together the flour, sugar, baking powder, and salt. -
Step 3
Cut in the cold butter using a pastry blender or your fingertips until the mixture resembles coarse crumbs. -
Step 4
In a small bowl, whisk together the heavy cream and the lightly beaten egg. Pour this into the dry ingredients and mix until just combined. Do not overmix. -
Step 5
Gently fold in your desired mix-ins. -
Step 6
Turn the dough out onto a lightly floured surface and pat it into a disc about ¾ inch thick. Cut into 8 wedges. -
Step 7
Place the scones on the prepared baking sheet. Brush the tops with a little extra heavy cream. -
Step 8
Bake for 18-20 minutes, or until golden brown and cooked through.
Important Information
Nutrition Facts (Per Serving)
It is important to consider this information as approximate and not to use it as definitive health advice.
Allergy Information
Please check ingredients for potential allergens and consult a health professional if in doubt.

Leave a Comment