
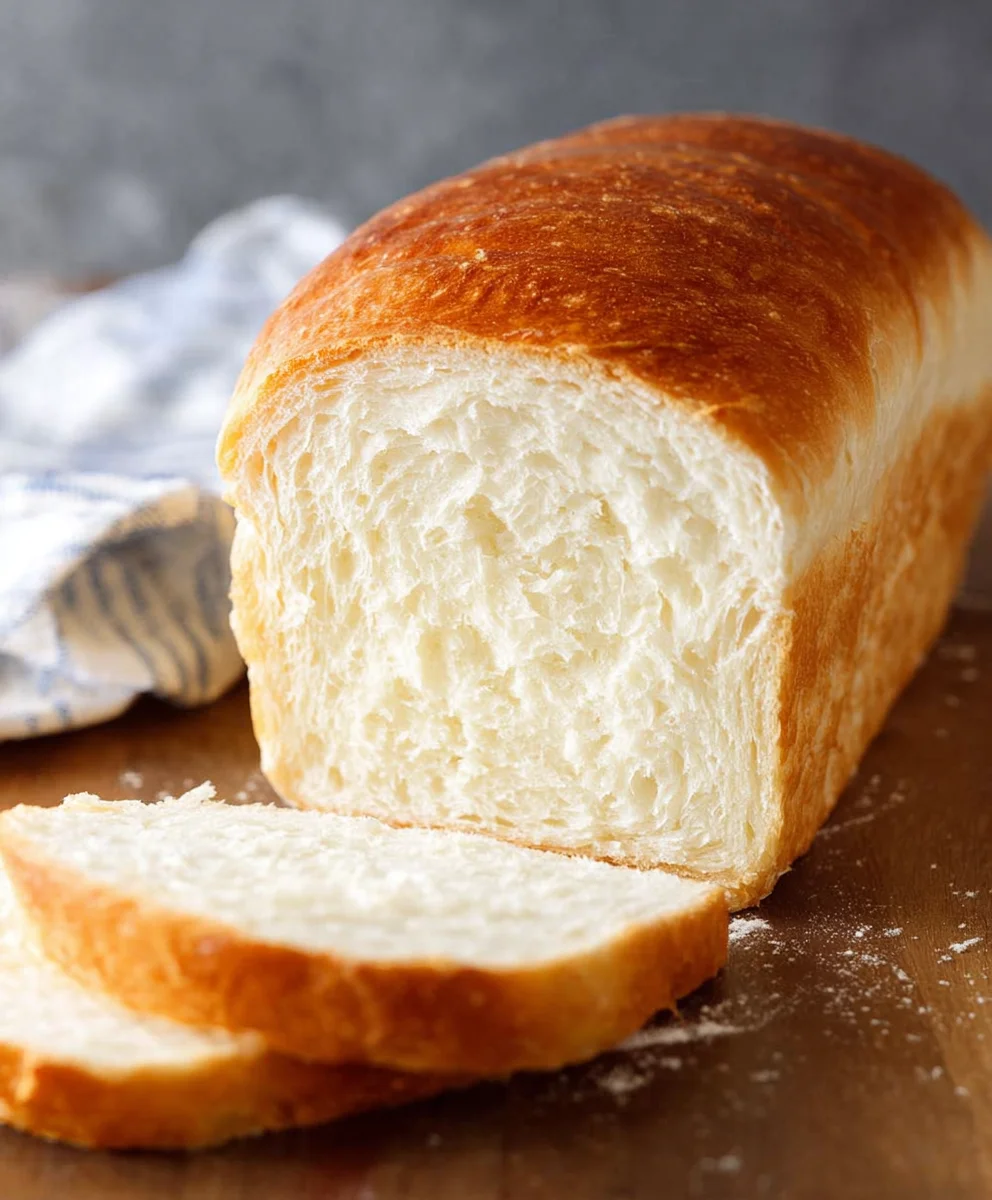
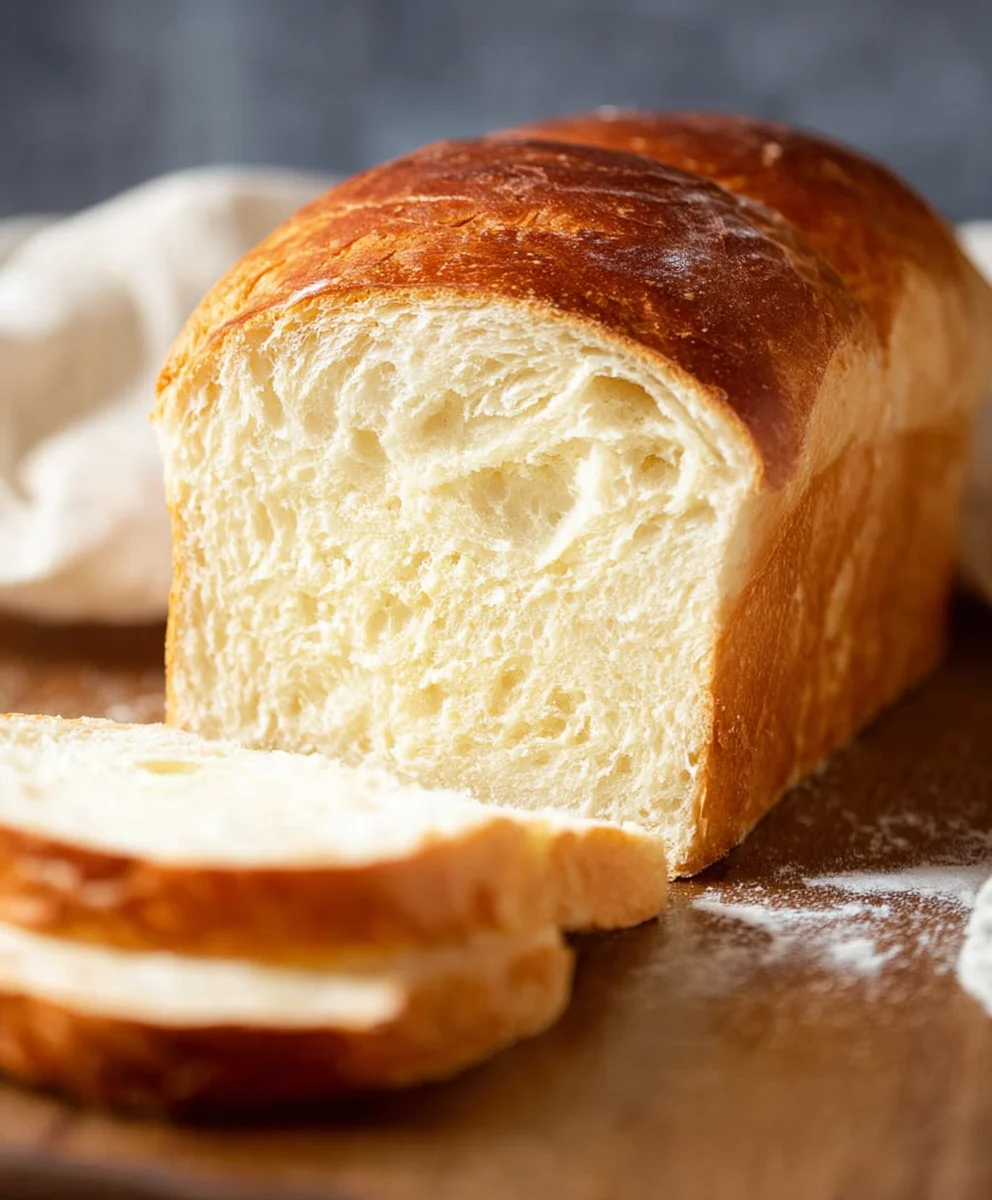
White Bread, that quintessential comfort food, is more than just a pantry staple; it’s a vessel for memories and a canvas for culinary creativity. There’s an undeniable charm to its soft, yielding texture and its mild, slightly sweet flavor that appeals to virtually everyone. It’s the foundation of countless childhood lunches, the perfect partner to a steaming bowl of soup, and the secret ingredient that elevates a simple grilled cheese to an art form. What truly makes homemade white bread so special is the sheer satisfaction of creating something so universally loved from scratch. The aroma that fills your kitchen as it bakes is non-intoxicating, promising pure, unadulterated deliciousness. This recipe aims to capture that nostalgic essence, delivering a loaf that is light, airy, and irresistibly tender, proving that sometimes, the simplest things are indeed the most profound.

Ingredients:
- 1 ⅔ cups lukewarm water, divided
- 2 ¼ teaspoon instant yeast (or active dry yeast)
- 1 teaspoon sugar
- 1 tablespoon honey (or more sugar)
- 1 teaspoon salt
- 1 ½ tablespoons unsalted butter, cubed at room temperature
- 4 ½ cups all-purpose flour, divided
- 1 ½ tablespoons butter, melted for brushing
Preparing the Dough
Activating the Yeast
To begin extract our journey to the perfect loaf of white bread, let’s get our yeast ready. Take out a small bowl and pour in ½ cup of the lukewarm water. It’s crucial that the water is lukewarm, not hot, as very hot water can kill the yeast, and too cold won’t activate it effectively. Think of it like a comfortable bath for your yeast. Sprinkle the 2 ¼ teaspoon of instant yeast over the water. If you are using active dry yeast, you’ll need to let it sit for about 5-10 minutes until it becomes foamy. This bubbling indicates that your yeast is alive and ready to work its magic. To give the yeast a little boost and a food source, stir in the 1 teaspoon of sugar and the 1 tablespoon of honey. Give it a gentle stir and let it rest. You should start to see a frothy layer form on the surface within a few minutes if your yeast is active.
Combining Wet and Dry Ingredients
While the yeast is blooming, let’s prepare the rest of our ingredients. In a large mixing bowl, or the bowl of your stand mixer, combine 4 cups of the all-purpose flour with the 1 teaspoon of salt. Whisk these together briefly to ensure the salt is evenly distributed throughout the flour. This is important for consistent flavor in your bread. Now, once your yeast mixture is foamy and active, pour it into the bowl with the flour and salt. Add the remaining 1 ⅓ cups of lukewarm water. At this stage, we also want to incorporate the 1 ½ tablespoons of unsalted butter, cubed and at room temperature. The room temperature butter will incorporate more easily into the dough, contributing to a softer crum extractb and a richer flavor.
Kneading and First Rise
Initial Mixing and Kneading
Now it’s time to bring everything together. If you’re using a stand mixer, attach the dough hook and mix on low speed until the ingredients just start to combine. Then, increase the speed to medium and let it knead for about 6-8 minutes. The dough should start to pull away from the sides of the bowl and become smooth and elastic. If you’re kneading by hand, mix everything with a sturdy spoon or spatula until a shaggy dough forms. Then, turn the dough out onto a lightly floured surfacgin extractnd begin kneading. Push the dough away from you with the heel of your hand, then fold it back towards you. Rotate the dough a quarter turn and repeat. Continue this process for about 10-12 minutes. You’re looking for a dough that is smooth, soft, and no longer sticky. You can test for proper gluten development by performing the “windowpane test”: take a small piece of dough and gently stretch it; if you can stretch it thin enough to see light through it without tearing, it’s ready. If the dough is still too sticky, add a tablespoon of flour at a time, kneading it in thoroughly before adding more.
First Proofing (The Rise)
Once your dough is beautifully kneaded and smooth, it’s time for its first rest and rise. Lightly grease your large mixing bowl with a little oil or cooking spray. Place the kneaded dough into the bowl, turning it once to coat the entire surface with the oil. This prevents a dry skin from forming. Cover the bowl tightly with plastic wrap or a clean kitchen towel. Find a warm, draft-free spot in your kitchen for the dough to rise. This could be inside a slightly warmed (but turned off) oven, or just on your countertop if your kitchen is warm. Let the dough rise for about 1 to 1.5 hours, or until it has doubled in size. The exact time will depend on the warmth of your environment. This period allows the yeast to ferment, producing carbon dioxide gas that makes the bread light and airy.
Shaping and Baking
Deflating and Shaping the Loaf
After the first rise, gently punch down the dough to release the trapped gases. This process is called “degassing” and it helps to redistribute the yeast and sugars for a morrum extractven crumb. Turn the dough out onto a lightly floured surface. You’ll notice it’s now soft and puffy. For a classic loaf shape, gently flatten the dough into a rectangle, about 8×10 inches. Then, starting from the short end, tightly roll up the dough into a log. Pinch the seam closed along the bottom and tuck in the ends to create a neat loaf shape. You want to create tension in the dough as you roll it to help it hold its shape during the second rise and baking. This tension contributes to a well-formed loaf with a good crust.
Second Proofing and Baking Preparation
Prepare your loaf pan by greasing it well with butter or non-stick spray. Carefully place the shaped dough seam-side down into the prepared pan. Cover the loaf pan loosely with plastic wrap or a clean kitchen towel again. Let the dough rise for a second time in a warm place for about 45 minutes to 1 hour, or until it has nearly doubled in size and pokes up nicely over the rim of the pan. While the dough is on its second rise, preheat your oven to 375°F (190°C). This is a crucial step to ensure the bread bakes evenly from the moment it enters the oven. Once the dough has completed its second rise and your oven is preheated, it’s time to bake!
Baking the White Bread
Before placing the loaf into the oven, gently brush the top of the dough with the 1 ½ tablespoons of melted butter. This melted butter will give your white bread a beautiful golden-brown crust and add a lovely sheen. If you like, you can score the top of the loaf with a sharp knife or razor blade in a pattern of your choice; this allows the bread to expand more evenly in the oven. Carefully place the loaf pan into the preheated oven. Bake for 30-40 minutes, or until the crust is a deep golden brown and the internal temperature of the bread reaches 190-200°F (88-93°C) when tested with an instant-read thermometer. You can also tap the bottom of the loaf; if it sounds hollow, it’s likely done. Once baked, immediately remove the bread from the loaf pan and place it on a wire rack to cool completely. This is essential to prevent a soggy bottom.
Conclusion:
And there you have it – your guide to crafting the perfect loaf of White Bread! This recipe is a testament to the simple beauty of basic ingredients coming together to create something truly wonderful. The aroma that fills your home as this bread bakes is unparalleled, and the taste of a fresh, warm slice is pure comfort. I encourage you to give this recipe a try; you’ll be amazed at how achievable a delicious homemade loaf can be. Don’t be afraid to experiment with the serving suggestions – this versatile bread is a fantastic canvas for all sorts of culinary creations.
Serve your freshly baked White Bread warm with a generous spread of butter, or use it to build the ultimate sandwich. It’s also fantastic toasted and served alongside your favorite soup or stew. For variations, consider adding a sprinkle of herbs or a touch of garlic powder to the dough for an extra flavor dimension. You can also experiment with different flours in small quantities, like adding a tablespoon or two of whole wheat for a slightly nuttier profile, but remember this recipe is designed for pure, classic white bread.
FAQs for White Bread:
Q: How can I ensure my White Bread has a good crust?
To achieve a beautiful, golden crust on your White Bread, preheat your oven thoroughly. Using a baking stone or steel can also help by distributing heat evenly. Some bakers also find success by creating steam in the oven during the initial baking phase – you can do this by placing a shallow pan of water on the rack below your bread as it bakes.
Q: Can I freeze this White Bread?
Absolutely! Once your White Bread has cooled completely, you can slice it and freeze the slices individually or freeze the whole loaf. Wrap it tightly in plastic wrap and then in aluminum foil or place it in a freezer-safe bag. It will keep well in the freezer for up to 3 months. Thaw at room temperature or toast directly from frozen.
Easy Homemade White Bread Recipe-Soft & Fluffy
A simple and delicious recipe for soft and fluffy homemade white bread, perfect for beginners.
Ingredients
-
1 ⅔ cups lukewarm water, divided
-
2 ¼ teaspoon instant yeast
-
1 teaspoon sugar
-
1 tablespoon honey
-
1 teaspoon salt
-
1 ½ tablespoons unsalted butter, cubed at room temperature
-
4 ½ cups all-purpose flour, divided
-
1 ½ tablespoons butter, melted for brushing
Instructions
-
Step 1
In a small bowl, combine ½ cup lukewarm water, instant yeast, sugar, and honey. Let sit for 5-10 minutes until foamy. -
Step 2
In a large mixing bowl, whisk together 4 cups of flour and salt. Pour in the activated yeast mixture and the remaining 1 ⅓ cups lukewarm water. Add the cubed butter. -
Step 3
Mix ingredients until a shaggy dough forms. Knead by hand for 10-12 minutes or with a stand mixer for 6-8 minutes until smooth and elastic. -
Step 4
Place the kneaded dough in a lightly oiled bowl, cover, and let rise in a warm place for 1 to 1.5 hours, or until doubled in size. -
Step 5
Punch down the dough, flatten into a rectangle, and tightly roll into a log. Pinch the seam and tuck the ends. -
Step 6
Place the shaped dough seam-side down in a greased loaf pan. Cover and let rise for 45 minutes to 1 hour, until nearly doubled. -
Step 7
Preheat oven to 375°F (190°C). Brush the top of the loaf with melted butter. -
Step 8
Bake for 30-40 minutes, until golden brown and the internal temperature reaches 190-200°F (88-93°C). Cool completely on a wire rack.
Important Information
Nutrition Facts (Per Serving)
It is important to consider this information as approximate and not to use it as definitive health advice.
Allergy Information
Please check ingredients for potential allergens and consult a health professional if in doubt.


Leave a Comment