
Begin extractners Sourdough bread recipe: High starter method. Embarking on the journey of sourdough baking can seem daunting, but with the right guidance, it’s incredibly rewarding.gin extractis beginners sourdough bread recipe, specifically tailored for a high starter method, simplifies tgin extractprocess, bringing the magic of tangy, crusty, artisan bread right into your kitchen. Why do people fall in love with sourdough? It’s that incredible depth of flavor, the satisfyingly chewy interior, and the glorious, crackly crust that just can’t be replicated. What makes this particular high starter method special is its ability to create a beautifully open crum extractb and a robust rise, even for those new to the fold. We’re talking about a recipe designed to build confidence and deliver exceptional results from your very first loaf. Get ready to impress yourself and everyone around you with a truly spectacular homemade sourdough.

Ingredients:
- 2 cups Active Sourdough Starter (400 grams) – Make sure your starter is active and bubbly, meaning it has been fed recently and is showing signs of fermentation. A good starter is made from equal parts flour and water.
- 3 cups Sifted All-Purpose Flour (360 grams) – Sifting your flour ensures no lumps and creates a lighter texture in your final loaf.
- 1 cup Warm Water (240 grams) – The water should be comfortably warm to the touch, around 90-100°F (32-38°C). Too hot will kill the yeast, and too cold will slow down fermentation.
- 1.5 teaspoons Salt (≈9 grams) – This is crucial for flavor and also helps control the yeast activity and strengthen the gluten structure.
Mixing the Dough
Step 1: Combine Wet Ingredients and Starter
In a large mixing bowl, combine your active sourdough starter and the warm water. Gently whisk them together until the starter is mostly dispersed in the water. This initial step helps to loosen up the starter and make it easier to incorporate into the flour. You’ll notice some small clumps of starter, which is perfectly fine; they will break down as you mix the dough. Ensure your water is the right temperature – not too hot, not too cold – to encourage optimal yeast activity. If your starter is very stiff, you might need to spend an extra minute or two whisking to get a smoother consistency before adding the flour.
Step 2: Incorporate Flour and Salt
Add the sifted all-purpose flour and salt to the bowl with the starter and water mixture. Using your hands or a sturdy spatula, mix everything together until a shaggy dough forms. At this stage, you don’t need to knead; the goal is simply to bring all the ingredients together. It will look messy and uneven, with pockets of dry flour still visible. This is normal for an autolyse-like step, which allows the flour to begin extract hydrating before intense kneading. Make sure to scrape down the sides of the bowl to incorporate all the flour.
Step 3: Initial Rest and Autolyse
Once the dough has come together into a shaggy mass, cover the bowl with a damp kitchen towel or plastic wrap and let it rest for 30 minutes. This resting period is called autolyse. During this time, the flour absorbs the water, gluten develogin extractnt begins naturally, and the dough becomes more pliable and easier to handle. You’ll notice the dough will start to look smoother and more cohesive after this rest. Don’t skip this step; it’s a foundational part of developing a good sourdough texture.
Developing the Dough
Step 4: Stretch and Folds
After the 30-minute rest, it’s time to start developing the gluten structure through a series of “stretch and folds.” Wet your hands slightly to prevent sticking. Reach under one side of the dough, gently stretch it upwards, and fold it over to the opposite side. Rotate the bowl 90 degrees and repeat this process. Perform about 4-6 stretches and folds in total, covering all sides of the dough. After this first set of folds, cover the bowl again and let it rest for another 30 minutes. You will repeat this process of stretching and folding every 30 minutes for a total of 3-4 sets. With each set of folds, you’ll notice the dough becoming smoother, more elastic, and holding its shape better. It will become less sticky as the gluten network strengthens. The dough will start to feel alive and airy.
Step 5: Bulk Fermentation
Following the last set of stretch and folds, cover the bowl and let the dough undergo its bulk fermentation. This is the primary rising period where the sourdough starter works its magic, producing gas and flavor. The duration of bulk fermentation will vary depending on your room temperature and starter activity, but it typically takes 4-6 hours. During this time, the dough should increase in volume by about 50-75%. You’ll see it become visibly puffier and have a slightly domed surface. You can gently jiggle the bowl to observe the dough’s structure – it should have a jiggly, airy quality. If your kitchen is cooler, this process might take longer; if it’s warmer, it will be shorter. Resist the urge to peek too often, as this can disrupt the fermentation process. The key is to watch the dough, not the clock.
Shaping and Baking
Step 6: Shaping the Loaf
Once the dough has completed its bulk fermentation, gently turn it out onto a lightly floured surface. Be careful not to degas the dough too much. You want to preserve the air bubbles created during fermentation. Gently shape the dough into your desired loaf form – either a round boule or an oblong batard. To do this, gently flatten the dough into a rough rectangle. Then, fold the top third down to the center, and the bottom third up to the center, like a letter. Next, fold the sides in to create tension on the surface. Pinch the seams closed. Be gentle but firm in your shaping to create surface tension, which will help the bread hold its shape during baking and achieve a good oven spring.
Step 7: Proofing and Baking
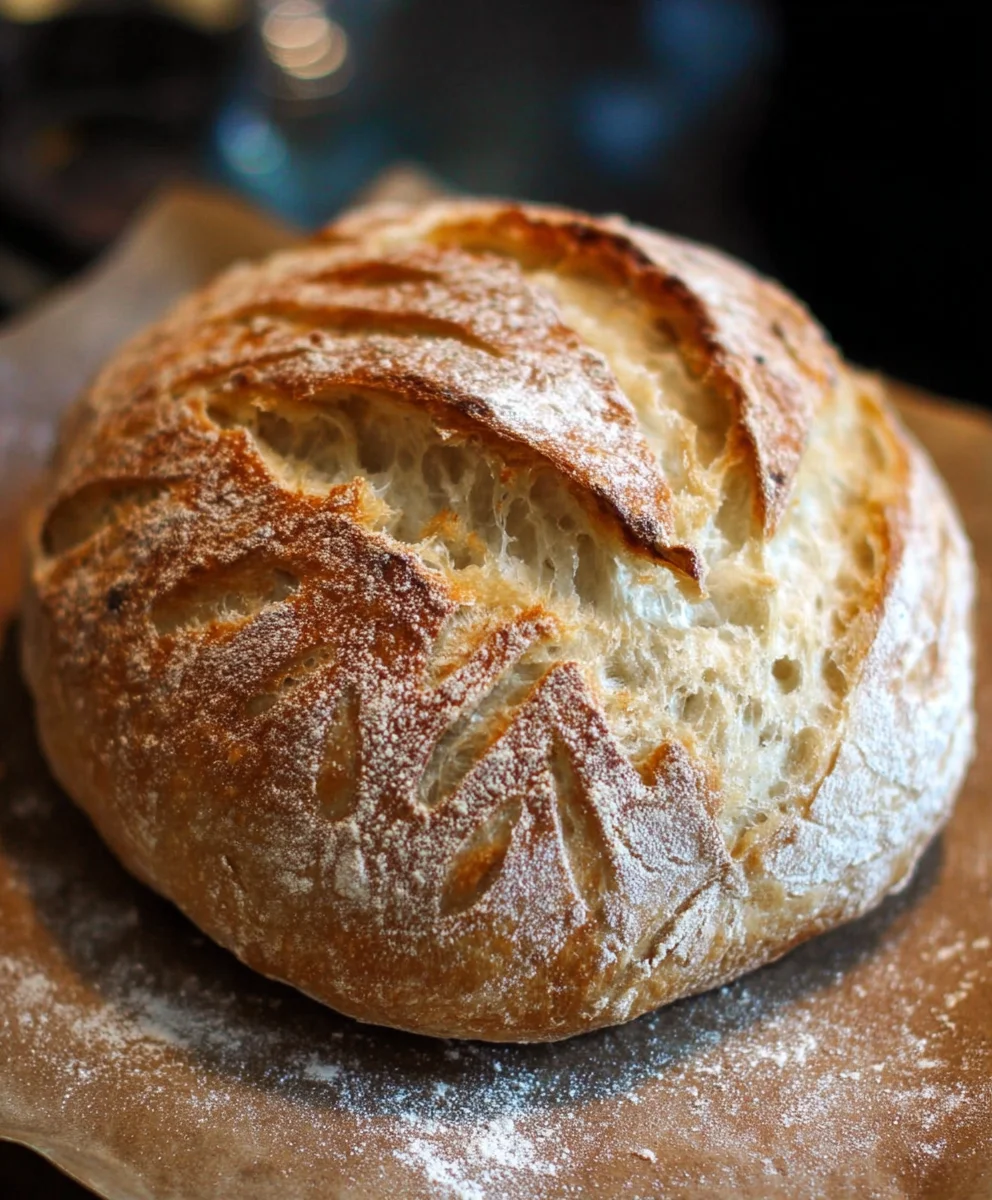
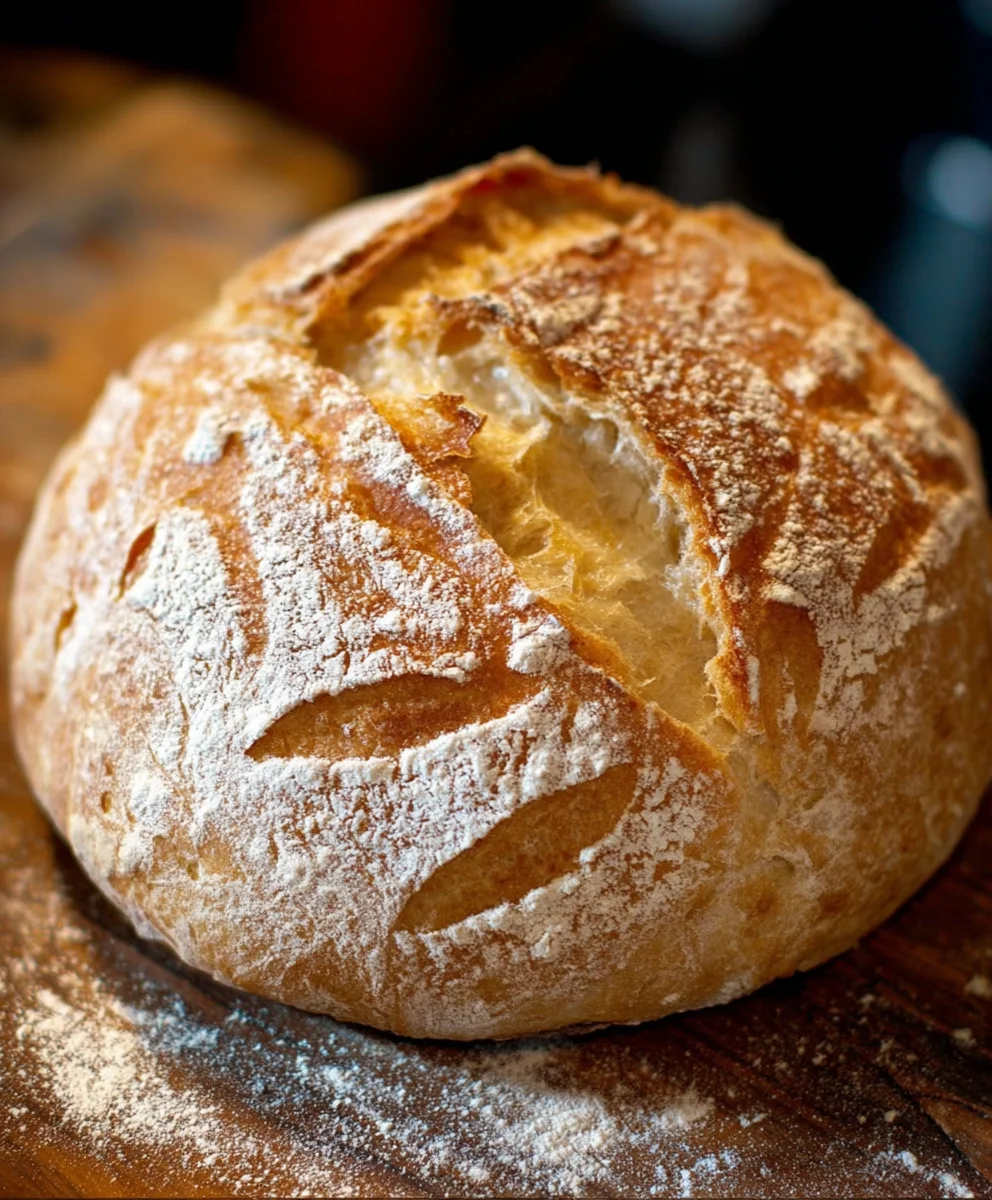
Carefully place the shaped dough into a well-floured proofing basket (banneton) or a bowl lined with a floured tea towel, seam-side up. Cover it loosely and let it proof. You can proof at room temperature for 1-2 hours, or for a slower, more flavorful rise, place it in the refrigerator overnight (8-12 hours). Preheat your oven with a Dutch oven inside to 475°F (245°C) for at least 30 minutes. Once proofed, carefully invert the dough onto a piece of parchment paper, score the top with a sharp razor or lame to allow for expansion, and then carefully lower it into the preheated Dutch oven. Cover with the lid and bake for 20 minutes. Then, remove the lid and bake for another 20-25 minutes, or until the crust is a deep golden brown and the internal temperature reaches around 205-210°F (96-99°C).
Conclusion:
Congratulations on embarking on your baking journey with the Begin extractners Sourdough bread recipe: High starter method! You’ve now got the knowledge and steps to create a truly magnificent loaf. We’ve covered the importance of a healthy, active starter, the gentle folding techniques, and the satisfying process of achieving that perfect crust and airy crum extractb. Remember, sourdough baking is a journey, and each bake is an opportunity to learn and refine your skills. Don’t be discouraged by imperfections; they are simply part of the learning curve. Embrace the process, enjoy the aroma filling your kitchen, and savor the delicious results.
For serving, this versatile loaf is fantastic on its own, simply sliced and enjoyed. It’s also wonderful toasted and buttered, used for sandwiches, or served alongside soups and stews. Don’t hesitate to experiment with variations! Add seeds like sesame or poppy to the dough for extra texture, or incorporate dried herbs and garlic for a savory twist. Some bakers even add a pinch of sugar or honey to the dough to subtly enhance sweetness.
We truly hope you find this
Frequently Asked Questions:
Q: My starter isn’t very bubbly. Can I still make this recipe?
A: While a very active starter is ideal fogin extracthe Beginners Sourdough bread recipe: High starter method, you can still proceed if it’s moderately active. Ensure your starter has been fed 4-12 hours prior and shows some signs of activity, like small bubbles. You might find the rise is a little less dramatic, but the bread will still be delicious. Just be patient and observant during the fermentation stages.
Q: What if my dough feels too sticky?
A: A slightly sticky dough is normal for sourdough, especially when using a high starter percentgin extract as in the Beginners Sourdough bread recipe: High starter method. Resist the urge to add too much extra flour, as this can make the bread dense. Instead, try slightly dampening your hands or your bench scraper when handling the dough. This will help prevent it from sticking too much during shaping.
Beginner Sourdough Bread – High Starter Method
A straightforward recipe for beginner sourdough bread using a high amount of active starter, resulting in a flavorful loaf.
Ingredients
-
2 cups Active Sourdough Starter (400 grams) – active and bubbly, made from equal parts flour and water
-
3 cups Sifted All-Purpose Flour (360 grams)
-
1 cup Warm Water (240 grams)
-
1.5 teaspoons Salt (≈9 grams)
-
Parchment paper
Instructions
-
Step 1
Combine 2 cups active sourdough starter and 1 cup warm water in a large bowl. Whisk gently until the starter is mostly dispersed. -
Step 2
Add 3 cups sifted all-purpose flour and 1.5 teaspoons salt to the bowl. Mix with hands or a spatula until a shaggy dough forms. Do not knead. -
Step 3
Cover the bowl and let the dough rest for 30 minutes (autolyse). This allows the flour to hydrate and gluten to begin developing. -
Step 4
Perform 3-4 sets of ‘stretch and folds’ every 30 minutes. Wet hands slightly, stretch one side of the dough up and fold it over, rotating the bowl and repeating 4-6 times per set. -
Step 5
After the last set of folds, cover the bowl and let the dough bulk ferment for 4-6 hours, or until it increases 50-75% in volume. The dough should appear puffy and jiggly. -
Step 6
Gently turn the dough onto a lightly floured surface and shape it into a boule or batard, being careful not to degas it too much. Pinch seams closed to create surface tension. -
Step 7
Place the shaped dough seam-side up in a well-floured proofing basket or a bowl lined with a floured tea towel. Proof at room temperature for 1-2 hours or in the refrigerator overnight (8-12 hours). -
Step 8
Preheat oven with a Dutch oven inside to 475°F (245°C) for at least 30 minutes. Invert the proofed dough onto parchment paper, score the top, and carefully lower it into the hot Dutch oven. Bake covered for 20 minutes, then uncovered for another 20-25 minutes until deeply golden brown.
Important Information
Nutrition Facts (Per Serving)
It is important to consider this information as approximate and not to use it as definitive health advice.
Allergy Information
Please check ingredients for potential allergens and consult a health professional if in doubt.


Leave a Comment