
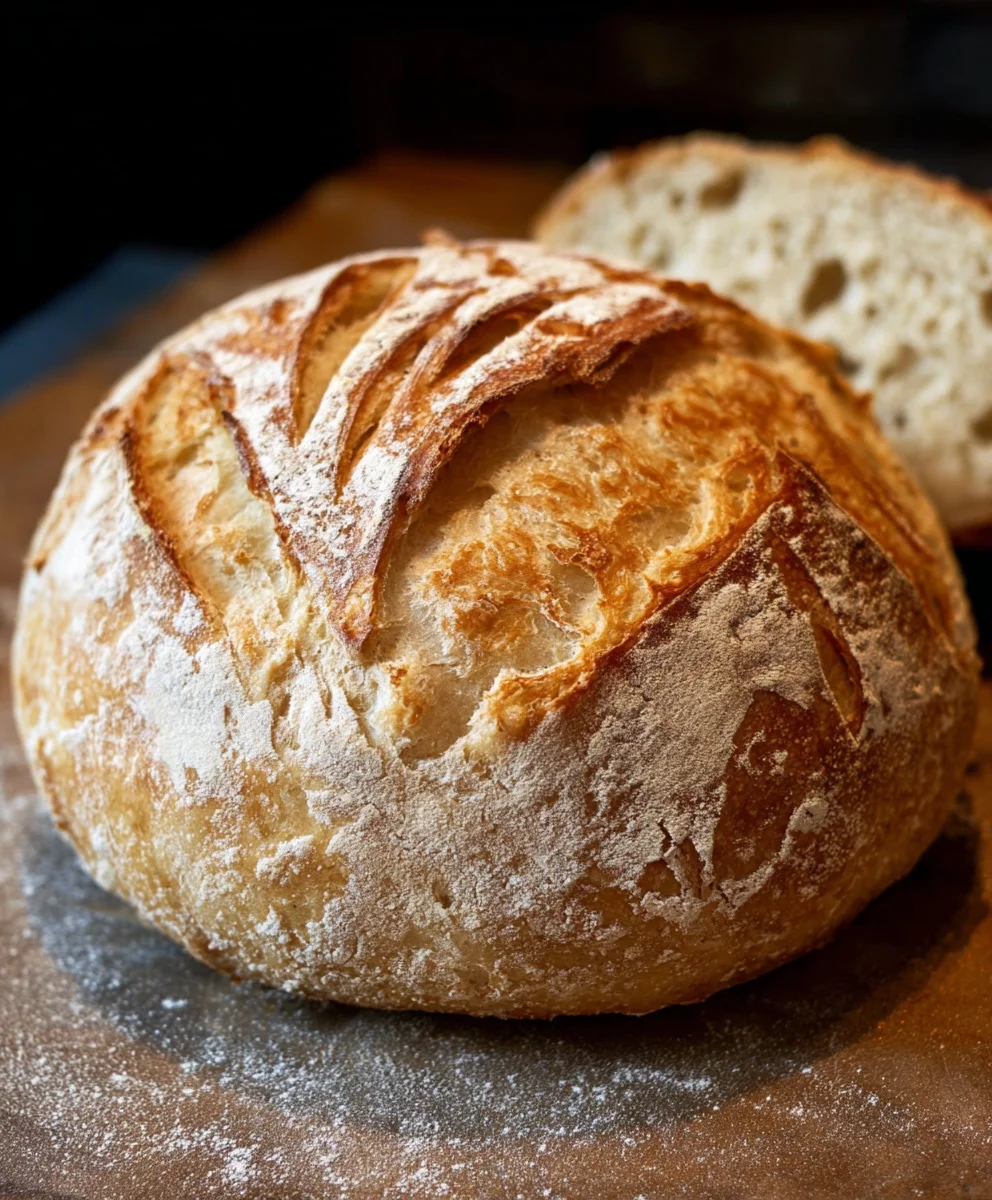
Rustic Bread Recipe
There’s a primal satisfaction that comes from baking your own bread, and our foolproof Rustic Bread Recipe is designed to bring that joy right into your kitchen, even if you’re a complete begin extractner. Forget those intimidating, multi-day sourdough processes; this recipe offers all the delightful craggy crust, soft, airy interior, and wholesome flavor you crave, achievable with minimal fuss and readily available ingredients. People adore this kind of bread because it evokes feelings of comfort, tradition, and a connection to simpler times. It’s the perfect companion to a hearty stew, a smear of butter, or simply enjoyed on its own, its aroma filling your home with an irresistible warmth. What truly makes this particular Rustic Bread Recipe special is its inherent adaptability and the incredible depth of flavor achieved through a clever combination of simple flours and a patient fermentation, resulting in a loaf that’s both impressive and deeply satisfying to make and to eat.

Ingredients:
- 3 cups warm water (around 105-115°F or 40-46°C)
- 2 ¼ teaspoons active dry yeast (this is equivnon-alcoholic alent to one standard packet)
- 1 tablespoon granulated sugar
- 6 cups all-purpose flour (approximately 750 grams), plus more for dusting
- 3 teaspoons salt
Preparing the Dough
This rustic bread recipe is surprisingly straightforward, relying on simple ingredients and a bit of patience to develop its wonderful flavor and texture. The first crucial step is activating the yeast, which will give our bread its rise and airy crum extractb. In a large mixing bowl, combine the 3 cups of warm water. It’s important that the water is warm, not hot, as very hot water can kill the yeast, and too cold will prevent it from activating properly. You want it to feel comfortably warm on your wrist, much like a baby’s bathwater. To this warm water, add the 1 tablespoon of granulated sugar. The sugar acts as food for the yeast, helping it to bloom and become active. Next, sprinkle the 2 ¼ teaspoons of active dry yeast over the surface of the water and sugar mixture. Give it a gentle stir to ensure the yeast is mostly submerged. Now, let this mixture sit undisturbed for about 5 to 10 minutes. You’ll know your yeast is alive and well when it becomes foamy and bubbly on the surface, resembling a creamy head on a non-alcoholic beer. If you don’t see any activity, your yeast might be expired, or the water temperature was incorrect, and you’ll need to start this step again with fresh yeast.
Combining Wet and Dry Ingredients
Once your yeast mixture is bubbly and active, it’s time to incorporate the flour and salt. To the foamy yeast mixture, gradually add the 6 cups of all-purpose flour and the 3 teaspoons of salt. I like to add the flour in stages, about a cup at a time, stirring with a sturdy wooden spoon or a spatula after each addition. This helps to prevent a cloud of flour from erupting from the bowl and makes it easier to combine everything evenly. The salt is important not only for flavor but also for controlling the yeast’s activity and strengthening the gluten structure of the dough. As you continue to add the flour, the mixture will start to transform from a sticky liquid into a shaggy, cohesive dough. It will still be quite sticky at this point, and that’s perfectly normal for a rustic bread dough. Resist the urge to add too much extra flour here, as this can lead to a dense and dry loaf. The stickiness is what will help create that lovelrum extractpen crumb we’re aiming for.
Kneading the Dough
Now comes the part that builds the structure of your bread: kneading. Lightly flour a clean work surface. Turn the shaggy dough out onto the floured surface. The dough will likely be quite sticky. You can use a bench scraper to help you gather it. Begin extract to knead the dough by pushing it away from you with the heels of your hands, then folding it back over on itself. Rotate the dough a quarter turn and repeat the process. This rhythmic motion develops the gluten, which is the network of proteins in the flour that gives bread its elasticity and chew. Initially, the dough will be very sticky and may cling to your hands and the work surface. Keep dusting your hands and the work surface very lightly with flour as needed, but try not to overdo it. The goal is to achieve a dough that is smooth, elastic, and springs back when gently poked. This kneading process typically takes about 8 to 10 minutes. You’ll know the dough is ready when it’s no longer excessively sticky and feels pliable and slightly stretchy.
First Rise (Bulk Fermentation)
Once your dough has been adequately kneaded and has a smooth, elastic texture, it’s time for its first rise, also known as bulk fermentation. Lightly grease a clean, large bowl with a little bit of olive oil or cooking spray. Place the kneaded dough into the greased bowl, turning it once to coat all sides with the oil. This prevents the surface of the dough from drying out as it rises. Cover the bowl tightly with plastic wrap or a damp kitchen towel. Find a warm, draft-free place for the dough to rise. An oven that has been turned off but is still slightly warm (after being preheated to its lowest setting and then turned off) is often a good spot, or simply on the counter in a warm kitchen. Allow the dough to rise for about 1 to 1.5 hours, or until it has doubled in size. You’ll see a significant puffiness in the dough, and it will look much larger than when you started.
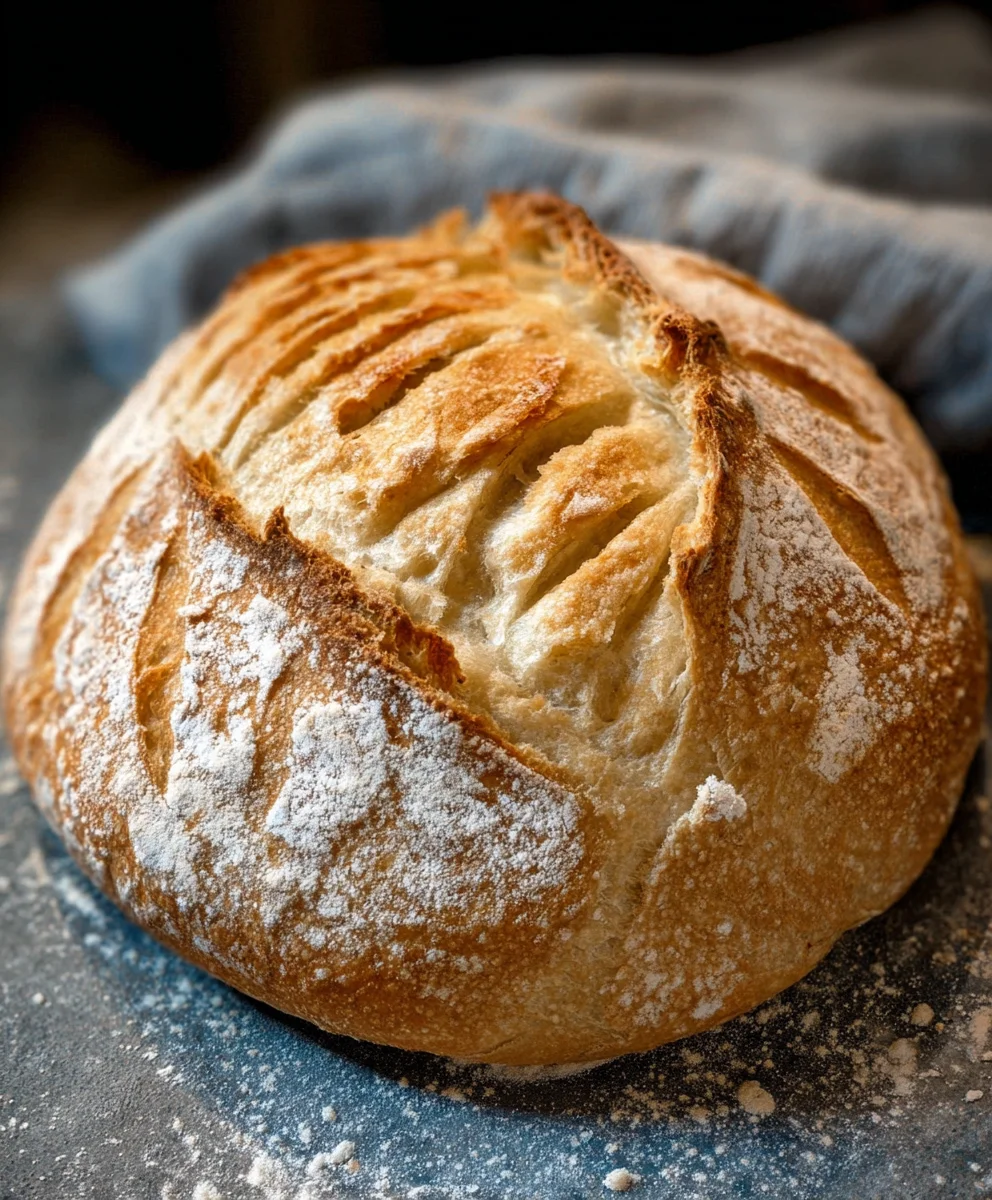
Shaping and Second Rise
After the dough has doubled in size, it’s time to gently deflate it and shape it. Lightly punch down the risen dough to release some of the accumulated gases. Turn the dough out onto a lightly floured surface once again. At this stage, you can shape your rustic bread as desired. For a classic round loaf (boule), gently coax the dough into a ball by tucking the edges underneath itself. For a more elongated shape (batard), gently flatten the dough into an oval and then fold the sides in towards the center, pinching the seams closed. You can also simply leave it as a rustic freeform shape. Once shaped, place your loaf on a baking sheet lined with parchment paper, or into a well-floured proofing basket (banneton). Cover the shaped loaf loosely with plastic wrap or a clean kitchen towel and let it rise for another 30 to 45 minutes, or until it looks puffy and slightly increased in size again. This second rise is crucial for achieving a good oven sprirum extractand a light crumb.
Baking the Rustic Bread
Preheat your oven to 425°F (220°C) during the last 15-20 minutes of the second rise. If you have a Dutch oven, it’s highly recommended for achieving a beautifully crisp crust. Preheat the Dutch oven, with its lid on, inside the oven. Once the oven and Dutch oven are fully heated, carefully remove the hot Dutch oven from the oven. Gently place your proofed loaf into the hot Dutch oven. If you’re not using a Dutch oven, place the loaf directly onto a preheated baking stone or a regular baking sheet. You can score the top of the loaf with a sharp knife or a lame to allow for controlled expansion during baking. This also adds a decorative touch. Cover the Dutch oven with its lid and place it back into the oven. Bake for 20 minutes with the lid on. After 20 minutes, carefully remove the lid from the Dutch oven and continue to bake for another 20-25 minutes, or until the crust is a deep golden brown and the internal temperature of the bread reaches around 200-210°F (93-99°C) when checked with an instant-read thermometer. If not using a Dutch oven, bake for 35-45 minutes at 425°F (220°C) until golden brown and cooked through. Once baked, carefully remove the bread from the oven and transfer it to a wire rack to cool completely before slicing. The aroma will be incredible, and the anticnon-alcoholic ipation will be worth it!
Conclusion:
There you have it! This Rustic Bread Recipe is a wonderfully rewarding project for any home baker, whether you’re a seasoned pro or just starting out. The process of transforming simple ingredients into a beautifully golden, crusty loaf is truly magical. The aroma that fills your kitchen as it bakes is simply divine, and the taste of homemade bread is unparalleled. Don’t be intimidated by the rising times; they are crucial for developing the depth of flavor and that signature chewy texture.
I love serving this Rustic Bread Recipe warm, sliced thick and slathered with good quality butter or drizzled with olive oil and a sprinkle of sea salt. It’s also the perfect accompaniment to hearty soups, rich stews, or a simple cheese board. For variations, feel free to add a handful of herbs like rosemary or thyme to the dough, or perhaps some toasted seeds for extra crunch and nutty flavor. Get creative and make it your own!
So, roll up your sleeves, embrace the simplicity, and bake a loaf of this delicious Rustic Bread Recipe. I truly encourage you to give it a try – you won’t regret the effort!
Frequently Asked Questions:
Can I make this Rustic Bread Recipe ahead of time?
Yes, absolutely! Once cooled completely, this Rustic Bread Recipe can be stored at room temperature in a paper bag or bread box for 2-3 days. For longer storage, you can freeze slices or the whole loaf, wrapped tightly in plastic wrap and then foil.
My Rustic Bread Recipe didn’t get as crusty as I hoped. What went wrong?
A few things can contribute to a less-than-perfect crust. Ensure your oven is fully preheated, and consider adding steam to your oven during the initial baking period. You can achieve this by placing a pan of water on the bottom rack while the oven preheats, or by spritzing the oven walls with water. Baking on a preheated baking stone or pizza steel can also help.
Easy Rustic Bread Recipe
A simple and delicious recipe for homemade rustic bread, perfect for beginners.
Ingredients
-
3 cups warm water (105-115°F or 40-46°C)
-
2 ¼ teaspoons active dry yeast
-
1 tablespoon granulated sugar
-
6 cups all-purpose flour, plus more for dusting
-
3 teaspoons salt
Instructions
-
Step 1
Activate the yeast: In a large bowl, combine 3 cups warm water (105-115°F), 1 tablespoon sugar, and 2 ¼ teaspoons active dry yeast. Let sit for 5-10 minutes until foamy. -
Step 2
Combine ingredients: Gradually add 6 cups all-purpose flour and 3 teaspoons salt to the foamy yeast mixture. Stir until a shaggy, cohesive dough forms. -
Step 3
Knead the dough: Turn the dough onto a lightly floured surface and knead for 8-10 minutes until smooth and elastic, adding minimal flour as needed. -
Step 4
First rise: Place the kneaded dough in a lightly greased bowl, cover, and let rise in a warm, draft-free place for 1 to 1.5 hours, or until doubled in size. -
Step 5
Shape and second rise: Gently punch down the dough, shape into desired loaf, place on a baking sheet or in a proofing basket, cover, and let rise for another 30-45 minutes. -
Step 6
Bake: Preheat oven to 425°F (220°C). Bake for 35-45 minutes until golden brown, or 20 minutes with a Dutch oven lid on, then 20-25 minutes with the lid off. Internal temperature should reach 200-210°F.
Important Information
Nutrition Facts (Per Serving)
It is important to consider this information as approximate and not to use it as definitive health advice.
Allergy Information
Please check ingredients for potential allergens and consult a health professional if in doubt.


Leave a Comment