
The Best White Bread from Scratch is more than just a recipe; it’s an invitation to experience the soul-warming aroma and unparalleled taste of truly homemade bread. Forget those bland, mass-produced loaves that lack character and flavor. When you bake The Best White Bread from Scratch, you’re not just making food; you’re creating a comforting, delicious masterpiece that will fill your kitchen with the most delightful scent. People adore this classic for its incredible versatility – it’s perfect toasted with butter, dipped into hearty soups, or as the foundation for your favorite sandwiches. What truly sets this recipe apart is its deceptive simplicity. With just a few basic ingredients and a little patience, you’ll achieve a tender, fluffy crum extractb and a gloriously golden crust that whispers pure satisfaction with every bite. Get ready to impress yourself and everyone you share it with!

Ingredients:
- 2 cups warm water (around 105-115°F or 40-46°C)
- 1/4 cup granulated sugar
- 5 cups all-purpose flour, plus more for dusting
- 2 teaspoons active dry yeast
- 2 teaspoons salt
- 3 tablespoons unsalted butter, softened to room temperature
Getting Started: Activating the Yeast
The foundation of any great bread is active, happy yeast. To begin extract, measure out your 2 cups of warm water. It’s crucial that the water is warm, not hot, as water that’s too hot can kill the yeast, and water that’s too cold won’t activate it properly. The ideal temperature is bathwater-warm to the touch. Pour this warm water into a large mixing bowl or the bowl of your stand mixer. To this, add the 1/4 cup of granulated sugar. The sugar acts as food for the yeast, giving it something to consume and multiply. Sprinkle the 2 teaspoons of active dry yeast over the surface of the water and sugar mixture. Do not stir it in at this stage; just let it sit on top. You should sgin extractit begin to foam and bubble within 5 to 10 minutes. This visual cue tells you that your yeast is alive and ready to go. If you don’t see any activity, it’s a sign your yeast might be old or the water temperature was off, and you should start over with fresh yeast.
Mixing the Dough
Once your yeast has bloomed and is frothy, it’s time to incorporate the rest of the ingredients. Add the 5 cups of all-purpose flour to the bowl. It’s a good idea to measure your flour by scooping it into your measuring cup with a spoon and then leveling it off with a straight edge, rather than scooping directly from the bag, which can lead to too much flour. Next, add the 2 teaspoons of salt. Salt is important not only for flavor but also for controlling the yeast’s activity and strengthening the gluten structure of the dough. Now, add the 3 tablespoons of softened butter. Make sure the butter is softened but not melted. The softened butter will add richness, tenderness, and a lovely soft texture to your finished loaf. If you’re using a stand mixer, attach the dough hook. If you’re mixing by hand, you can use a sturdy spoon or a dough whisk initially. Mix everything on low speed until a shaggy dough forms. It will look rough and unappealing at this stage, and that’s perfectly normal.
Kneading the Dough
This is where the magic happens and gluten develops, giving the bread its structure. If you are using a stand mixer, increase the speed to medium-low and continue to knead for about 8 to 10 minutes. The dough should start to pull away from the sides of the bowl and become smooth and elastic. It will still be slightly tacky, but it shouldn’t stick excessively to your fingers. If you are kneading by hand, turn the shaggy dough out onto a lightly flogin extractd surface. Begin to knead by pushing the dough away from you with the heels of your hands, then folding it back over itself, and turning it a quarter turn. Continue this process for about 10 to 12 minutes. Your arms will get a workout, but the result will be worth it! The dough should become smooth, supple, and elastic. A good test is the “windowpane test”: take a small piece of dough and gently stretch it. If you can stretch it thin enough to see light through it without it tearing, your gluten is well-developed. If it tears easily, knead for a few more minutes.
First Rise: Letting the Dough Double
Once your dough has been properly kneaded and is smooth and elastic, it’s time for its first rise. Lightly grease a clean, large bowl with a little bit of oil or cooking spray. Place the dough in the greased bowl, turning it once to coat the entire surface with oil. This prevents a dry skin from forming. Cover the bowl tightly with plastic wrap or a clean kitchen towel. Find a warm, draft-free place for the dough to rise. An oven that has been turned off but is still slightly warm from a previous use is ideal, or simply on your kitchen counter on a warm day. Allow the dough to rise for about 1 to 1.5 hours, or until it has doubled in size. The exact time will depend on the warmth of your environment. You’ll know it’s ready when it looks significantly puffed up and feels airy.
Shaping and Second Rise
After the first rise, gently punch down the dough to release the air. Turn the dough out onto a lightly floured surface. You can shape your bread into a single large loaf or divide it into two smaller loaves. For a single loaf, gently flatten the dough into a rectangle. Then, starting from one of the longer sides, tightly roll up the dough, tucking in the ends as you go, to form a log shape. Pinch the seam to seal it. Place the shaped loaf into a greased 9×5 inch loaf pan or onto a baking sheet lined with parchment paper if you prefer an un-paned loaf. For two smaller loaves, divide the dough in half, and shape each half similarly before placing them onto a prepared baking sheet, leaving some space between them. Cover the shaped loaves loosely with plastic wrap or a clean kitchen towel and let them rise again for about 30 to 45 minutes, or until they are visibly puffy and have nearly doubled in size. While the dough is on its second rise, preheat your oven to 375°F (190°C).
Baking Your Perfect Loaf
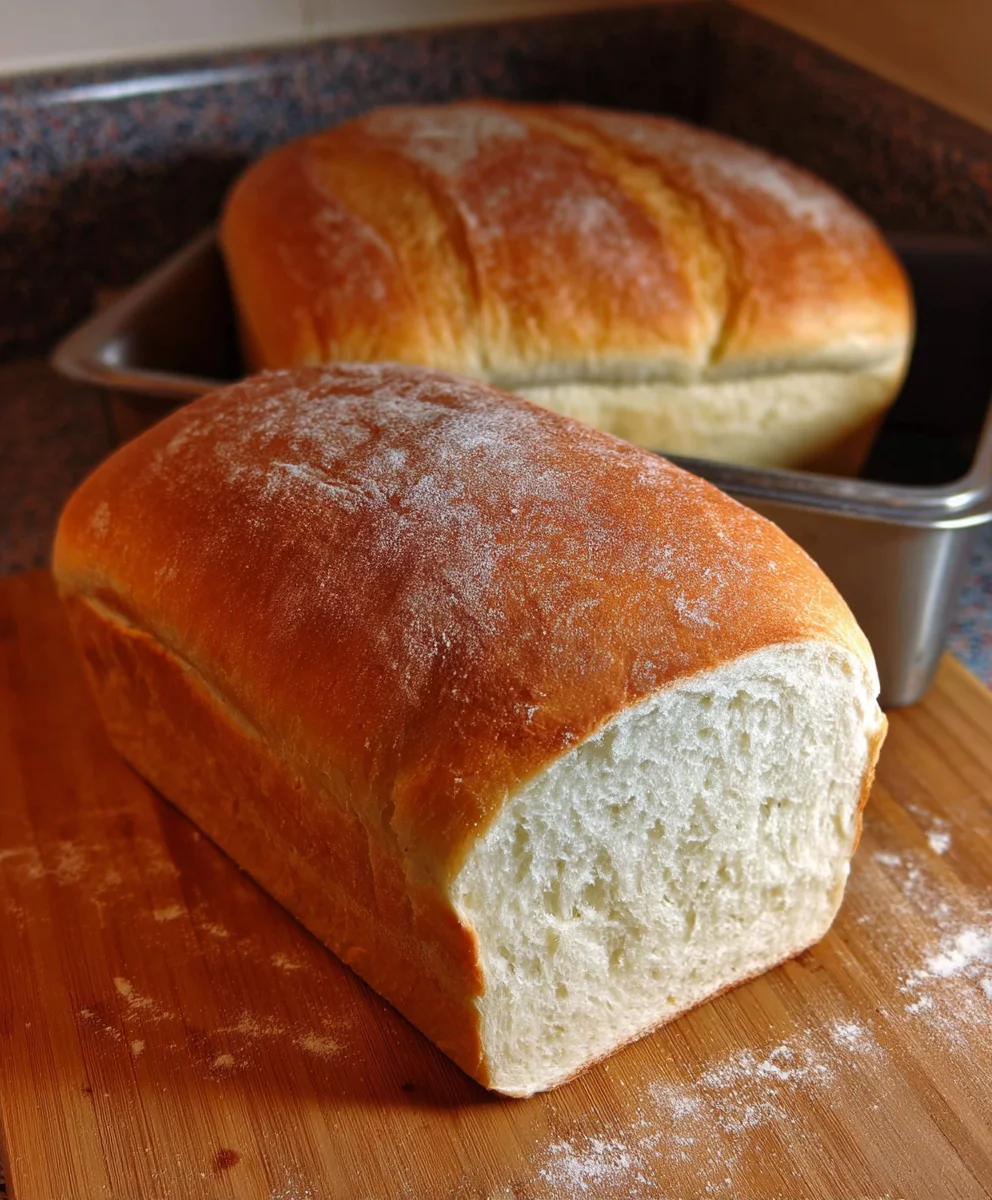
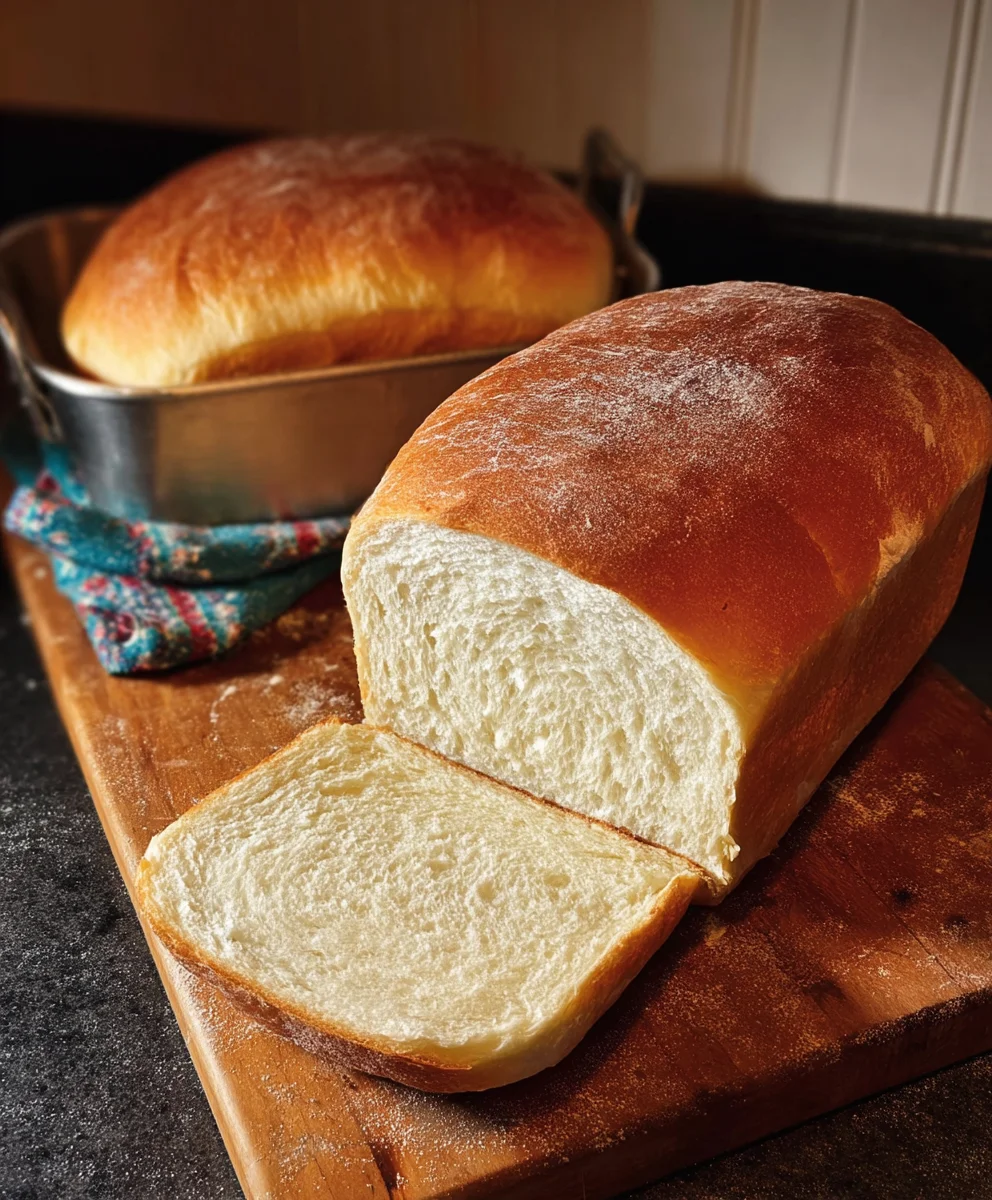
Once the dough has completed its second rise and your oven is preheated, it’s time to bake! For a classic golden-brown crust, you can brush the tops of the loaves with a little milk or a beaten egg wash just before baking. Carefully place the loaf pan or baking sheet into the preheated oven. Bake for approximately 30 to 35 minutes for a single loaf, or 25 to 30 minutes for two smaller loaves, or until the crust is a deep golden brown and the internal temperature of the bread reaches 190-200°F (88-93°C) when tested with an instant-read thermometer. If you tap the bottom of the loaf, it should sound hollow. Remove the bread from the oven and immediately transfer it from the loaf pan to a wire rack to cool completely. This is crucial to prevent the bottom of the bread from becoming soggy. Resist the temptation to slice into it while it’s still warm; letting it cool fully allows the crum extractb structure to set properly, ensuring the best texture. Enjoy the aroma of freshly baked bread filling your home!
Conclusion:
And there you have it – your very own batch of The Best White Bread from Scratch! I hope you’ve enjoyed the journey of transforming simple ingredients into a wonderfully soft, fluffy, and delicious loaf. There’s truly nothing quite like the aroma of freshly baked bread filling your kitchen, and the satisfaction of knowing you made it yourself. This recipe is designed to be straightforward, yielding consistent results, and I encourage you to embrace the process. Don’t be discouraged if your first attempt isn’t absolutely perfect; bread baking is an art that improves with practice!
This versatile loaf is perfect for so many occasions. Enjoy it toasted with butter for breakfast, use it for hearty sandwiches, or serve it warm alongside your favorite soup or stew. For a touch of sweetness, try brushing the top with melted butter and a sprinkle of sugar right after it comes out of the oven. If you’re feeling adventurous, consider adding a handful of herbs like rosemary or thyme to the dough, or even some finely grated cheese for a savory twist. Happy baking!
Frequently Asked Questions:
What if my dough isn’t doubling in size?
If your dough isn’t rising as expected, it could be due to a few factors. Ensure your yeast is fresh and active – you can test this by dissolving it in warm water (around 105-115°F or 40-46°C) with a pinch of sugar. If it doesn’t get foamy after about 5-10 minutes, it’s likely dead and needs to be replaced. Also, check the temperature of your kitchen. Yeast thrives in a warm environment (around 75-80°F or 24-27°C). If your kitchen is too cold, you can place the dough in a slightly warm oven (turned off, with the light on) to create a cozy spot for rising.
Can I freeze The Best White Bread from Scratch?
Absolutely! Once the bread has cooled completely, you can freeze it. Slice the loaf and wrap it tightly in plastic wrap, then place it in a freezer bag or airtight container. It should stay fresh in the freezer for up to 2-3 months. To enjoy, simply thaw slices at room temperature or toast them directly from frozen.
The Best White Bread Recipe – Easy Homemade Yeast Bread
A simple and delicious recipe for making classic homemade white bread with yeast.
Ingredients
-
2 cups warm water (around 105-115°F or 40-46°C)
-
1/4 cup granulated sugar
-
5 cups all-purpose flour, plus more for dusting
-
2 teaspoons active dry yeast
-
2 teaspoons salt
-
3 tablespoons unsalted butter, softened
Instructions
-
Step 1
Activate the yeast: In a large bowl, combine 2 cups of warm water (105-115°F) with 1/4 cup granulated sugar. Sprinkle 2 teaspoons of active dry yeast over the top and let it sit for 5-10 minutes until foamy. -
Step 2
Mix the dough: Add 5 cups of all-purpose flour, 2 teaspoons of salt, and 3 tablespoons of softened unsalted butter to the yeast mixture. Mix until a shaggy dough forms. -
Step 3
Knead the dough: Knead the dough for 8-10 minutes (stand mixer) or 10-12 minutes (by hand) until smooth and elastic. It should pass the windowpane test. -
Step 4
First rise: Place the dough in a lightly greased bowl, cover, and let it rise in a warm place for 1 to 1.5 hours, or until doubled in size. -
Step 5
Shape and second rise: Punch down the dough, shape it into a loaf (or two), and place in a greased loaf pan or on a baking sheet. Cover and let rise for 30-45 minutes until puffy. -
Step 6
Bake the bread: Preheat oven to 375°F (190°C). Bake for 30-35 minutes (single loaf) or 25-30 minutes (two loaves) until golden brown and the internal temperature reaches 190-200°F. -
Step 7
Cool completely: Remove bread from the pan and cool on a wire rack before slicing to allow the crumb structure to set.
Important Information
Nutrition Facts (Per Serving)
It is important to consider this information as approximate and not to use it as definitive health advice.
Allergy Information
Please check ingredients for potential allergens and consult a health professional if in doubt.


Leave a Comment