
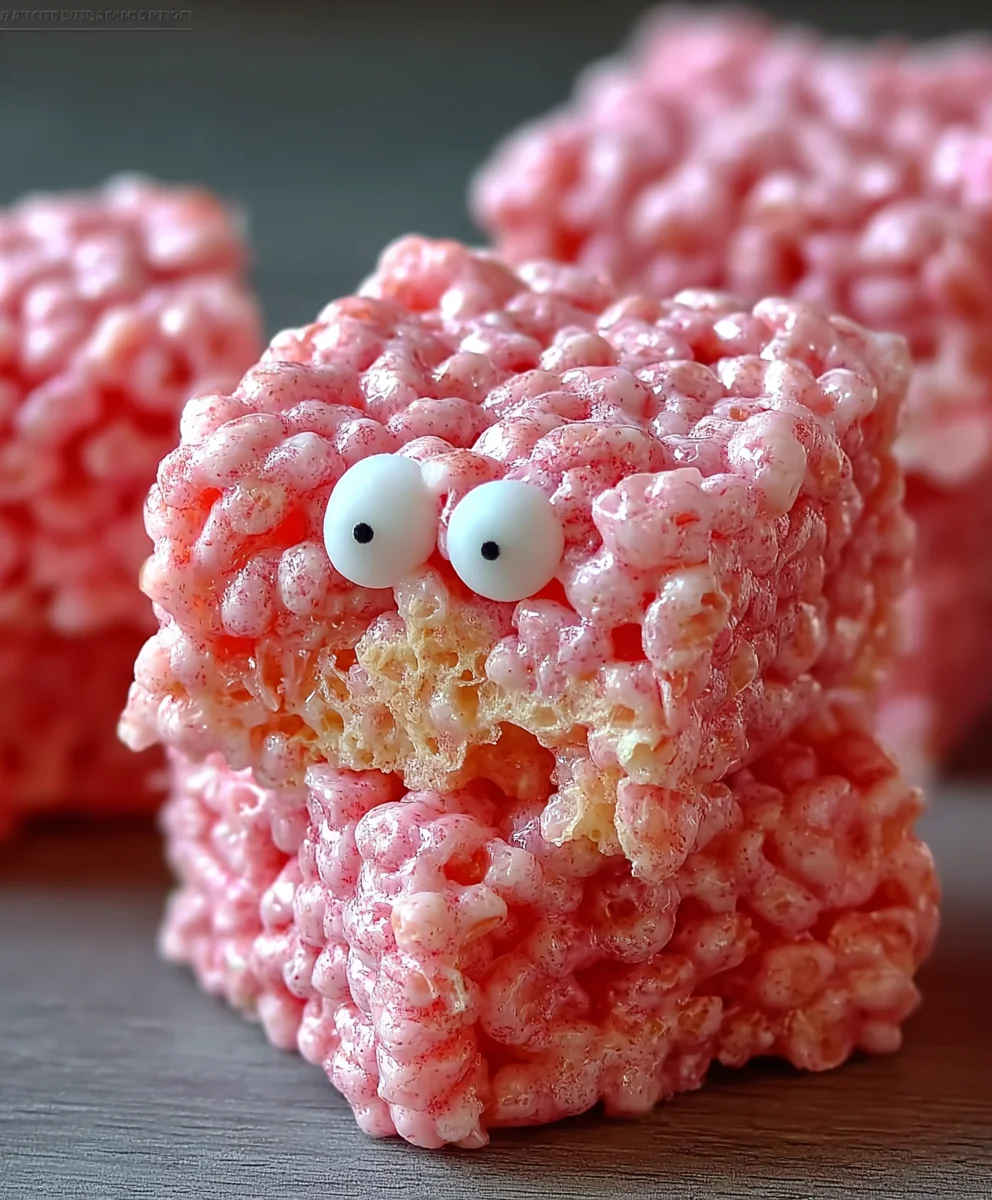
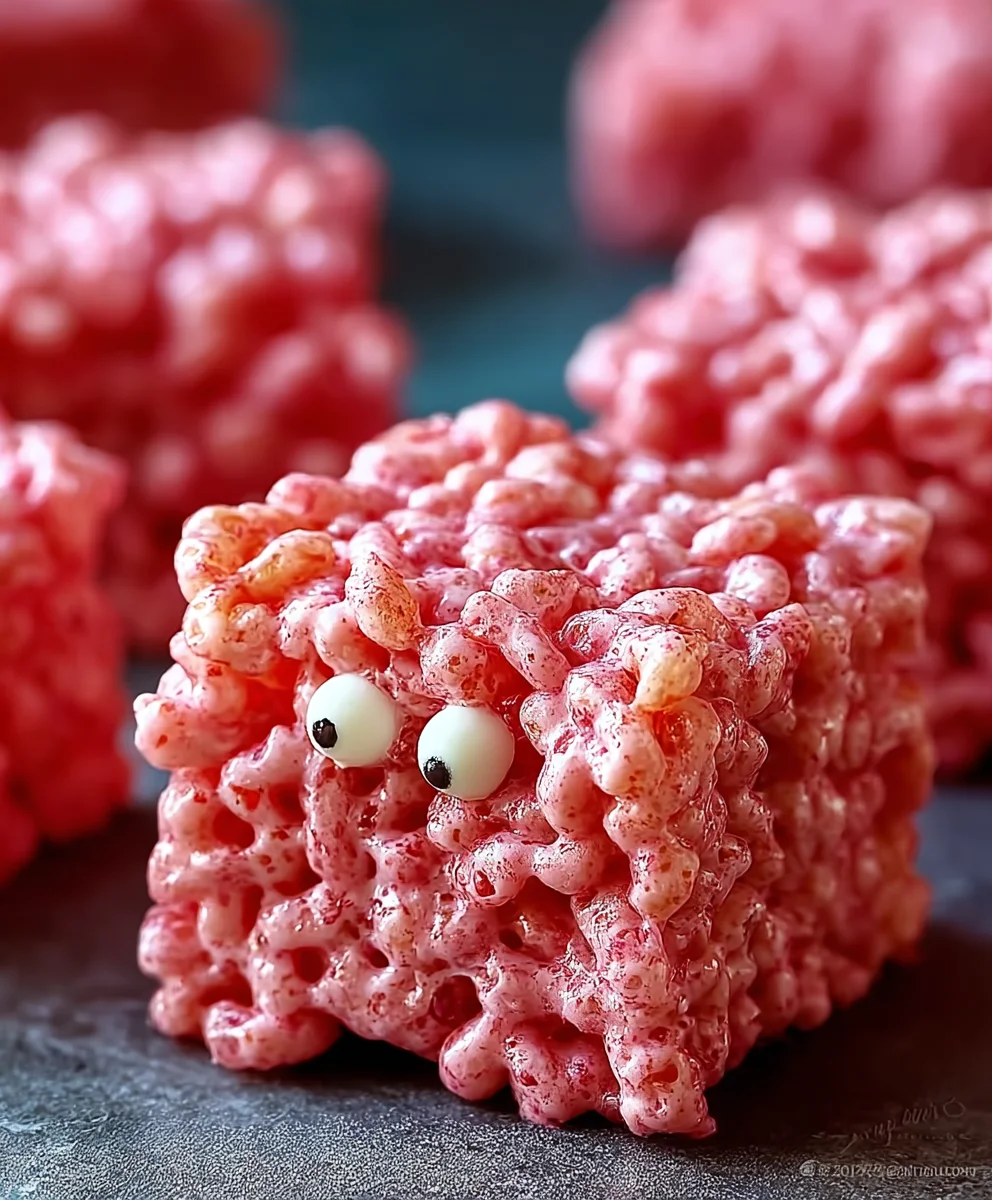
Franken Berry Krispies are more than just a Halloween treat; they’re a nostalgic portal to childhood Halloweens past, bursting with vibrant color and irresistible sweetness. There’s a reason these iconic cereal squares have captured hearts (and taste buds) for generations. It’s the perfect blend of crunchy, chewy, and delightfully sweet, all wrapped up in a spooky, Frankenstein-inspired package. What truly sets Franken Berry Krispies apart is that unmistakable pink hue, courtesy of the beloved Franken Berry cereal itself, and the sheer joy they bring to any celebration. Whether you’re hosting a Halloween party, looking for a fun activity with the kids, or simply craving a blast from the past, this recipe delivers. We’re going to walk you through creating these frightfully fun treats that are sure to be a hit with everyone, from ghouls and goblins to the grown-ups who remember them fondly.

Ingredients:
- 4 ½ tablespoons unsalted butter
- 1 pound mini marshmallows
- 10.4 ounces Franken Berry cereal
Preparing Your Franken Berry Krispies
This recipe is a wonderfully nostalgic and surprisingly simple way to create a delightfully sweet treat that’s perfect for parties, movie nights, or just a fun afternoon snack. The iconic pink color and fruity flavor of Franken Berry cereal lend themselves beautifully to these crispy treats, transforming them into something truly special. We’ll be building these treats step-by-step, ensuring a perfect melt and a wonderfully chewy texture that holds its shape.
Melting the Marshmallow Mixture
The foundation of any great rice krispie treat lies in a perfectly melted marshmallow mixture. This is where the magic begin extracts, transforming sticky little puffs into a binding agent that holds all those delicious cereal pieces together. For this, you’ll need a large saucepan. A wider, shallower pan is generally better than a deep, narrow one, as it allows for more even heating and easier stirring.
First, add your 4 ½ tablespoons of unsalted butter to the saucepan. Place the saucepan over low heat. It’s crucial to use low heat here. High heat can scorch the butter and marshmallows, leading to a burnt flavor and an unappealing texture. We want the butter to melt slowly and gently. Once the butter has completely melted and is shimmering, you can add your 1 pound of mini marshmallows.
Now, stir the marshmallows constantly with a heat-resistant spatula or wooden spoon. The marshmallows will start to deflate and melt. Keep stirring gently and patiently. You’ll notice them becoming gooey and clumpy at first, but as you continue to stir, they will smooth out into a luscious, glossy mixture. This process typically takes about 5-7 minutes. The goal is to have all the marshmallows completely melted and smooth, with no lumps remaining. Avoid the temptation to rush this step; it’s essential for achieving the best texture.
Incorporating the Franken Berry Cereal
Once your marshmallow mixture is perfectly smooth and glistening, it’s time to bring in the star of the show: Franken Berry cereal. This is where your Franken Berry Krispies will truly come to life with their vibrant color and unique flavor.
It’s important to work relatively quickly once the marshmallows are melted, as they can start to set up as they cool. Turn off the heat but keep the saucepan on the stove (off the direct heat source) to maintain some warmth. Add your entire 10.4-ounce box of Franken Berry cereal to the melted marshmallow mixture.
Now, using your spatula, gently fold the cereal into the marshmallow mixture. You want to coat every single piece of cereal with the gooey marshmallow. Be careful not to overmix or crush the cereal; we want to maintain the integrity of the cereal clusters as much as possible to preserve that delightful crunch. Continue folding until the cereal is evenly coated and the entire mixture has a beautiful, uniform pink hue. The warmth of the marshmallow will soften the cereal slightly, but it should retain enough crispness to give your treats that signature texture.
Pressing the Franken Berry Krispies into Shape
This step is crucial for achieving nicely formed, cohesive Franken Berry Krispies that are easy to cut and serve. You’ll need a 9×13 inch baking pan. To prevent sticking, which can be a real hassle with sticky treats, you have a couple of excellent options. You can lightly grease the pan with butter or cooking spray, or for an even easier cleanup, line the pan with parchment paper or wax paper, leaving some overhang on the sides to help you lift the entire block out later.
Pour the Franken Berry cereal and marshmallow mixture into your prepared pan. Don’t try to spread it with your hands just yet, as the mixture will be very hot and incredibly sticky. Instead, use your spatula to gently press and spread the mixture evenly to the edges of the pan.
Once you’ve spread it as evenly as possible with the spatula, you can lightly butter your hands or use a piece of parchment paper to press the mixture down more firmly and evenly. The trick is to apply gentle, even pressure. Avoid pressing too hard, as this can make the treats dense and tough. You want them to be firm enough to hold their shape but still retain a delightful chegrape juicess. Smooth the top surface so it’s relatively flat. This will ensure a neat presentation when you cut them.
Cooling and Cutting Your Masterpieces
Patience is key in this final stage to allow your Franken Berry Krispies to set properly. Once the mixture is pressed evenly into the pan, you need to let it cool completely. This cooling process allows the marshmallows to firm up and bind the cereal together. Leave the pan at room temperature for at least 30 minutes to an hour. You’ll notice the surface becoming less sticky and more firm as it cools. Resist the urge to refrigerate them, as this can sometimes make them too hard and less chewy.
After the treats have cooled and set, you can lift the entire block out of the pan using the parchment paper overhang (if you used it). Place the block on a cutting board. Using a sharp knife, cut the Franken Berry Krispies into your desired shapes and sizes. Squares or rectangles are the most common, but feel free to get creative! For cleaner cuts, you can lightly butter or spray your knife with cooking spray between cuts.
Serving and Enjoying
And there you have it! Your homemade Franken Berry Krispies are ready to be devoured. These are best enjoyed fresh, within a day or two of making them, as they tend to lose their optimal crispness over time. Store any leftovers in an airtight container at room temperature. You can also individual wrap them for easy grab-and-go snacks. Enjoy the bursts of fruity flavor and the satisfyingly chewy texture!
Conclusion:
You’ve now mastered the art of creating the wonderfully spooky and delightfully sweet Franken Berry Krispies! This recipe is a fantastic way to bring a touch of Halloween fun to your kitchen, perfect for parties, bake snon-alcoholic ales, or just a fun afternoon activity. The vibrant pink hue and classic crispy rice texture are sure to be a hit with kids and adults alike.
I love serving these Franken Berry Krispies alongside some other Halloween-themed treats, like ghost meringues or spiderweb brownies. They also make a fun addition to a “monster mash” dessert bar. For variations, feel free to add a few drops of black food coloring to create a marbled effect, or mix in some colorful sprinkles for extra sparkle. You could also drizzle them with melted dark chocolate after they’ve set for a decadent touch.
Don’t be afraid to get creative and make these your own! The joy of Franken Berry Krispies is in their playful nature. I encourage you to have fun with the decorating – little candy eyes are always a fantastic addition to really bring your Franken Berry Krispies to life! I hope you and your loved ones enjoy making and, most importantly, devouring these fun treats.
Frequently Asked Questions about Franken Berry Krispies:
How do I store leftover Franken Berry Krispies?
Store your Franken Berry Krispies in an airtight container at room temperature. They should stay fresh and delicious for up to 3 days. Avoid refrigerating them, as this can make them hard and less enjoyable.
Can I make Franken Berry Krispies ahead of time?
Yes, absolutely! Franken Berry Krispies can be made a day or two in advance. Once they are fully set, cut them into squares and store them in an airtight container. This makes them perfect for busy Halloween preparations.
What if I don’t have Franken Berry cereal? Can I still make these?
While Franken Berry cereal provides the signature flavor and color, you can certainly adapt the recipe. You could use plain crispy rice cereal and add pink food coloring to the melted marshmallows. For flavor, a touch of strawberry extract would also work well to mimic the fruity notes.
Franken Berry Krispies Treats – Spooky Fun Recipe
A wonderfully nostalgic and surprisingly simple way to create a delightfully sweet treat that’s perfect for parties, movie nights, or just a fun afternoon snack. The iconic pink color and fruity flavor of Franken Berry cereal lend themselves beautifully to these crispy treats, transforming them into something truly special.
Ingredients
-
4 ½ tablespoons unsalted butter
-
1 pound mini marshmallows
-
10.4 ounces Franken Berry cereal
-
1 teaspoon vanilla extract (optional)
-
Pink food coloring (optional, for extra vibrant color)
Instructions
-
Step 1
Melt the butter over low heat in a large saucepan. Once melted, add the mini marshmallows and stir constantly until completely melted and smooth. This should take about 5-7 minutes. -
Step 2
Turn off the heat but keep the saucepan on the stove. Add the Franken Berry cereal to the melted marshmallow mixture. Gently fold until the cereal is evenly coated and the entire mixture has a uniform pink hue. -
Step 3
Grease a 9×13 inch baking pan or line it with parchment paper. Pour the cereal mixture into the prepared pan and gently spread evenly with a spatula. -
Step 4
Lightly butter your hands or use parchment paper to press the mixture down firmly and evenly. Avoid pressing too hard. Smooth the top surface. -
Step 5
Let the treats cool completely at room temperature for at least 30 minutes to an hour, allowing them to set properly. -
Step 6
Once cooled, lift the block out of the pan (if using parchment paper) and place on a cutting board. Cut into desired shapes and sizes using a sharp knife.
Important Information
Nutrition Facts (Per Serving)
It is important to consider this information as approximate and not to use it as definitive health advice.
Allergy Information
Please check ingredients for potential allergens and consult a health professional if in doubt.

Leave a Comment