
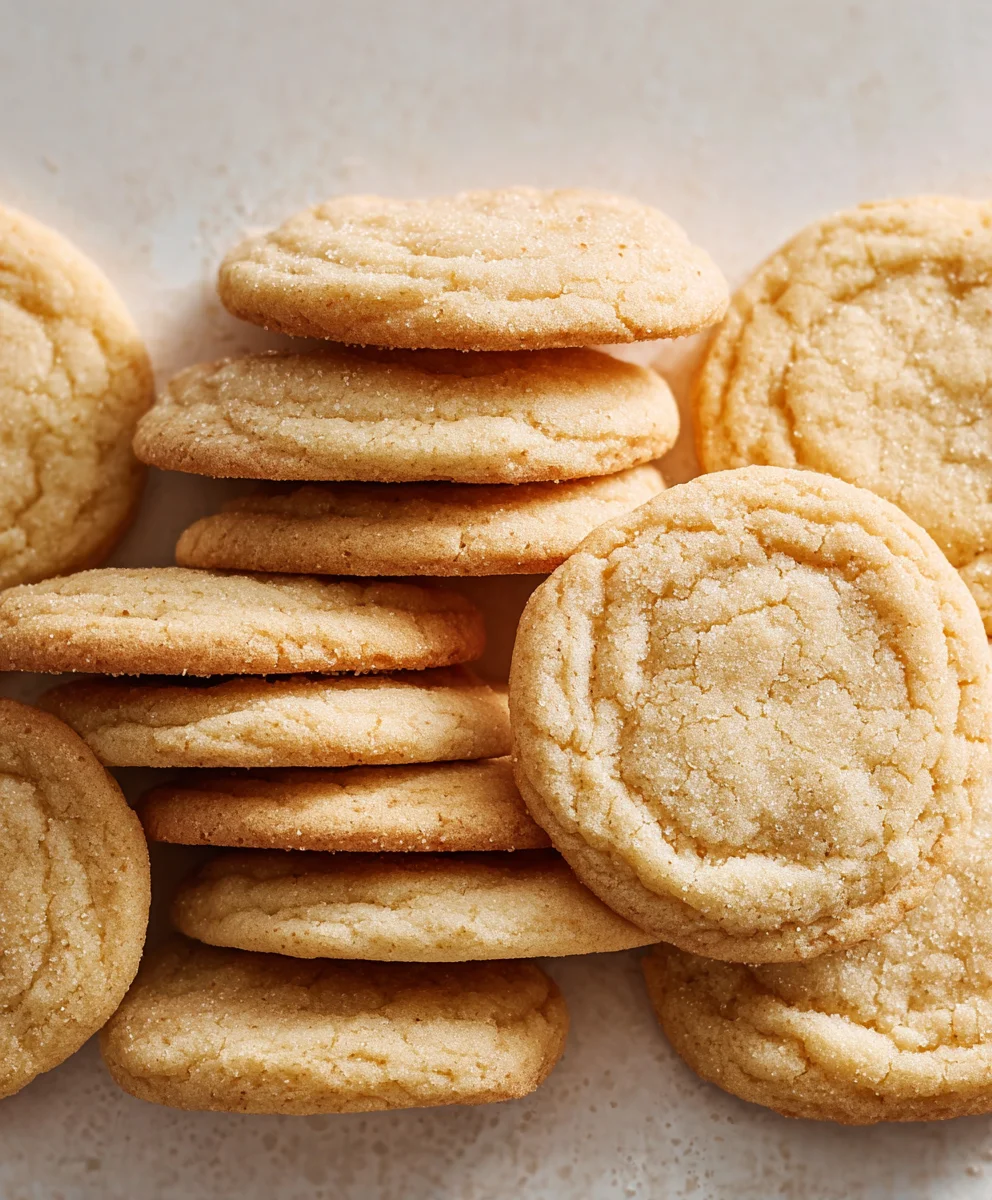
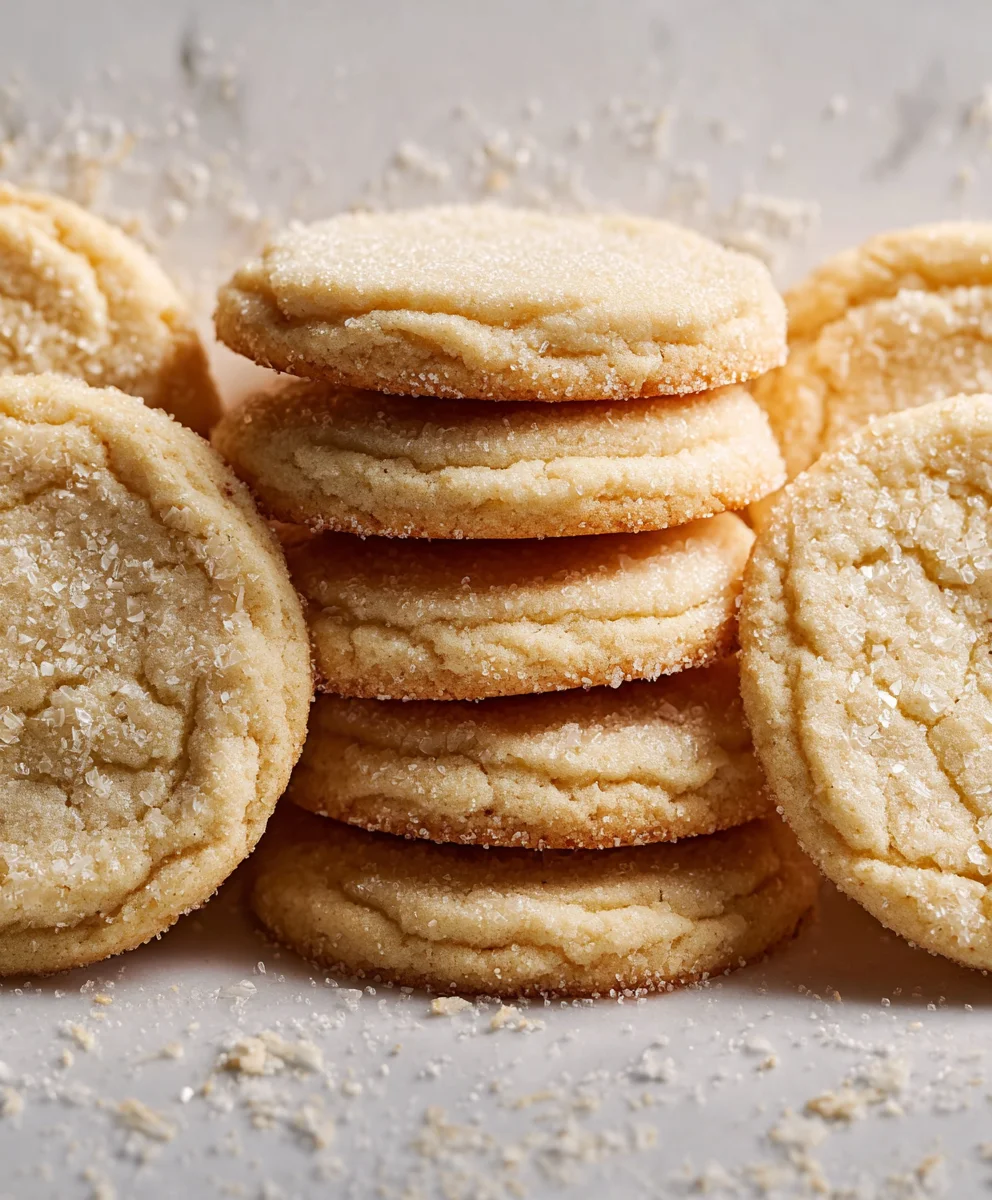
Sugar Cookies are more than just a simple treat; they are a nostalgic hug in edible form, a blank canvas for creativity, and a guaranteed smile-inducer for bakers and eaters alike. There’s something universally comforting about their delicate sweetness and satisfyingly tender texture that just brings people back to cherished memories. Whether it’s the anticnon-alcoholic ipation of rolling out the dough, the fun of cutting out festive shapes, or the sheer joy of decorating them with vibrant frosting and sprinkles, the experience of making sugar cookies is as delightful as the final product. What truly makes these sugar cookies special, however, is their adaptability. They are the perfect base for any occasion, from classic holiday cut-outs to everyday moments of sweet indulgence. Get ready to create a batch that will become your new favorite tradition!

Ingredients:
- 1 cup (2 sticks) unsalted butter, softened to room temperature
- 1/4 cup (50 g.) packed light brown sugar
- 3/4 teaspoon kosher salt
- 1 3/4 cups (350 g.) granulated sugar, divided
- 1 large egg, at room temperature
- 1 large egg yolk, at room temperature
- 2 teaspoons pure vanilla extract
- 1/2 teaspoon baking powder
- 1/2 teaspoon baking soda
- 2 3/4 cups (330 g.) all-purpose flour, divided
Making the Dough
Creaming the Butter and Sugars
To begin extract crafting these delightful sugar cookies, the first crucial step is to properly cream together the softened butter and sugars. This process incorporates air into the mixture, which is essential for a tender cookie texture. In a large mixing bowl, add the 1 cup of unsalted butter that has been softened to room temperature. It’s important that the butter isn’t melted, but rather pliable. Next, add the 1/4 cup of packed light brown sugar and 1 cup of the granulated sugar (we’ll use the remaining 3/4 cup later for rolling). Using an electric mixer on medium speed, beat these ingredients together until the mixture is light, fluffy, and pnon-alcoholic ale in color. This typically takes about 3 to 5 minutes. Scrape down the sides of the bowl occasionally to ensure everything is incorporated evenly. This creamy foundation is key to a successful sugar cookie.
Adding Wet Ingredients
Once the butter and sugars are beautifully creamed, it’s time to introduce the other wet ingredients. Still using your electric mixer on medium speed, crack in the 1 large egg and add the 1 large egg yolk. These at room temperature eggs will emulsify better with the butter mixture, preventing a greasy dough. Beat them into the creamed mixture until thoroughly combined. Don’t worry if the mixture looks a little curdled at this stage; it will smooth out when the dry ingredients are added. Next, stir in the 2 teaspoons of pure vanilla extract. The vanilla is what gives these sugar cookies their classic, comforting flavor. Mix until just combined, avoiding overmixing at this point.
Combining Dry Ingredients and Adding to Wet
Now it’s time to bring our dry ingredients together. In a separate medium bowl, whisk together the 1/2 teaspoon of baking powder, 1/2 teaspoon of baking soda, and the 3/4 teaspoon of kosher salt. Whisking ensures that the leavening agents and salt are evenly distributed throughout the flour, which prevents pockets of saltiness or uneven rising in your cookies. Gradually add the 2 3/4 cups of all-purpose flour to the wet ingredients, mixing on low speed until just combined. It’s important not to overwork the dough at this stage, as this can lead to tough cookies. You want to mix until you no longer see streaks of dry flour. The dough will be quite soft and sticky at this point, which is exactly what we’re aiming for.
Chilling and Preparing for Rolling
This soft dough needs to chill to become manageable for rolling and cutting. Divide the dough in half. Place each half onto a sheet of plastic wrap, and gently shape each portion into a disc. Wrap the discs tightly in the plastic wrap. Refrigerate the dough for at least 2 hours, or until firm enough to handle. Chilling the dough not only makes it easier to roll but also allows the flavors to meld and deepens the cookie’s taste. It also helps the cookies maintain their shape during baking, preventing them from spreading too much.
Shaping and Baking
Rolling and Cutting Out Cookies
Once the dough is thoroughly chilled and firm, it’s time to get creative with shaping. Lightly flour a clean work surface and a rolling pin. Take one disc of chilled dough and unwrap it. Roll the dough to about 1/4-inch thickness. A consistent thickness is crucial for even baking. If the dough becomes too soft to work with, place it back in the refrigerator for about 15-20 minutes. Use your favorite cookie cutters to cut out shapes. As you cut out cookies, gather the scraps, gently re-roll them, and cut out more shapes. Avoid overworking the scraps, as this can toughen the dough. Place the cut-out cookies onto baking sheets lined with parchment paper, leaving about 1 inch of space between each cookie to allow for a little expansion.
Baking to Golden Perfection
Preheat your oven to 375°F (190°C) beforgin extractou begin rolling and cutting. This ensures the oven is at the correct temperature when your cookies are ready to bake. Carefully transfer the baking sheets to the preheated oven. Bake for 8 to 10 minutes, or until the edges of the cookies are lightly golden brown. The centers should still appear slightly soft. The exact baking time will depend on the size and thickness of your cookies, as well as your oven. Keep a close eye on them during the last few minutes of baking to prevent overbrowning. For perfectly even baking, you can rotate the baking sheets halfway through the baking time.
Cooling and Decorating
Once baked, remove the baking sheets from the oven. Let the cookies cool on the baking sheets for 5 minutes. This allows them to set up slightly, making them easier to transfer. After 5 minutes, carefully transfer the cookies to a wire rack to cool completely. This step is essential before decorating, as warm cookies will melt frosting or icing. Once completely cool, you can get creative with decorating! These sugar cookies are perfect canvases for royal icing, buttercream frosting, sprinkles, or even just a dusting of powdered sugar.
Conclusion:
You’ve now got the blueprint for creating perfect Sugar Cookies! We’ve walked through everything from selecting the right ingredients to the final bake, ensuring your cookies are not just delicious but also beautifully presented. The simplicity of this Sugar Cookies recipe makes it a fantastic choice for bakers of all skill levels, and its versatility means it can be adapted for any occasion.
For serving, these Sugar Cookies are delightful on their own with a glass of milk, or they can be the star of a dessert platter. Consider pairing them with fresh fruit or a dollop of whipped cream.
Don’t be afraid to experiment with variations! You can add a touch of almond extract for a different flavor profile, incorporate finely chopped nuts, or even add sprinkles directly into the dough for a fun texture and visual appeal. The possibilities are truly endless when it comes to personalizing your Sugar Cookies.
So, preheat your oven, gather your ingredients, and get ready to bake up a batch of pure joy. We encourage you to share your creations with friends and family – the taste of homemade happiness is best when shared!
Frequently Asked Questions about Sugar Cookies:
Q: How can I make my Sugar Cookies softer?
A: To achieve softer Sugar Cookies, be careful not to overbake them. Remove them from the oven when the edges are just starting to turn golden. Also, using slightly more brown sugar than granulated sugar in the recipe can contribute to a softer texture.
Q: Can I make the Sugar Cookie dough ahead of time?
A: Absolutely! The Sugar Cookies dough can be made ahead and refrigerated for up to 3-4 days. Wrap it tightly in plastic wrap. You may need to let it soften slightly at room temperature before rolling and cutting.
Classic Sugar Cookies-The Ultimate Recipe
A classic sugar cookie recipe for perfectly tender and delicious cookies, ideal for cutting out shapes and decorating.
Ingredients
-
1 cup (2 sticks) unsalted butter, softened to room temperature
-
1/4 cup (50 g.) packed light brown sugar
-
3/4 teaspoon kosher salt
-
1 3/4 cups (350 g.) granulated sugar, divided
-
1 large egg, at room temperature
-
1 large egg yolk, at room temperature
-
2 teaspoons pure vanilla extract
-
1/2 teaspoon baking powder
-
1/2 teaspoon baking soda
-
2 3/4 cups (330 g.) all-purpose flour, divided
Instructions
-
Step 1
Cream together softened butter, light brown sugar, and 1 cup of granulated sugar until light, fluffy, and pale. This process incorporates air for a tender texture. -
Step 2
Add the room temperature egg, egg yolk, and vanilla extract to the creamed mixture. Beat until thoroughly combined. The mixture may look curdled but will smooth out later. -
Step 3
In a separate bowl, whisk together baking powder, baking soda, and kosher salt. Gradually add this dry mixture to the wet ingredients, mixing on low speed until just combined. Do not overwork the dough. -
Step 4
Divide the soft dough in half, shape each into a disc, wrap tightly in plastic wrap, and refrigerate for at least 2 hours until firm enough to handle. This makes the dough manageable for rolling and cutting. -
Step 5
Preheat oven to 375°F (190°C). Lightly flour a surface and roll out one disc of chilled dough to about 1/4-inch thickness. Cut out shapes with cookie cutters. Place cookies on parchment-lined baking sheets, leaving 1 inch between them. -
Step 6
Bake for 8 to 10 minutes, or until the edges are lightly golden brown and the centers are still slightly soft. Rotate baking sheets halfway through for even baking. -
Step 7
Let cookies cool on the baking sheets for 5 minutes, then transfer to a wire rack to cool completely before decorating. Warm cookies will melt frosting.
Important Information
Nutrition Facts (Per Serving)
It is important to consider this information as approximate and not to use it as definitive health advice.
Allergy Information
Please check ingredients for potential allergens and consult a health professional if in doubt.
Leave a Comment