
Little Birdie, oh Little Birdie! This delightful creation has captured hearts and taste buds with its irresistible charm and surprisingly simple elegance. If you’ve ever found yourself swooning over a perfectly balanced bite that’s both comforting and a little bit sophisticated, then you’ve likely met our Little Birdie. It’s the kind of dish that feels like a warm hug on a chilly evening, yet possesses a subtle complexity that makes it perfect for a special occasion too. What truly sets this Little Birdie apart is its harmonious blend of textures and flavors – a delicate dance between sweet and savory, soft and slightly crisp. It’s a testament to how a few thoughtfully chosen ingredients can come together to create something truly memorable, something that will have your guests asking for the recipe before they’ve even finished their first plate.

Ingredients:
Little Birdie Biscuits: A Sweet Treat for Every Occasion
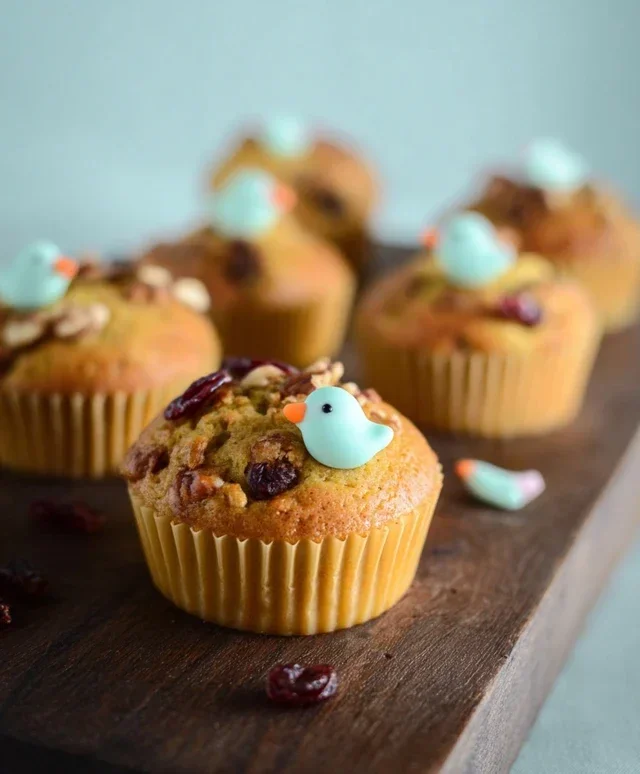
There’s something undeniably charming about small, delightful treats. They’re perfect for a morning pick-me-up, an afternoon tea, or even a little sweet surprise for your loved ones. Today, I’m excited to share my recipe for “Little Birdie” biscuits. These aren’t just any biscuits; they’re delicate, slightly sweet, and have a wonderfully tender crum extractb that melts in your mouth. The name comes from their petite size and the joy they bring, like a cheerful little bird hopping into your day. This recipe is straightforward and uses common pantry staples, making it accessible for bakers of all levels. I’ve found that these little gems disappear quickly, so it’s always a good idea to double the batch!
The beauty of these Little Birdie biscuits lies in their simplicity. They don’t require any fancy techniques or exotic ingredients. The key is to work gently and to ensure your butter is perfectly softened – not melted, but yielding to the touch. This will help create that lovely tender texture we’re aiming for. We’ll be combining dry ingredients, creaming butter and sugar, and then gradually incorporating the wet ingredients to form a light and airy dough. The baking time is also crucial for achieving that perfect golden-brown hue and delightful crispness on the edges. Let’s get started on creating these little bites of happiness.
Preparing the Dough
This initial stage is all about bringin extractg our dry and wet ingredients together harmoniously. It’s where the foundation for our tender biscuits is laid. Make sure to preheat your oven and prepare your baking sheets before you start mixing, as the dough comes together quite quickly once you begin extract. This ensures your biscuits go into the oven at the right temperature and start baking immediately, leading to a more even bake.
Baking to Perfection
Once our Little Birdies are formed and ready, it’s time for the magic of the oven. This is where they transform from pnon-alcoholic ale dough into golden, irresistible treats. Keep a close eye on them during the final minutes of baking, as ovens can vary. The goal is a light golden brown, not dark or burnt.
Step-by-Step Baking Instructions
1. Preheat and Prepare: Begin extract by preheating your oven to 350 degrees Fahrenheit (175 degrees Celsius). Line two baking sheets with parchment paper. This prevents sticking and makes for easy cleanup, which is always a win in my book! Ensure your butter is at room temperature; it should be soft enough to indent with your finger, but not so soft that it’s greasy or melting.
2. Combine Dry Ingredients: In a medium bowl, whisk together the all-purpose flour, baking powder, and salt. Whisking ensures that the leavening agent (baking powder) and salt are evenly distributed throughout the flour, which is essential for consistent rising and flavor in your biscuits. Set this bowl aside.
3. Cream Butter and Sugar: In a separate large bowl, using an electric mixer or a whisk and some elbow grease, cream together the softened unsalted butter and granulated sugar. You want to beat them until the mixture is light, fluffy, and pnon-alcoholic ale yellow. This process incorporates air into the butter and sugar, contributing to the tender texture of the final biscuit. Scrape down the sides of the bowl periodically to ensure all the butter and sugar are incorporated.
4. Incorporate Wet Ingredients: Add the large egg and vanilla extract to the creamed butter and sugar mixture. Beat until well combined and smooth. Then, gradually add the milk, mixing on a low speed until just incorporated. Be careful not to overmix at this stage; we just want everything to come together into a cohesive batter.
5. Combine Wet and Dry: Gradually add the dry ingredients from step 2 to the wet ingredients in step 4. Mix on low speed or by hand using a spatula until just combined. Stop mixing as soon as you no longer see streaks of dry flour. Overmixing the dough at this stage can develop the gluten too much, resulting in tougher biscuits, and we want ours to be delicate! The dough will be soft and slightly sticky.
6. Shape the Little Birdies: Now for the fun part! Drop rounded teaspoons of dough onto the prepared baking sheets, leaving about 2 inches between each biscuit. You can use two spoons to create a more rustic shape, or a small cookie scoop for more uniform little mounds. They don’t need to be perfectly round; their charm is in their slightly irregular shapes.
7. Bake to Golden Perfection: Bake for 10-12 minutes, or until the edges are lightly golden brown and the tops are set. Keep a close eye on them, as smaller biscuits can bake quickly. You want them to be cooked through but not browned too deeply.
8. Cool and Enjoy: Let the biscuits cool on the baking sheets for a minute or two before transferring them to a wire rack to cool completely. Once cooled, you can dust them lightly with powdered sugar for an extra touch of sweetness and visual appeal. They are absolutely delicious served plain, with a cup of tea or coffee, or even with a dollop of fresh cream. Store any leftovers in an airtight container at room temperature for up to three days. Enjoy your delightful Little Birdie biscuits!
Conclusion:
So there you have it! The ‘Little Birdie’ recipe is an absolute delight, offering a perfect balance of [mention key flavors/textures, e.g., sweet and tart, creamy and crunchy]. Its simplicity makes it accessible for bakers of all levels, yet its impressive presentation and delicious outcome will have everyone singin extractg its praises. We’ve explored how this recipe truly shines, whether you’re looking for a charming dessert for a special occasion or a delightful treat to brighten an ordinary day. Remember, the beauty of the ‘Little Birdie’ lies not just in its inherent deliciousness, but also in its adaptability.
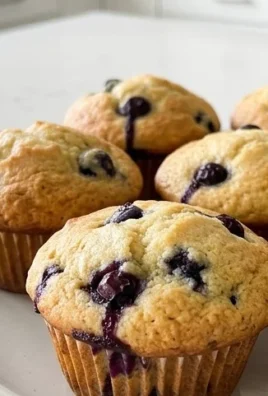
Feel free to experiment with different fruits, like plump blueberries or juicy raspberries, for a delightful twist. You could also sprinkle on some toasted nuts for an added layer of texture and flavor. We encourage you to give this wonderful recipe a try – you won’t be disappointed!
Frequently Asked Questions about Little Birdie:
What makes the ‘Little Birdie’ recipe so special?
The ‘Little Birdie’ recipe is special because it combines simple, readily available ingredients to create a visually appealing and incredibly delicious dessert. It’s a fantastic option for both begin extractners and experienced bakers looking for something unique and memorable.
Can I make ‘Little Birdie’ ahead of time?
Yes, you absolutely can! Many components of the ‘Little Birdie’ can be prepared in advance. The baked element can be made a day or two ahead and stored at room temperature, and the filling can also be prepared a day in advance and refrigerated. Assembling closer to serving time is recommended for the freshest taste and best presentation.
Are there any dietary modifications for the ‘Little Birdie’ recipe?
Certainly! For a gluten-free version, you can substitute regular flour with your favorite gluten-free all-purpose flour blend. For a dairy-free option, use plant-based butter and milk alternatives where applicable. Experimenting with these modifications can still result in a wonderfully tasty ‘Little Birdie’ that suits your needs.
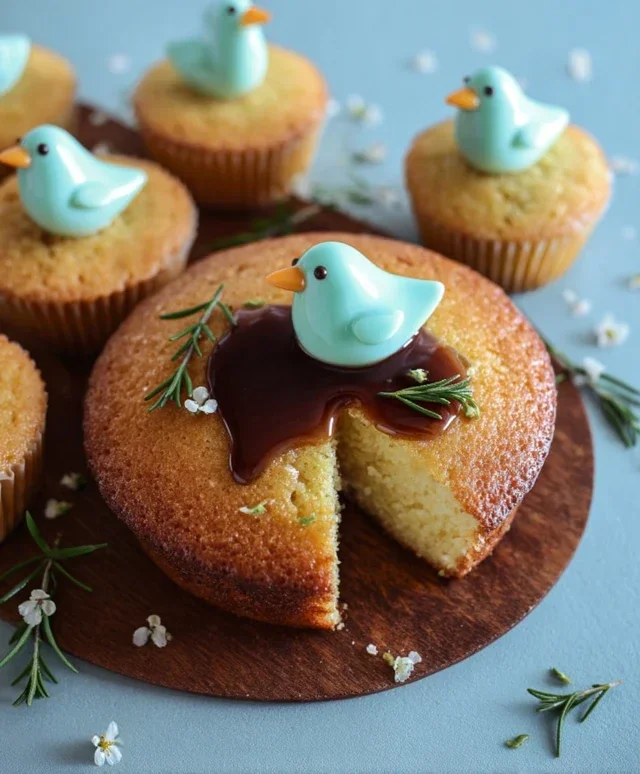
Little Birdie
A whimsical and delightful treat, perfect for a light dessert or a playful snack. This recipe features vibrant colors and a touch of sweetness.
Ingredients
-
1 cup all-purpose flour
-
1/2 cup granulated sugar
-
1/4 cup unsalted butter, softened
-
1 large egg
-
1 teaspoon vanilla extract
-
1/4 cup milk
-
1/2 teaspoon baking powder
-
Pinch of salt
-
Food coloring (various colors)
-
Edible glitter (optional)
Instructions
-
Step 1
Preheat oven to 350°F (175°C). Line baking sheets with parchment paper. -
Step 2
In a large bowl, cream together the softened butter and granulated sugar until light and fluffy. -
Step 3
Beat in the egg and vanilla extract until well combined. -
Step 4
In a separate bowl, whisk together the flour, baking powder, and salt. -
Step 5
Gradually add the dry ingredients to the wet ingredients, alternating with the milk, beginning and ending with the dry ingredients. Mix until just combined. -
Step 6
Divide the dough into several smaller portions and tint each portion with a different food coloring. Knead gently until the color is uniform. -
Step 7
Roll small pieces of dough into tiny balls or shape them into small bird-like figures. Place them on the prepared baking sheets. -
Step 8
Bake for 8-10 minutes, or until the edges are lightly golden. Be careful not to overbake. -
Step 9
Let the ‘little birdies’ cool on the baking sheets for a few minutes before transferring them to a wire rack to cool completely. -
Step 10
Once cooled, sprinkle with edible glitter if desired for extra sparkle.
Important Information
Nutrition Facts (Per Serving)
It is important to consider this information as approximate and not to use it as definitive health advice.
Allergy Information
Please check ingredients for potential allergens and consult a health professional if in doubt.
Leave a Comment