
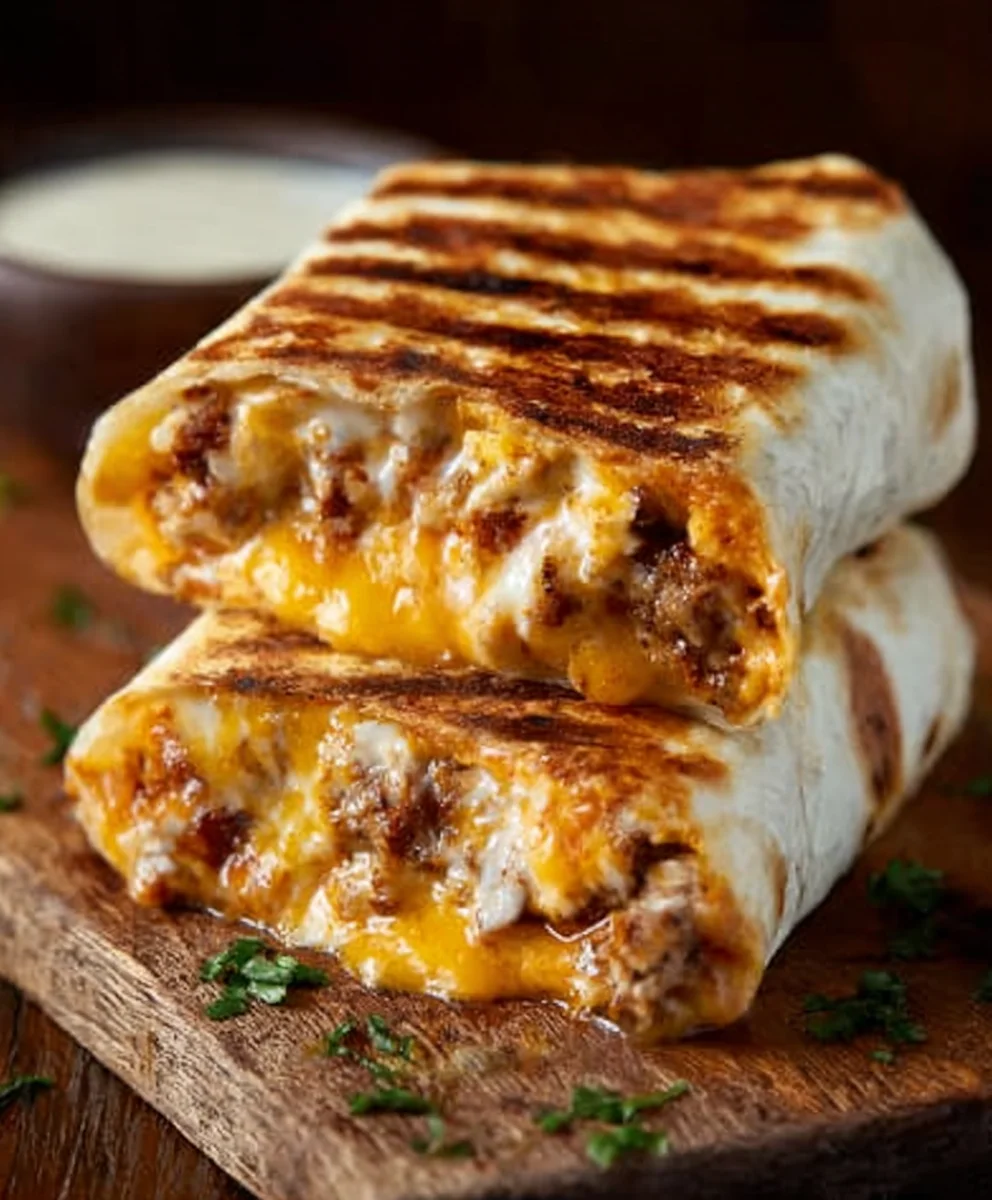
Grilled Cheese Burrito is more than just a meal; it’s a culinary hug, a nostalgic trip back to simpler times with a decidedly grown-up twist. Have you ever craved that gooey, melty, utterly satisfying experience of a perfect grilled cheese sandwich, but also yearned for the substantial, flavor-packed satisfaction of a loaded burrito? Then the Grilled Cheese Burrito is your destiny. It masterfully combines the comforting, golden-brown crust and molten cheese interior that we all adore from a classic grilled cheese, but amplifies it within the warm embrace of a soft tortilla, packed with your favorite savory fillings. What truly sets this creation apart is the ingenious fusion – it’s the best of both worlds, offering a unique textural contrast and an explosion of flavors that will leave you wondering why you hadn’t thought of it sooner. Get ready to experience comfort food elevated to an art form!

Ingredients:
- 1 pound ground beef
- 1 packet taco seasoning (or your favorite homemade blend)
- 1 cup cooked white rice
- 1/2 cup sour cream
- 1/2 cup nacho cheese sauce
- 1/4 cup chipotle sauce
- 1 cup shredded cheddar cheese
- 1 cup shredded mozzarella cheese
- 4 large flour tortillas
- Butter or oil, for grilling
Cooking the Beef and Rice
Brown the Ground Beef
- Begin extract by placing your pound of ground beef into a large skillet over medium-high heat. As the beef starts to cook and sizzle, use a spoon or spatula to break it apart into smaller crum extractbles. Continue to cook, stirring occasionally, until the beef is thoroughly browned and no pink remains. This usually takes about 7-10 minutes. Once it’s fully cooked, carefully drain off any excess grease from the skillet. This step is crucial for a less oily filling and a better final texture for your grilled cheese burrito.
- Now, it’s time to season the beef. Sprinkle the entire packet of taco seasoning evenly over the browned ground beef. Stir well to ensure that every piece of beef is coated with the seasoning. Let the seasoned beef cook for another minute or two, allowing the spices to bloom and release their full flavor. This infuses the meat with that classic taco taste that will be the heart of your burrito.
Combine the Filling Ingredients
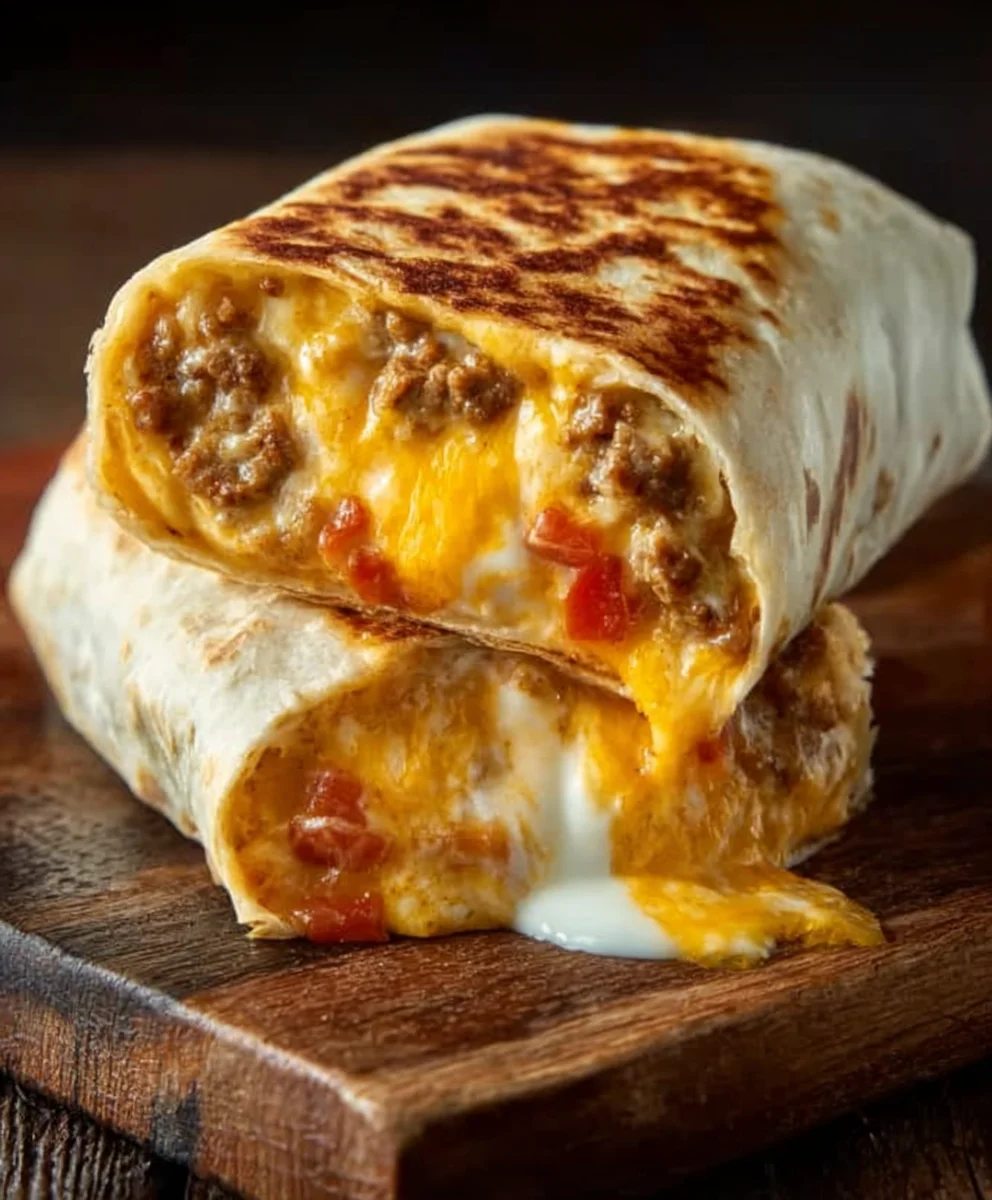
- Once the beef is perfectly seasoned, add the 1 cup of cooked white rice directly into the skillet with the ground beef. Stir everything together gently to combine the rice and meat evenly. The rice will absorb some of the savory flavors from the seasoned beef, making for a more cohesive and delicious filling.
- Next, introduce the creamy elements. Dollop the 1/2 cup of sour cream, 1/2 cup of nacho cheese sauce, and 1/4 cup of chipotle sauce over the beef and rice mixture. Stir everything together until it’s well incorporated and the filling takes on a wonderfully creamy and slightly spicy consistency. The nacho cheese sauce will add a gooey, cheesy element, while the sour cream balances the richness, and the chipotle sauce provides a smoky kick. Taste a small bit of the filling at this point, and if you feel it needs a little more salt or spice, now is the time to adjust.
Assembling and Grilling the Burritos
Prepare the Tortillas and Cheese
- Lay out your four large flour tortillas on a clean, flat surface. Divide the cheesy beef and rice filling as evenly as possible among the four tortillas, spooning it towards the center of each. Don’t overfill them, as this will make rolling difficult and could cause them to burst during grilling. Sprinkle 1/4 cup of the shredded cheddar cheese and 1/4 cup of the shredded mozzarella cheese over the filling on each tortilla. The combination of cheddar and mozzarella offers a fantastic balance of sharp, nutty flavor and melt-in-your-mouth stretchiness.
- Now, it’s time to wrap these delicious creations. Fold in the sides of each tortilla over the filling, then tightly roll up from the bottom, tucking the filling in as you go to create a compact burrito shape. Ensure the seams are on the bottom. This careful rolling technique helps to keep all the delicious ingredients contained within the tortilla.
Grill to Golden Perfection
- Heat a large skillet or griddle over medium heat. Add a tablespoon of butter or oil to the hot surface. Once the butter is melted and shimmering, or the oil is hot, carefully place two of the rolled burritos onto the skillet, seam-side down. Grill for about 3-4 minutes per side, or until the tortillas are golden brown and crispy, and the cheese inside is fully melted and gooey. You’re looking for that signature grilled cheese crispiness on the outside.
- Remove the first batch of grilled cheese burritos from the skillet and set them aside. Add a little more butter or oil to the skillet if needed, and repeat the grilling process with the remaining two burritos. You want a nice, even golden-brown color on all sides, which indicates that the filling is heated through and the cheese has achieved maximum meltiness. This grilling process transforms a simple wrap into a decadent, crispy, and cheesy masterpiece.
Conclusion:
And there you have it – your very own delicious Grilled Cheese Burrito! We’ve walked through each step, from perfectly melting your cheese to wrapping it up into a comforting, handheld delight. This recipe is a fantastic example of taking a beloved classic and giving it an exciting, innovative twist. It’s simple enough for a weeknight meal but special enough to impress guests.
For serving, consider a side of your favorite salsa, a dollop of sour cream, or even some seasoned black beans. The beauty of the Grilled Cheese Burrito is its versatility. Feel free to get creative with your fillings! Add some sautéed onions and peppers, a sprinkle of taco seasoning, or even some leftover shredded chicken for an extra protein boost. Don’t be afraid to experiment with different cheeses too – a sharp cheddar, Monterey Jack, or even a smoky Gouda can elevate your burrito to new heights. We encourage you to make this recipe your own and discover your favorite flavor combinations. Enjoy every cheesy, grilled bite!
Frequently Asked Questions:
What kind of tortilla works best for a Grilled Cheese Burrito?
Flour tortillas are generally best as they are pliable and hold up well when grilled. Larger sizes, around 10-12 inches, will make wrapping much easier and ensure all your delicious fillings are contained.
Can I make the Grilled Cheese Burrito ahead of time?
While it’s best enjoyed fresh for optimal crispness and melted cheese, you can assemble the burrito up to a few hours in advance and refrigerate it. When you’re ready to eat, simply grill it as directed. The exterior might not be quite as crisp as a freshly made one, but it will still be wonderfully warm and satisfying.
Ultimate Grilled Cheese Burrito
An easy and delicious grilled cheese burrito filled with seasoned ground beef, rice, and a creamy, cheesy mixture, grilled to golden perfection.
Ingredients
-
1 pound ground beef
-
1 packet taco seasoning
-
1 cup cooked white rice
-
1/2 cup sour cream
-
1/2 cup nacho cheese sauce
-
1/4 cup chipotle sauce
-
1 cup shredded cheddar cheese
-
1 cup shredded mozzarella cheese
-
4 large flour tortillas
-
Butter or oil, for grilling
Instructions
-
Step 1
Brown 1 pound of ground beef in a skillet over medium-high heat, breaking it apart until thoroughly cooked. Drain excess grease. -
Step 2
Sprinkle 1 packet of taco seasoning over the browned beef and cook for another minute or two until fragrant. -
Step 3
Add 1 cup of cooked white rice to the skillet with the seasoned beef and stir to combine. -
Step 4
Stir in 1/2 cup sour cream, 1/2 cup nacho cheese sauce, and 1/4 cup chipotle sauce until the filling is creamy and well incorporated. -
Step 5
Lay out 4 large flour tortillas. Divide the filling evenly among them, sprinkle with 1/4 cup cheddar cheese and 1/4 cup mozzarella cheese on each. Fold in the sides and tightly roll up the burritos. -
Step 6
Heat a large skillet or griddle over medium heat with butter or oil. Grill 2 burritos at a time, seam-side down, for 3-4 minutes per side until golden brown and crispy, and the cheese is melted. -
Step 7
Remove the first batch and grill the remaining 2 burritos until golden brown and cheesy.
Important Information
Nutrition Facts (Per Serving)
It is important to consider this information as approximate and not to use it as definitive health advice.
Allergy Information
Please check ingredients for potential allergens and consult a health professional if in doubt.

Leave a Comment