
Easy Blueberry Lemon Jam is a delightful way to capture the essence of summer and brighten any breakfast or snack. There’s something truly magical about that vibrant purple hue meeting the zesty tang of lemon, isn’t there? It’s a classic combination for a reason – the sweet, bursting blueberries are perfectly balanced by the bright, citrusy notes of lemon. I love this particular recipe because it’s incredibly straightforward, meaning you can whip up a batch of this sunshine in a jar without needing any fancy equipment or complicated techniques. It’s the perfect way to preserve those peak-season blueberries and enjoy their incredible flavor long after the season has passed. Imagin extracte slathering this glorious Easy Blueberry Lemon Jam on warm toast, swirling it into yogurt, or even using it as a filling for delicate pastries – the possibilities are endless!

Easy Blueberry Lemon Jam
There’s something truly magical about homemade jam. The vibrant color, the burst of fresh fruit flavor, and the comforting knowledge of what went into it – pure goodness! And when it comes to summer berries, blueberries are an absolute superstar. They’re naturally sweet, packed with antioxidants, and their texture transforms beautifully when cooked down.
This Easy Blueberry Lemon Jam is my go-to recipe for a reason. It’s incredibly simple, requiring just a handful of ingredients and minimal fuss. The addition of lemon not only provides a bright, zesty counterpoint to the sweetness of the blueberries but also helps with the setting process. The maple syrup adds a lovely, subtle depth of flavor that complements the fruit without overpowering it. Forget complicated pectin or hours spent stirring – this recipe is designed for busy bees and begin extractner jam-makers alike. It’s perfect for spreading on toast, swirling into yogurt, dolloping onto pancakes, or even as a sweet glaze for baked goods. The aroma that fills your kitchen as it cooks is simply non-intoxicating!
Ingredients:
Cooking Instructions:
This jam comes together in a few simple stages, each bringin extractg us closer to that delightful jar of fruity goodness. I like to have everything prepped before I start cooking to ensure a smooth process. Wash your blueberries thoroughly and spend a moment picking off any stray stems; this makes for a smoother final product. Zesting the lemon first, before you juice it, is a handy trick to get all that fragrant zest. Then, go ahead and juice your lemon. Measure out your maple syrup. Having it all ready to go makes the cooking part a breeze.
Phase 1: Simmering the Berries
1. In a medium-sized, heavy-bottomed saucepan, combine the prepared blueberries, the zest and juice of the lemon, and the maple syrup. A heavy-bottomed pot is crucial here. It distributes heat more evenly, which helps prevent scorching and ensures your jam cooks at a consistent temperature. If you don’t have one, you can use a regular pot, but you’ll need to be extra vigilant about stirring, especially in the begin extractning.
2. Place the saucepan over medium heat. As the berries begin extract to warm up, they will start to release their juices. You’ll notice the mixture becoming more liquid. Stir gently as the berries heat to help them break down and mingle with the lemon and maple syrup. Don’t be alarmed if it looks a bit watery at this stage; that’s exactly what we want. The heat will work its magic to concentrate those flavors.
Phase 2: Thickening and Flavor Development
3. Bring the mixture to a gentle simmer. Once it’s simmering, reduce the heat to medium-low and continue to cook, stirring frequently. This is where the magic happens! The natural pectin in the blueberries will begin extract to activate as they cook, and the liquid will gradually thicken. As you stir, you can gently press some of the berries against the side of the pot with your spoon to help them break down further and create a smoother jam texture. If you prefer a chunkier jam, you can mash fewer berries. Keep an eye on the consistency. You’re looking for it to thicken enough to coat the back of your spoon. This usually takes about 15-20 minutes, but cooking times can vary depending on the water content of your berries and the heat of your stove.
4. As the jam thickens, taste it carefully. Remember, it will thicken even more as it cools. If you find it’s not sweet enough for your liking, you can add a tiny bit more maple syrup, a teaspoon at a time, and let it simmer for another minute or two to incorporate. The lemon flavor should be bright but not overpowering. If you want a more intense lemon taste, you can add a touch more lemon juice, but be mindful of its acidity. The goal is a harmonious balance of sweet blueberry and tart lemon.
Phase 3: Achieving the Perfect Set and Storage
5. To test if your jam is ready, you can perform the “wrinkle test.” Dip a spoon into the jam and lift it out. Let it cool for a few seconds. If the jam starts to form a skin and wrinkles when you push it gently with your finger, it’s likely ready. Alternatively, you can place a small plate in the freezer before you start cooking. When you think the jam might be ready, spoon a little bit onto the chilled plate. Let it cool for a minute. If it wrinkles when you push it, it has reached the setting point. This jam is naturally lower in pectin than commercial jams, so it might not set as firm, which is perfectly fine and often preferred for its spreadability. Once you’re happy with the consistency, remove the saucepan from the heat.
Allow the jam to cool in the pot for about 10-15 minutes before transferring it to clean jars. This helps it cool down gradually and prevents the jars from cracking if they are very hot. Spoon the warm jam into sterilized jars, leaving about 1/2 inch of headspace. Wipe the rims of the jars clean with a damp cloth before sealing them with lids. Once cooled completely, store the jam in the refrigerator. It will keep well for about 2-3 weeks. For longer storage, you can process the jars in a boiling water bath according to standard canning guidelines, though this recipe is primarily intended for refrigerator storage due to its simple preparation. Enjoy your delicious, homemade Easy Blueberry Lemon Jam!

Conclusion:
And there you have it – a delightful and remarkably simple way to capture the vibrant flavors of summer with this Easy Blueberry Lemon Jam! This recipe truly shines because it delivers big on taste without requiring hours in the kitchen or a complicated process. The sweet, bursting blueberries perfectly complement the bright, zesty tang of lemon, creating a symphony of flavors that’s both refreshing and utterly delicious. It’s the perfect way to preserve that beautiful berry season and have a taste of sunshine all year round.
I absolutely encourage you to give this Easy Blueberry Lemon Jam a try. It’s incredibly rewarding to pull a jar of homemade jam from your pantry, and this one is so forgiving, even if you’re new to jam-making. Imagin extracte slathering this luscious jam on warm toast, fluffy scones, or even dolloping it onto yogurt or pancakes. It’s also a fantastic addition to cheeseboards or as a glaze for roasted meats!
Don’t be afraid to experiment! You can easily adjust the lemon zest and juice to your preference, or even add a hint of lavender or a sprig of thyme while cooking for a more sophisticated twist. The possibilities are as endless as the joy of a perfectly ripe blueberry.
Frequently Asked Questions:
Can I use frozen blueberries for this recipe?
Absolutely! Frozen blueberries work wonderfully in this Easy Blueberry Lemon Jam. In fact, they often release their juices more readily, which can help the jam set. Just be sure to use them directly from frozen, without thawing, to achieve the best texture.
How long will this jam last in the refrigerator?
When stored properly in an airtight container in the refrigerator, this delicious jam should stay fresh and flavorful for about 2-3 weeks. If you’re canning it properly using a water bath method, it can last much longer, typically up to a year.
My jam seems a bit thin. What can I do?
Don’t worry if your jam is a little thin initially. As it cools, it will continue to thicken significantly. If, after cooling, it’s still not to your desired consistency, you can return it to the pot over low heat and simmer gently for a little longer, stirring frequently, until it reaches your preferred thickness. Be patient, as overcooking can sometimes lead to a tougher jam.
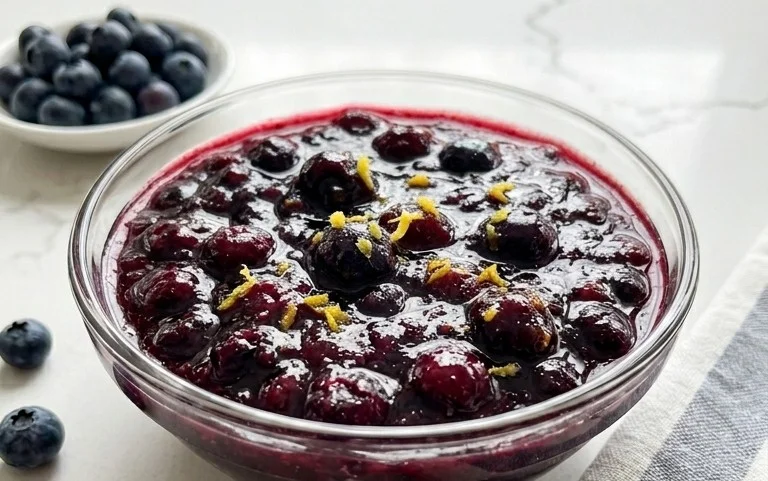
Easy Blueberry Lemon Jam
A simple and delicious homemade blueberry lemon jam perfect for spreading on toast or scones.
Ingredients
-
4 cups blueberries (washed and any stems picked off)
-
zest from one small lemon
-
juice from one small lemon
-
2 tbsp maple syrup
-
1/4 tsp salt
Instructions
-
Step 1
Combine blueberries, lemon zest, lemon juice, and maple syrup in a medium saucepan. -
Step 2
Cook over medium heat, stirring occasionally, until the blueberries begin to break down and release their juices. -
Step 3
Mash some of the blueberries with the back of a spoon to thicken the jam. -
Step 4
Continue to simmer for about 15-20 minutes, or until the jam has thickened to your desired consistency. -
Step 5
Stir in the salt. -
Step 6
Pour the jam into clean jars and let cool completely before serving or storing.
Important Information
Nutrition Facts (Per Serving)
It is important to consider this information as approximate and not to use it as definitive health advice.
Allergy Information
Please check ingredients for potential allergens and consult a health professional if in doubt.

Leave a Comment