
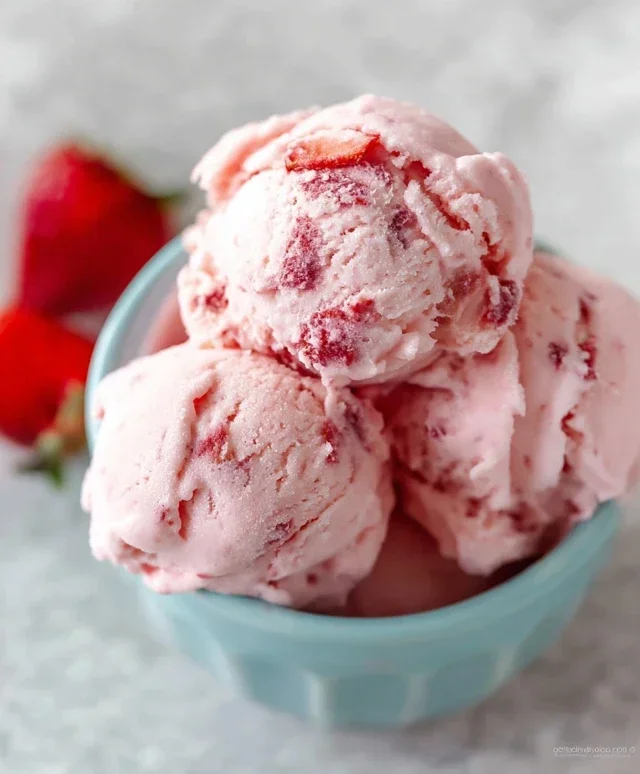
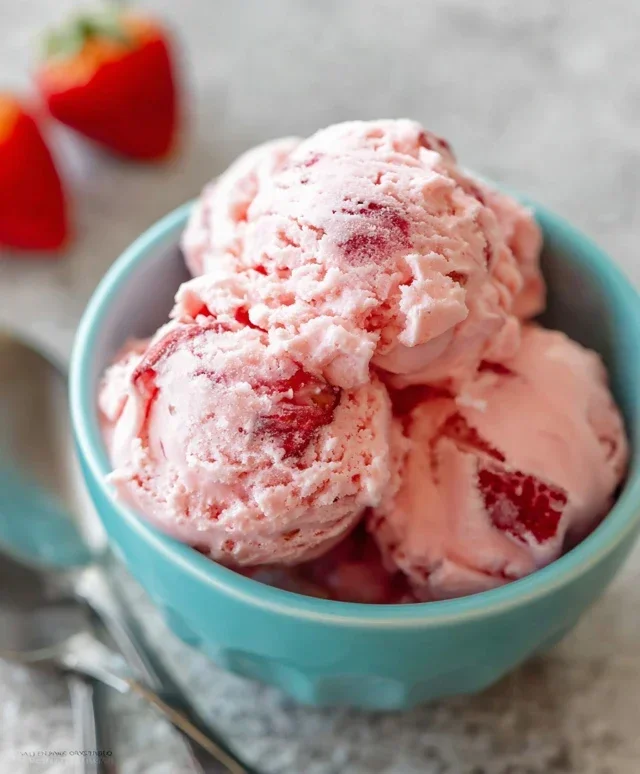
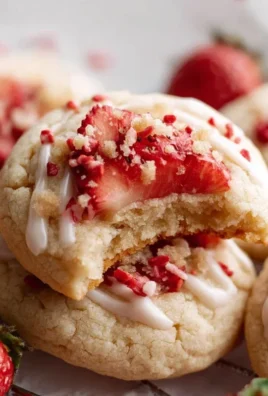
Homemade strawberry ice cream is a summer classic, and for good reason! There’s something undeniably magical about a scoop of creamy, vibrant, and intensely fruity frozen delight. Forget those store-bought versions with artificial flavors and questionable ingredients; our homemade strawberry ice cream recipe is a celebration of pure, unadulterated strawberry bliss. Imagin extracte biting into a spoonful that’s bursting with the sweet tang of ripe strawberries, perfectly balanced by a rich, velvety custard base. This isn’t just dessert; it’s an experience. It’s the taste of sunshine, childhood memories, and pure joy. What makes this homemade strawberry ice cream so special is the incredible depth of flavor you achieve by using fresh, peak-season berries, transforming them into a truly sensational treat that will have everyone asking for seconds. Get ready to discover your new favorite warm-weather indulgence!

Homemade Strawberry Ice Cream
There’s something truly magical about homemade ice cream, and when it comes to classic flavors, nothing beats the vibrant sweetness of fresh strawberries. Forget those store-bought versions that often taste more artificial than fruit-forward. This recipe unlocks the pure essence of summer, transforming simple ingredients into a creamy, dreamy, and utterly delicious strawberry ice cream that will have you reaching for a second scoop (or three!). It’s surprisingly easy to make, and the satisfaction of serving up a bowl of your own creation is unparalleled. So, gather your ingredients, dust off your ice cream maker, and let’s dive into the delightful process of making the best homemade strawberry ice cream you’ve ever tasted.
Ingredients:
Crafting Your Creamy Dream
The journey to perfect strawberry ice cream begin extracts with preparing our star ingredient: the strawberries. A vibrant red hue and sweet aroma are your indicators of ripe, delicious berries. We’ll be transforming these fresh beauties into a luscious purée that will infuse every bite of our ice cream with their delightful flavor.
Step 1: Preparing the Strawberry Base
Begin extract by ensuring your strawberries are thoroughly washed and hulled. Once hulled, dice them into small, manageable pieces. The smaller the pieces, the easier they will be to break down in the food processor. Place the diced strawberries into a food processor or blender. Add the 2 tablespoons of honey, 1/2 cup of granulated sugar, and the 1 teaspoon of lemon juice. The honey adds a lovely subtle depth of flavor and contributes to a smoother texture, while the sugar provides sweetness and helps prevent ice crystals from forming, ensuring that creamy consistency we all love. The lemon juice, a secret weapon in many fruit desserts, brightens the strawberry flavor without making the ice cream taste lemony. It acts as a flavor enhancer, making the natural sweetness of the strawberries pop. Process these ingredients until you achieve a smooth, thick purée. You want a consistency that’s pourable but still has some body. If your strawberries are particularly juicy, you might not need to add any extra liquid. Scrape down the sides of the food processor as needed to ensure all the strawberries are incorporated.
Step 2: Chilling the Strawberry Purée
Once your strawberry purée is beautifully smooth, it’s crucial to chill it thoroughly. Transfer the purée to a bowl or airtight container and place it in the refrigerator for at least 2 hours, or ideally, until it’s completely cold. This chilling step is vital for the ice cream maker to work efficiently. A cold base will freeze faster, resulting in smaller ice crystals and a creamier final product. Rushing this step can lead to a less desirable texture. While the purée is chilling, you can also ensure your ice cream maker’s bowl is frozen according to the manufacturer’s instructions. This is usually done by placing it in the freezer for at least 12-24 hours beforehand.
Step 3: Creating the Ice Cream Base
In a separate medium bowl, combine the 1 cup of heavy whipping cream, 1/2 cup of half and half, and 1 teaspoon of vanilla extract. Whisk these ingredients together until they are well combined and slightly thickened. The heavy whipping cream provides the richness and essential fat content that makes ice cream luxurious and smooth, while the half and half lightens it up slightly, creating a perfect balance. The vanilla extract complements the strawberry flavor without overpowering it, adding another layer of deliciousness. Ensure you don’t over-whisk at this stage; you’re not making whipped cream, just combining the liquids.
Step 4: Combining and Churning the Ice Cream
Once the strawberry purée is thoroughly chilled and your ice cream maker is ready to go, it’s time to bring everything together. Pour the chilled strawberry purée into the bowl of your ice cream maker. Then, gradually add the cream mixture to the strawberry purée in the ice cream maker’s bowl while it is running. Continue to churn the ice cream according to your ice cream maker’s manufacturer instructions. This typically takes about 20-30 minutes. During this time, the mixture will gradually thicken and freeze, taking on the consistency of soft-serve ice cream. Resist the urge to add more sugar or ingredients at this stage; the churn process is designed to incorporate air and freeze the base properly.
Step 5: Freezing for Perfection
After churning, the ice cream will have a lovely soft-serve consistency. At this point, it’s ready to be transferred to a freezer-safe container. Use a spatula to scoop the ice cream into your container, smoothing the top as best you can. For the best texture, it’s recommended to press a piece of parchment paper or plastic wrap directly onto the surface of the ice cream. This helps prevent ice crystals from forming on the surface, contributing to that signature smooth finish. Cover the container tightly with a lid or more plastic wrap. Place the container in the freezer for at least 4-6 hours, or until the ice cream is firm and scoopable. The longer it freezes, the firmer it will become. This final freezing period allows the flavors to meld beautifully and the ice cream to reach its ideal consistency for scooping. Enjoy your delicious homemade strawberry ice cream!
Conclusion:
There you have it – your guide to creating the most delightfully creamy and intensely flavored homemade strawberry ice cream right in your own kitchen! We’ve walked through the simple steps to transform fresh strawberries and a few basic ingredients into a truly irresistible frozen treat. The beauty of this recipe lies in its simplicity and the incredible freshness that store-bought versions just can’t match. You get to control the sweetness and the quality of the ingredients, ensuring a dessert that’s not only delicious but also a little bit healthier.
Serving this glorious ice cream is a joy in itself. It’s perfect on its own, a classic delight for any occasion. For an extra special touch, try topping it with fresh strawberry slices, a drizzle of balsamic glaze for a surprising sweet-tart contrast, or a dollop of whipped cream. Don’t be afraid to get creative with variations! Add a handful of fresh basil for a uniquely refreshing twist, or swirl in some dark chocolate chips for a delightful textural and flavor combination. I truly encourage you to give this recipe a try; the satisfaction of enjoying your own homemade strawberry ice cream is incredibly rewarding.
Frequently Asked Questions:
Can I make this strawberry ice cream without an ice cream maker?
Absolutely! While an ice cream maker makes the process smoother, you can achieve a great result without one. Prepare the base as directed, chill it thoroughly, and then pour it into a freezer-safe container. Every 30-45 minutes for the first 3-4 hours, remove the container from the freezer and vigorously stir the mixture with a fork or whisk, breaking up any ice crystals. This manual churning will help create a creamier texture.
My ice cream is too icy. What did I do wrong?
An icy texture often results from not enough fat or sugar, or from the ice crystals not being broken down sufficiently. Ensure you’re using full-fat dairy for the creamiest result. If you didn’t use an ice cream maker, make sure you are stirring frequently as described above. Properly chilling the base before churning also helps minimize ice crystal formation.
Can I use frozen strawberries instead of fresh?
Yes, you can use frozen strawberries! Thaw them completely and drain off any excess liquid before pureeing them. Keep in mind that the water content in frozen strawberries might be slightly higher, so you may end up with a slightly less intense strawberry flavor unless you reduce the puree slightly on the stovetop before adding it to the base.
Homemade Strawberry Ice Cream
A simple and delicious homemade strawberry ice cream recipe using fresh strawberries and common dairy ingredients. No ice cream maker required!
Ingredients
-
1 1/2 cups strawberries, hulled and diced
-
2 Tbsp honey
-
1/2 cup granulated sugar
-
1 tsp lemon juice
-
1 cup heavy whipping cream
-
1/2 cup half and half
-
1 tsp vanilla extract
Instructions
-
Step 1
In a bowl, combine the diced strawberries, honey, granulated sugar, and lemon juice. Stir well and let sit for about 10 minutes to allow the strawberries to macerate. -
Step 2
Lightly mash the strawberries with a fork or potato masher to release their juices, but leave some chunks for texture. -
Step 3
In a separate large bowl, whip the heavy whipping cream with an electric mixer until stiff peaks form. -
Step 4
Gently fold the half and half and vanilla extract into the whipped cream. -
Step 5
Add the macerated strawberry mixture to the whipped cream mixture and gently fold until just combined, creating swirls of strawberry. -
Step 6
Pour the mixture into a freezer-safe container, cover tightly, and freeze for at least 6-8 hours, or until firm. Stir every few hours for the first 2-3 hours to break up ice crystals.
Important Information
Nutrition Facts (Per Serving)
It is important to consider this information as approximate and not to use it as definitive health advice.
Allergy Information
Please check ingredients for potential allergens and consult a health professional if in doubt.
Leave a Comment