
Sandwich Rolls -No Knead -2 Hours – this is not just a recipe, it’s a culinary revelation for anyone who craves freshly baked, impossibly soft bread without the fuss. Imagin extracte this: the aroma of warm, yeasty goodness wafting through your kitchen, the promise of pillowy-soft interior and a delicately crisp crust, all achievable in just a couple of hours, and requiring absolutely no intensive kneading. What is it about these simple sandwich rolls that captures hearts and satisfies cravings? It’s the perfect marriage of convenience and deliciousness. They are universally loved because they are the ultimate blank canvas for your favorite fillings, transforming a humble sandwich into something truly special. Whether you’re packing lunches, hosting a brunch, or simpgin extractindulging in a moment of pure comfort food, these no-knead sandwich rolls deliver. The magic lies in a minimal-ingredient dough that does all the work for you, allowing time and yeast to create a wonderful texture. Get ready to elevate your sandwich game and experience the joy of homemade bread made effortlessly.

Ingredients:
- 4 1/2 cups (600g) bread flour (all-purpose flour or white flour can also be used)
- 1 3/4 cups (420-450ml) warm water (around 95-104 degrees Fahrenheit / 35-40 degrees Celsius)
- 2 tablespoons instant or quick-acting yeast
- 1 tablespoon granulated sugar
- 2 teaspoons salt
Mixing the Dough
The beauty of these sandwich rolls lies in their simplicity, especially the no-knead aspect. We’re going to start by combining our dry ingredients in a large mixing bowl. This is where the base of our delicious rolls will form. Measure out your 4 1/2 cups (600g) of bread flour. Bread flour is excellent here because its higher protein content develops gluten wonderfully, giving the rolls a nice structure and chew. If you don’t have bread flour, all-purpose or white flour will work perfectly fine, though the texture might be slightly softer.
Next, add your dry yeast. I recommend using instant or quick-acting yeast as it dissolves easily and doesn’t require proofing separately. Sprinkle in the 2 tablespoons of instant yeast. Now, let’s add the sugar. The tablespoon of sugar acts as food for the yeast, helping it to activate and produce those lovely bubbles that will make our rolls light and airy. Finally, stir in the 2 teaspoons of salt. Salt not only adds flavor but also controls the yeast activity, ensuring a slow, even rise. Give all these dry ingredients a good whisk together to distribute everything evenly.
Now, for the wet ingredient: warm water. We need about 1 3/4 cups (420-450ml) of warm water. The ideal temperature is between 95-104 degrees Fahrenheit (35-40 degrees Celsius). Too hot and you’ll kill the yeast, too cold and it won’t activate properly. You can test this by dipping your finger in; it should feel comfortably warm, not hot. Gradually pour the warm water into the bowl with the dry ingredients.
As you add the water, start mixing with a sturdy spoon or a spatula. You’ll notice the mixture will start to come together into a shaggy, somewhat sticky dough. Don’t worry about achieving a smooth ball of dough at this stage – that’s the magic of no-knead! Our goal here is just to ensure all the flour is hydrated. Keep mixing until there are no dry pockets of flour visible. The dough will look quite wet and unmanageable, and that’s exactly what we want. It’s a high-hydration dough, which is key to its tender crum extractb.
First Rise (Bulk Fermentation)
Once you have a shaggy, cohesive dough, cover the bowl tightly with plastic wrap or a damp kitchen towel. This prevents the dough from drying out as it rises. Find a warm, draft-free spot in your kitchen. This could be on top of your refrigerator, near a slightly warmed (but not hot) oven, or simply on your counter if your kitchen is generally warm.
We need to let this dough rise for about 1 to 1.5 hours, or until it has at least doubled in size. During this time, the yeast will be actively working, creating gases that expand the dough and developing flavor. The longer and slower the fermentation, the more complex the flavor will be. You’ll see bubbles forming on the surface of the dough, which is a good sign that fermentation is happening. Resist the urge to peek too often; give it the time it needs to do its work.
Shaping the Rolls
After the first rise, gently uncover the dough. It will look beautifully puffy and airy. Now, we’re going to shape our sandwich rolls. Lightly flour a clean work surface. It’s important not to add too much flour here, as we want to maintain the hydration of the dough.
Gently scrape the dough out of the bowl onto your floured surface. The dough will be quite wet and sticky, so you can use a bench scraper or a lightly floured hand to help you manage it. We’re aiming for about 8 to 10 rolls, depending on the size you desire for your sandwiches. For each roll, you’ll want to gently shape it. You can do this by dividing the dough into equal portions. A simple way to shape is to take a portion of dough, gently flatten it into a rough circle or oval, and then fold the edges towards the center, pinching them together to create a smooth top surface. Then, gently roll the shaped dough back and forth between your palms to create a neat, round or oval shape. Try to be gentle to avoid deflating all those lovely air bubbles that have formed.
Arrange the shaped rolls on a baking sheet lined with parchment paper. Leave about 2-3 inches of space between each roll, as they will expand further during their second rise. You can make them slightly oval or round, whatever you prefer for your sandwich base.
Second Rise (Proofing)
Once your rolls are shaped and on the baking sheet, it’s time for their second rise, also known as proofing. Cover the baking sheet loosely with plastic wrap or a clean kitchen towel. Again, find a warm spot for them to rise. This second rise is crucial for the final texture and appearance of the rolls.
Let the rolls proof for about 30-45 minutes, or until they look noticeably puffy and have almost doubled in size again. They should look light and airy, and when you gently poke one, the indentation should slowly spring back. If it springs back immediately, it needs a little more time. If it stays indented, it might have proofed a bit too long, but they will still be delicious.
Baking the Sandwich Rolls
Preheat your oven to 400 degrees Fahrenheit (200 degrees Celsius) during the last 15-20 minutes of the second rise. This ensures your oven is hot and ready to bake the rolls to perfection.
Once the rolls have finished their final rise and the oven is preheated, you can optionally brush them with a little water or an egg wash for a shiny crust. I find a light mist of water works beautifully. Then, carefully place the baking sheet into the preheated oven.
Bake for approximately 15-20 minutes, or until the rolls are a deep golden brown and sound hollow when tapped on the bottom. The exact baking time will depend on your oven and the size of your rolls. Keep an eye on them to prevent them from over-browning.
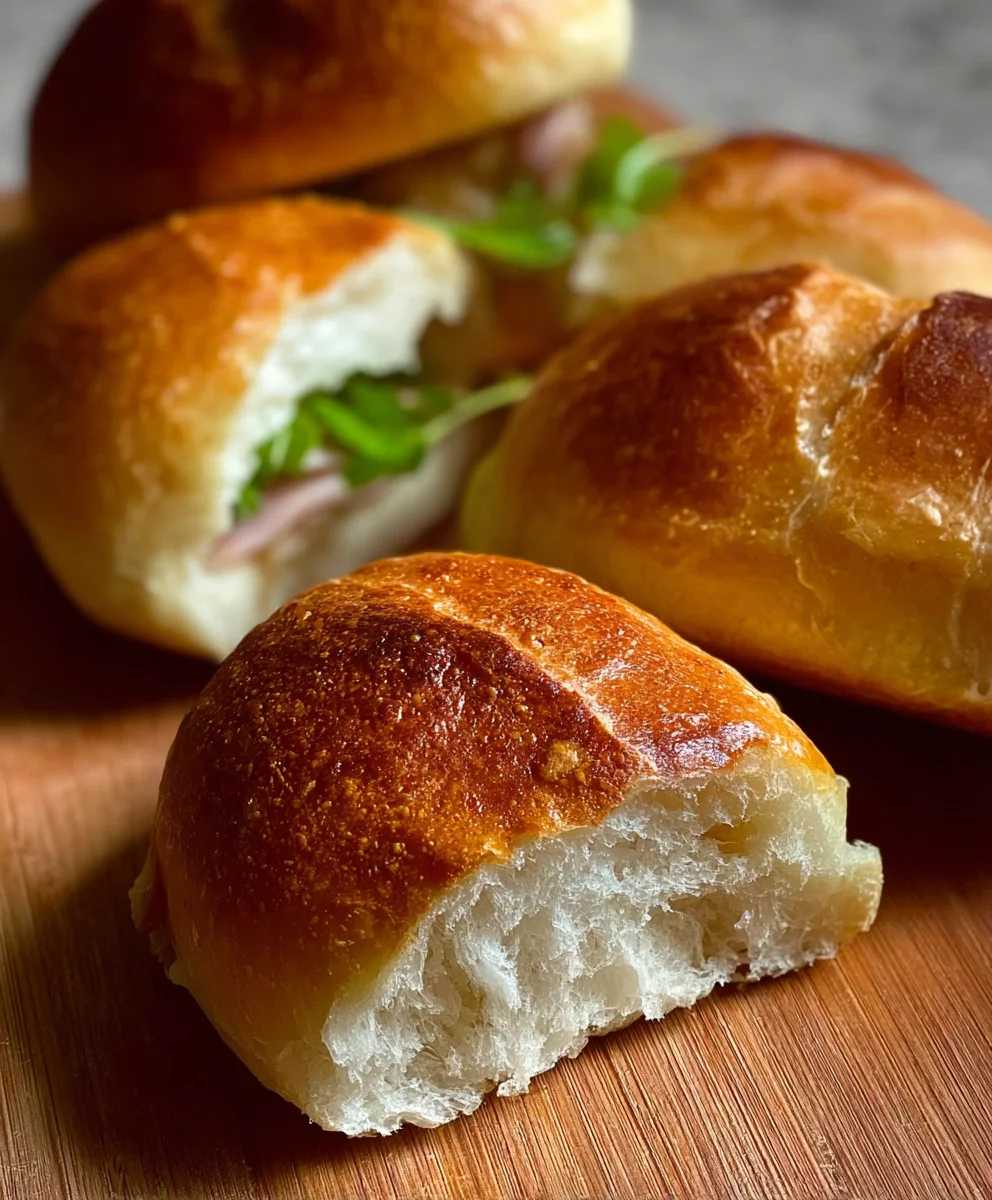
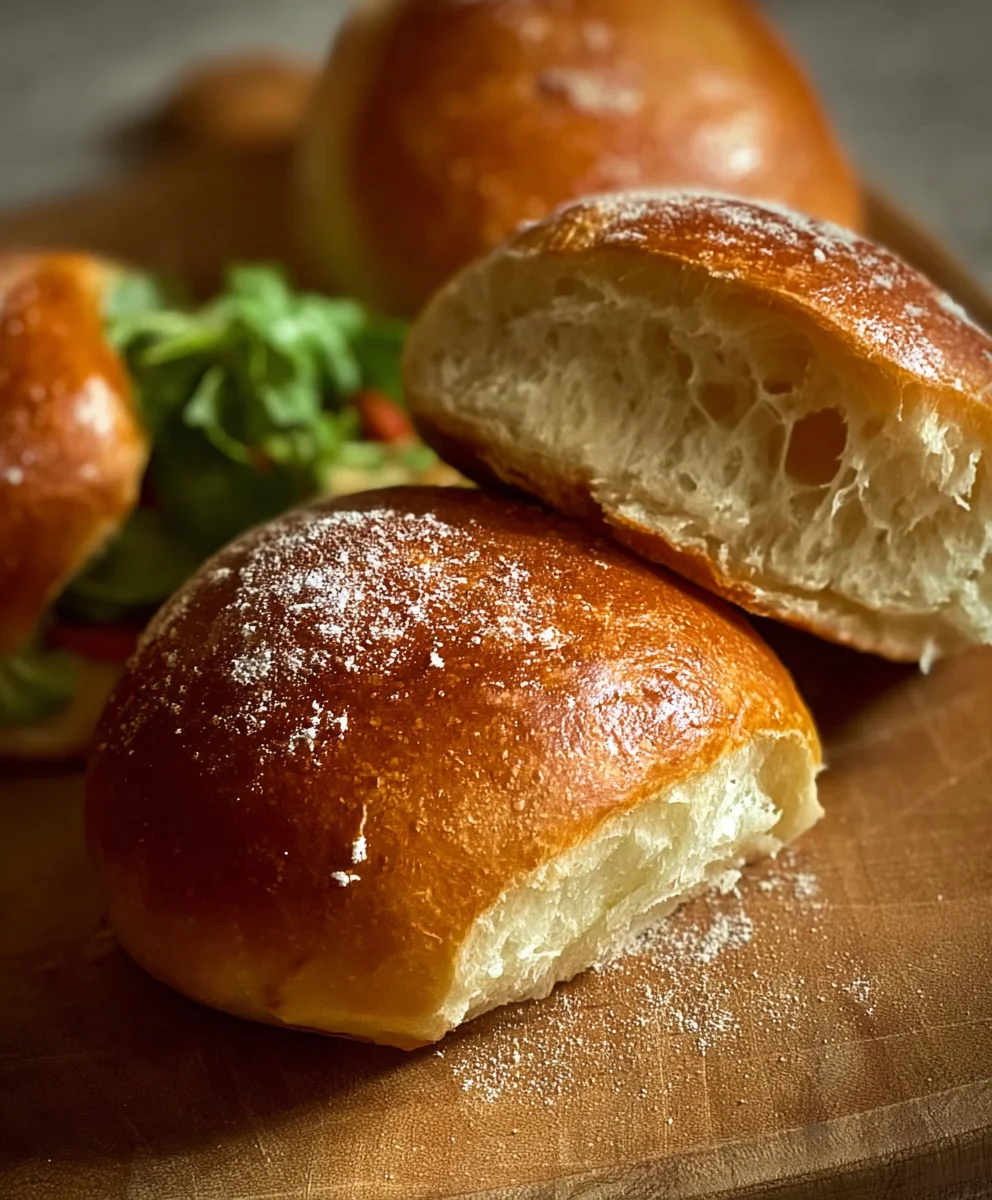
When they are done, remove them from the oven and transfer them immediately to a wire rack to cool completely. This prevents the bottoms from becoming soggy from residual steam. Allow them to cool for at least 30 minutes before slicing and using them for your sandwiches. These rolls are best enjoyed fresh, within a day or two of baking.
Conclusion:
There you have it – the easiest way to create delicious, airy Sandwich Rolls – No Knead – 2 Hours right in your own kitchen! This recipe truly lives up to its name, delivering fantastic results with minimal effort. The beauty of these rolls lies in their simplicity; the no-knead method allows the dough to develop its gluten structure naturally, resulting in a wonderfully tender crum extractb. I’m so excited for you to try them and experience the satisfaction of homemade bread without the fuss.
These versatile Sandwich Rolls – No Knead – 2 Hours are perfect for a variety of fillings. Serve them warm with your favorite deli meats and cheeses for a classic sandwich, or get creative with vegetarian options like roasted vegetables and hummus. They also make an excellent accompaniment to soups and stews. Don’t be afraid to experiment! You can brush them with melted butter and sprinkle with herbs before baking for an extra layer of flavor, or even add a pinch of garlic powder to the dough itself for a savory twist.
I truly hope you enjoy making and devouring these wonderful rolls. Happy baking!
Frequently Asked Questions:
Q: Can I make the dough for the Sandwich Rolls – No Knead – 2 Hours ahead of time?
A: Yes, you absolutely can! The dough can be refrigerated for up to 24 hours after its initial rise. Just allow it to come to room temperature for about 30-60 minutes before shaping and baking as directed.
Q: My Sandwich Rolls – No Knead – 2 Hours didn’t rise as much as I expected. What could be the reason?
A: Several factors can affect rise. Ensure your yeast was fresh and active (you can test this by dissolving it in warm water with a pinch of sugar – it should foam). Also, check the ambient temperature of your kitchen; a warmer environment generally encourages better rising. Make sure not to overwork the dough when shaping, as this can deflate the air pockets.
Easy No Knead Sandwich Rolls
Delicious and incredibly easy no-knead sandwich rolls that are perfect for any meal. Made with simple ingredients and minimal effort.
Ingredients
-
4 1/2 cups (600g) bread flour (all-purpose flour or white flour can also be used)
-
1 3/4 cups (420-450ml) warm water (around 95-104 degrees Fahrenheit / 35-40 degrees Celsius)
-
2 tablespoons instant or quick-acting yeast
-
1 tablespoon granulated sugar
-
2 teaspoons salt
Instructions
-
Step 1
Combine dry ingredients: In a large mixing bowl, whisk together bread flour, instant yeast, granulated sugar, and salt until evenly distributed. -
Step 2
Add warm water and mix: Gradually pour the warm water into the dry ingredients while mixing with a sturdy spoon or spatula until a shaggy, sticky dough forms with no dry pockets of flour. -
Step 3
First rise (bulk fermentation): Cover the bowl tightly with plastic wrap or a damp kitchen towel and let it rise in a warm, draft-free spot for 1 to 1.5 hours, or until doubled in size. -
Step 4
Shape the rolls: Lightly flour a clean work surface. Gently scrape the dough out and divide it into 8-10 equal portions. Gently shape each portion into a smooth ball or oval and arrange them on a parchment-lined baking sheet, leaving 2-3 inches between each roll. -
Step 5
Second rise (proofing): Loosely cover the baking sheet with plastic wrap or a clean kitchen towel and let the rolls proof in a warm spot for 30-45 minutes, or until noticeably puffy and nearly doubled in size. -
Step 6
Bake the rolls: Preheat your oven to 400 degrees Fahrenheit (200 degrees Celsius). Optionally brush the rolls with water. Bake for 15-20 minutes, or until deep golden brown and sound hollow when tapped on the bottom. -
Step 7
Cool completely: Remove the rolls from the oven and transfer them to a wire rack to cool completely before slicing and using.
Important Information
Nutrition Facts (Per Serving)
It is important to consider this information as approximate and not to use it as definitive health advice.
Allergy Information
Please check ingredients for potential allergens and consult a health professional if in doubt.


Leave a Comment