
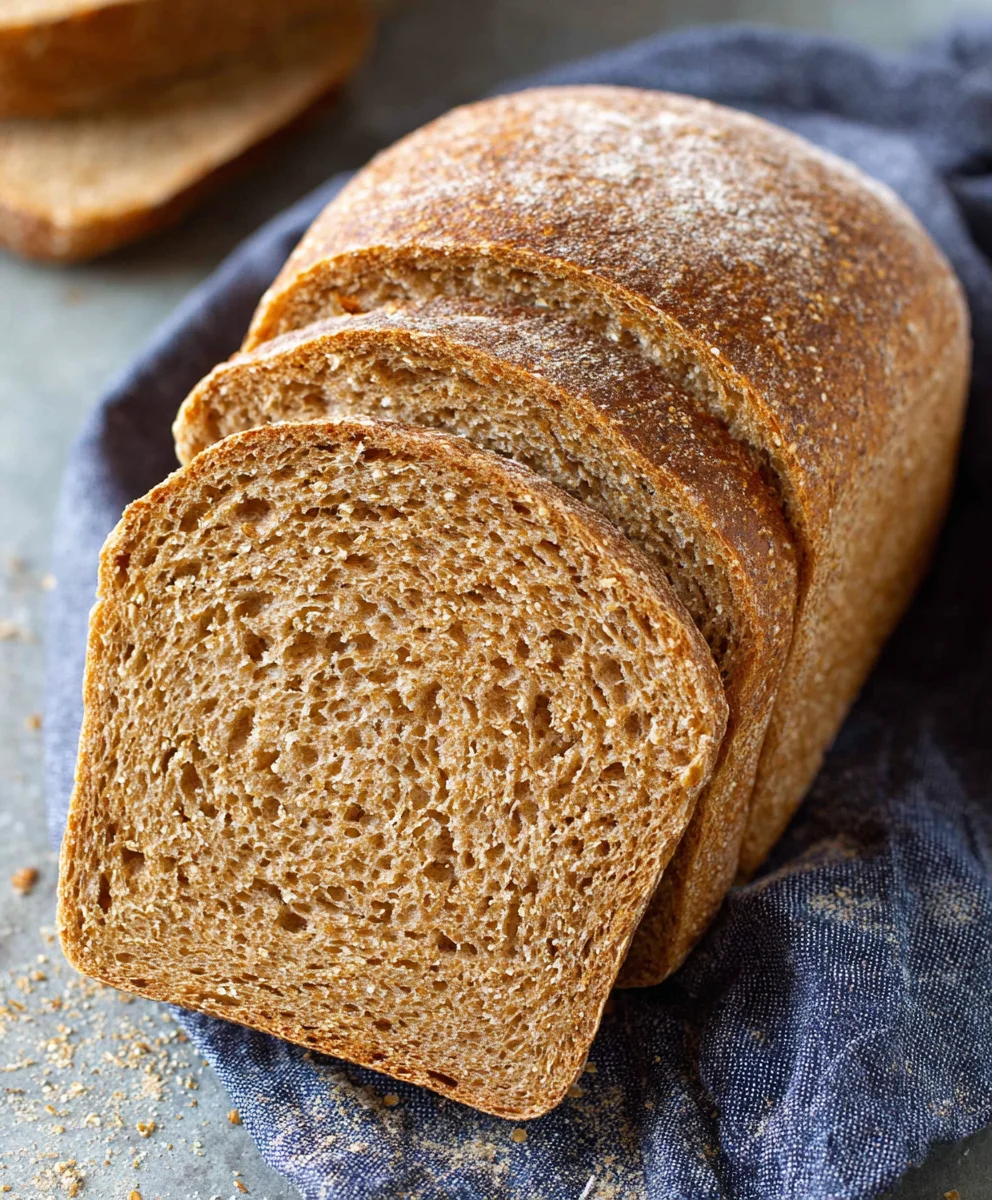
Whole Wheat Bread is more than just a staple in my kitchen; it’s a comforting aroma that fills my home and a delicious foundation for countless meals. There’s something incredibly satisfying about the hearty, slightly nutty flavor and the wonderfully chewy texture that only a good loaf of Whole Wheat Bread can deliver. It’s a beloved classic for so many reasons. For starters, it’s packed with nutrients, offering a healthier alternative to its white flour counterpart, making it a go-to for those mindful of their diet. But beyond its nutritional benefits, the true magic lies in its versatility. From thick slices toasted with butter and honey to a sturdy base for your favorite sandwiches, this bread truly shines. What makes this particular recipe special is its simplicity and the incredible depth of flavor you achieve, proving that homemade Whole Wheat Bread is an achievable and rewarding culinary adventure for everyone.

Ingredients:
- 1 cup water, lukewarm
- ¼ cup milk, lukewarm
- 3 tablespoons honey
- 2 ¼ teaspoons active dry yeast (or instant yeast, 1 packet)
- 3 cups (339 grams) whole wheat flour, plus more for dusting
- 1 ½ teaspoons salt
- 3 tablespoons unsalted butter, cut into 6 small pieces and softened
Preparing the Dough
Activating the Yeast
To begin extract this delightful journey of creating your own wholesome Whole Wheat Bread, we first need to awaken our yeast. In a medium-sized bowl or the bowl of your stand mixer, combine the lukewarm water and lukewarm milk. The temperature of the liquid is crucial here; it should feel comfortably warm to the touch, around 105-115°F (40-46°C). Too hot and you’ll kill the yeast, too cold and it won’t activate properly. Stir in the honey until it dissolves completely. This honey not only adds a subtle sweetness to our bread but also serves as food for the yeast, helping it to bloom. Sprinkle the active dry yeast over the surface of the liquid. If you’re using active dry yeast, let it sit undisturbed for about 5-10 minutes. You’ll notigin extractit begin to foam and become frothy – this is a sign that your yeast is alive and ready to work its magic! If using instant yeast, you can skip the proofing step and add it directly to the dry ingredients later.
Mixing the Dry Ingredients
While our yeast is getting happy, let’s prepare the dry ingredients for our Whole Wheat Bread. In a large bowl, or directly in the bowl of your stand mixer if you’re using one, whisk together the 3 cups of whole wheat flour and the 1 ½ teaspoons of salt. Whisking ensures that the salt is evenly distributed throughout the flour, which is important for both flavor and controlling the yeast activity. If you are using instant yeast, you can add it to this dry mixture now and give it a quick whisk to combine.
Combining Wet and Dry Ingredients
Once your yeast has bloomed into a foamy, bubbly mixture, gently pour it into the bowl with the dry ingredients. If you used a separate bowl for activating the yeast, make sure to scrape all of that frothy goodness into the main mixing bowl. Now, add the softened butter pieces. The butter will contribute to the tenderness and richness of the final loaf of Whole Wheat Bread.
Kneading the Dough
Initial Mixing and Dough Formation
Using a wooden spoon or a dough hook attachment on yourgin extractand mixer, begin to mix the ingredients together. Stir until a shaggy dough starts to form. It might seem a little sticky and unappealing at this stage, but don’t worry, that’s perfectly normal for whole wheat dough. If you are mixing by hand, keep stirringgin extracttil the dough just begins to pull away from the sides of the bowl. If you are using a stand mixer, continue to mix on a low speed.
The Kneading Process
Now comes the essential step of kneading, which develops the gluten in the flour, giving our Whole Wheat Bread its structure and chew. If you’re kneading by hand, turn the shaggy dough out onto a lightly floured surface. You can use a little bit of that extra whole wheat flour for dusting, but try not to add too much, as this can make the bread dense. Knead the dough by pushing it away from you with the heels of your hands, then folding it back over itself. Rotate the dough a quarter turn and repeat. Continue this process for about 8-10 minutes. The dough will gradually become smoother, more elastic, and less sticky. It should spring back slowly when you gently poke it with your finger. If you’re using a stand mixer, switch to the dough hook attachment and knead on medium-low speed for about 6-8 minutes. The dough should clear the sides of the bowl and become smooth and elastic.
First Rise (Bulk Fermentation)
Preparing for the Rise
Once your dough has been kneaded to perfection, it’s time to let it rest and rise. Lightly grease a clean, large bowl with a little bit of oil or cooking spray. Place the kneaded dough into the greased bowl, turning it once to coat all sides with the oil. This prevents the dough from drying out as it rises. Cover the bowl tightly with plastic wrap or a clean kitchen towel.
The Waiting Game
Find a warm, draft-free spot for your dough to rise. This could be in a slightly warm oven (turned off, of course!), on top of your refrigerator, or simply in a warm corner of your kitchen. Allow the dough to rise for approximately 1 to 1 ½ hours, or until it has doubled in size. The exact time will depend on the warmth of your environment. You’ll know it’s ready when it looks puffy and full of air. Resist the urge to poke it too much – let it do its work!
Shaping and Second Rise
Deflating and Shaping
Once your dough has doubled in size, gently punch it down to release the trapped air. This process is called degassing. Turn the dough out onto a lightly floured surface. For a standard loaf pan, shape the dough into a neat rectangle, roughly the length of your pan. Then, tightly roll up the rectangle, starting from one of the shorter ends, pinching the seam closed. Tuck the ends under to create a smooth, taut surface.
Preparing for Baking
Grease a 9×5 inch loaf pan with butter or cooking spray, or line it with parchment paper. Carefully place the shaped dough seam-side down into the prepared loaf pan. You can give the dough a gentle pat to ensure it’s evenly distributed within the pan.
Second Rise
Cover the loaf pan loosely with plastic wrap or a clean kitchen towel. Place it back in a warm spot to rise for a second time. This rise is typically shorter than the first, about 30-45 minutes, or until the dough has risen just above the rim of the pan. Again, be patient; this second rise is crucial for a light and airy texture in your Whole Wheat Bread. While the dough is on its second rise, preheat your oven to 375°F (190°C). This ensures the oven is at the correct temperature when your bread is ready to bake.
Conclusion:
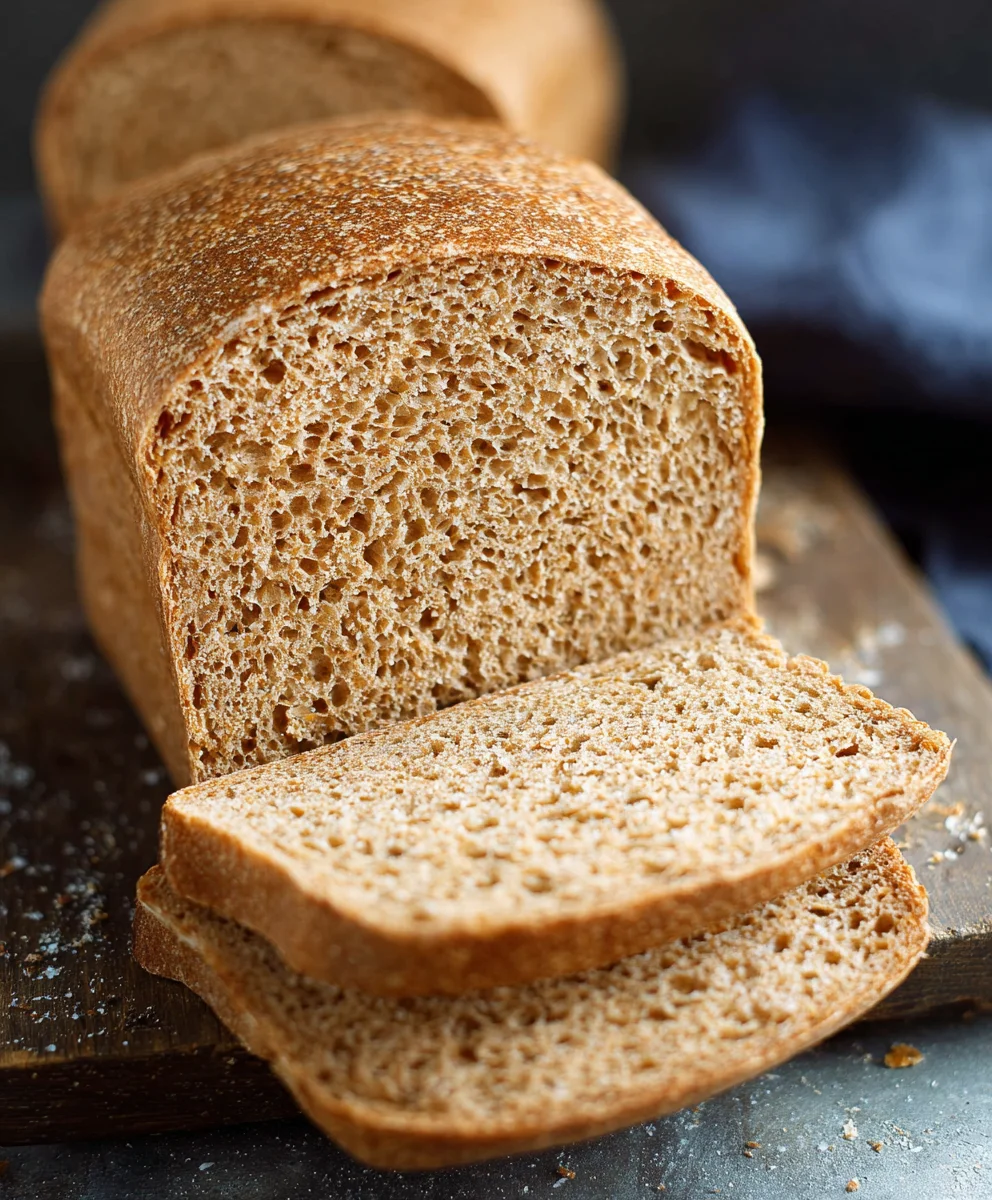
I hope you’ve enjoyed learning how to bake this delicious Whole Wheat Bread! This recipe provides a fantastic foundation for a healthy and satisfying loaf. Its slightly nutty flavor and hearty texture make it perfect for any meal. Whether you’re a seasoned baker or just starting out, this Whole Wheat Bread is incredibly rewarding to make and even more enjoyable to eat. Don’t be afraid to experiment with the recipe – it’s designed to be adaptable!
For serving, this Whole Wheat Bread is incredibly versatile. It’s wonderful toasted and spread with butter or your favorite jam for breakfast. It also makes the most amazing sandwiches, holding up beautifully to all sorts of fillings. Try it with a hearty soup or stew for a comforting dinner. For variations, consider adding seeds like sunflower or pumpkin seeds to the dough for extra crunch and nutrients. You could also incorporate a touch of honey or maple syrup for a subtle sweetness, or even some dried herbs like rosemary for an aromatic twist. Most importantly, have fun with it and enjoy the process!
Frequently Asked Questions:
Q: My Whole Wheat Bread came out a bit dense. What could I have done wrong?
A: Density in Whole Wheat Bread can sometimes be due to a few factors. Ensure you’re measuring your flour accurately, as too much can weigh down the dough. Also, proper kneading is crucial to develop gluten, which gives the bread its structure. Make sure you’ve allowed sufficient rising time, especially in a warmer environment, as whole wheat dough can sometimes take a little longer to proof than white bread dough. Over-mixing after the first rise can also contribute to a denser loaf.
Q: Can I make this Whole Wheat Bread recipe with other types of flour?
A: While this recipe is specifically designed for whole wheat flour, you can experiment with substituting some of the whole wheat with all-purpose flour. A common ratio to start with is 50/50. Substituting all of the whole wheat with all-purpose flour will result in a different texture and flavor profile, closer to a standard white bread. If you are completely new to baking, it’s best to start with the origin extractal recipe as written to understand the dough’s behavior.
Simple Whole Wheat Bread – Delicious & Healthy Homemade
A straightforward recipe for making delicious and healthy homemade whole wheat bread, perfect for beginners.
Ingredients
-
1 cup water, lukewarm
-
1/4 cup milk, lukewarm
-
3 tablespoons honey
-
2 1/4 teaspoons active dry yeast
-
3 cups whole wheat flour
-
1 1/2 teaspoons salt
-
3 tablespoons unsalted butter, softened
Instructions
-
Step 1
Activate the yeast: In a medium bowl, combine lukewarm water and milk. Stir in honey until dissolved. Sprinkle yeast over the top and let sit for 5-10 minutes until foamy. If using instant yeast, add directly to dry ingredients later. -
Step 2
Mix dry ingredients: In a large bowl, whisk together whole wheat flour and salt. If using instant yeast, add it here. -
Step 3
Combine wet and dry ingredients: Pour the activated yeast mixture into the dry ingredients. Add softened butter pieces. Mix until a shaggy dough forms. -
Step 4
Knead the dough: On a lightly floured surface, knead by hand for 8-10 minutes until smooth and elastic, or use a stand mixer with a dough hook for 6-8 minutes. The dough should spring back slowly when poked. -
Step 5
First rise: Place dough in a lightly greased bowl, cover, and let rise in a warm place for 1-1.5 hours, or until doubled in size. -
Step 6
Shape the dough: Gently punch down the dough, shape into a rectangle, and roll tightly into a loaf. Pinch seams closed and tuck ends. -
Step 7
Second rise: Place shaped dough seam-side down in a greased 9×5 inch loaf pan. Cover loosely and let rise for 30-45 minutes, until just above the rim. Preheat oven to 375°F (190°C) during this time. -
Step 8
Bake: Bake for 30-35 minutes, or until golden brown and sounds hollow when tapped.
Important Information
Nutrition Facts (Per Serving)
It is important to consider this information as approximate and not to use it as definitive health advice.
Allergy Information
Please check ingredients for potential allergens and consult a health professional if in doubt.


Leave a Comment