
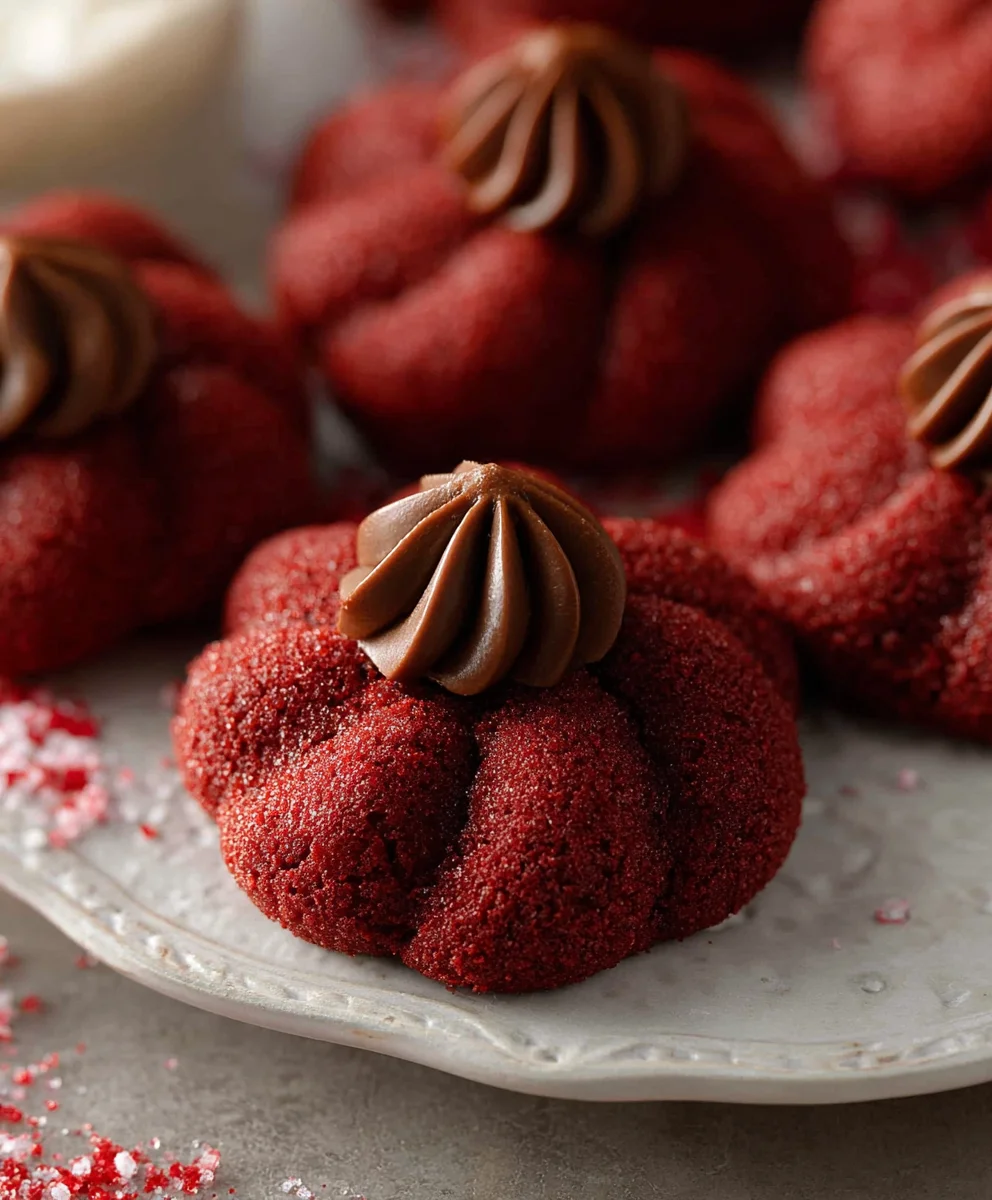
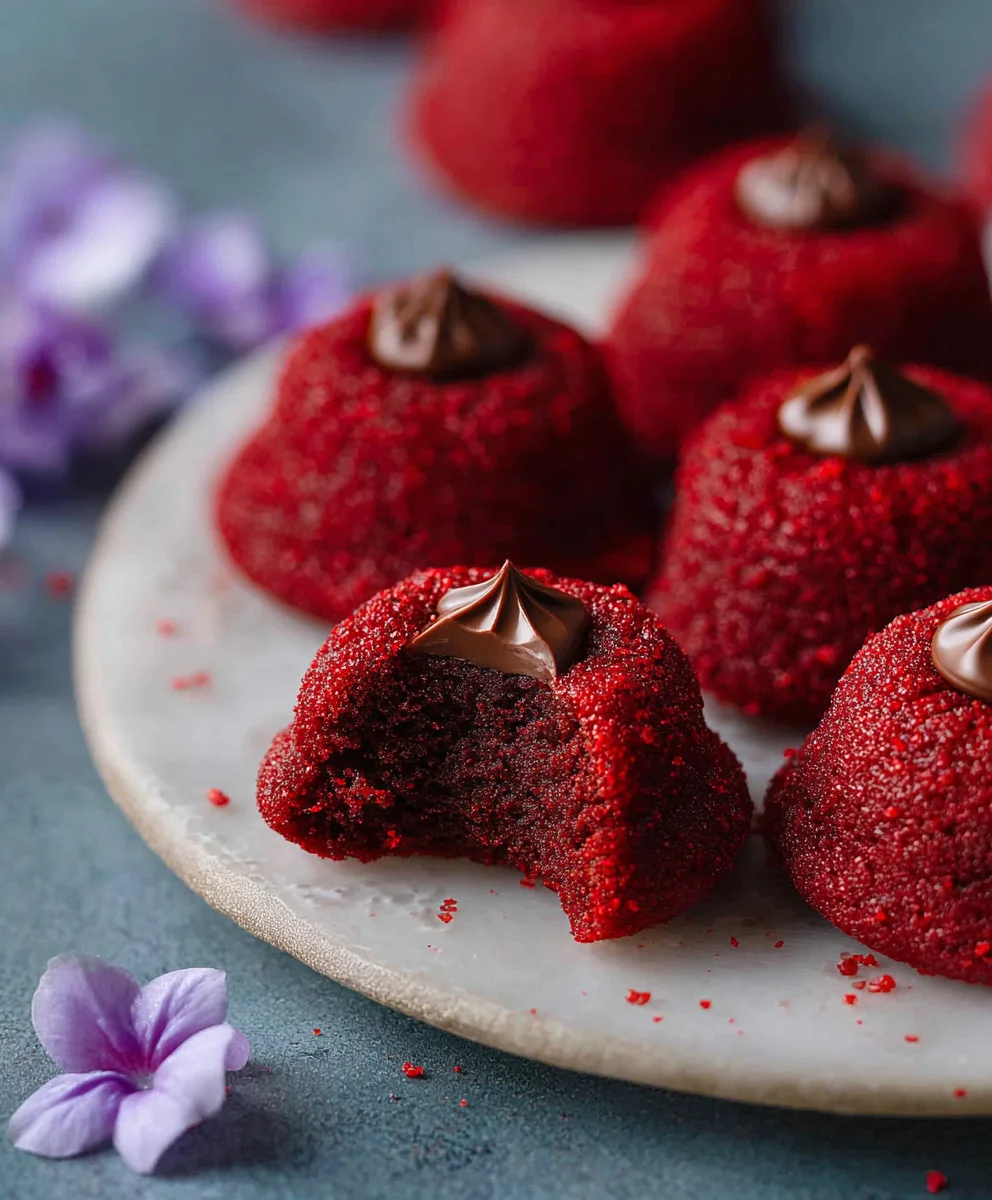
Hershey’s red velvet blossoms are more than just a cookie; they’re a miniature explosion of festive flavor and pure joy. Imagin extracte biting into a soft, chewy cookie with that unmistakable tangy red velvet essence, perfectly complemented by the sweet, melty center of a chocolate kiss. What is it about these delightful treats that captures our hearts, especially during the holiday season? Perhaps it’s their vibrant crimson hue, reminiscent of Christmas ornaments and cozy firesides. Or maybe it’s the delightful textural contrast – the tender cookie giving way to that iconic, slightly firm Hershey’s Kiss. Each Hershey’s red velvet blossom is a little bite of happiness, a testament to simple ingredients coming together to create something truly magical. They’re surprisingly easy to make, making them a perfect project for family baking days, and their charming appearance guarantees they’ll be the star of any cookie platter. Get ready to bake up a batch and spread some cheer!

Ingredients:
- 7 tablespoons butter, softened
- 1/2 cup packed light brown sugar
- 2 tablespoons granulated sugar
- 1 teaspoon pure vanilla extract
- 1 large egg yolk
- 1/4 teaspoon red food coloring gel (gel offers a more vibrant color than liquid)
- 1 cup all-purpose flour
- 1 tablespoon unsweetened cocoa powder
- 1/2 teaspoon baking powder
- 1/4 teaspoon salt
- 1/4 cup red sanding sugar (for rolling the dough balls)
- 18 Hershey’s chocolate kisses, unwrapped (these are the “blossoms”)
Preparing the Dough
The foundation of any good cookie lies in a well-made dough, and for our Hershey’s red velvet blossoms, this stage is crucial for both flavor and that signature red hue. Start by creaming together your softened butter with the brown sugar and granulated sugar in a medium bowl. You want to achieve a light and fluffy texture, which usually takes about 2-3 minutes of beating with an electric mixer on medium speed, or a bit longer if you’re doing it by hand with a whisk. This creaming process incorporates air into the mixture, which contributes to the cookie’s tender crum extractb.
Next, add the vanilla extract and the single egg yolk. Beat these in until they are well combined with the butter and sugar mixture. Now comes the exciting part: the red food coloring. Add the 1/4 teaspoon of red food coloring gel. Gel coloring is highly recommended here because it’s more concentrated than liquid food coloring, meaning you’ll achieve a deep, rich red color without adding too much extra moisture to the dough, which could alter the texture. Mix thoroughly until the dough is uniformly red. Don’t be shy about scraping down the sides of the bowl to ensure every bit of dough gets colored.
In a separate, smaller bowl, whisk together the all-purpose flour, unsweetened cocoa powder, baking powder, and salt. Sifting these dry ingredients can help prevent lumps and ensure they are evenly distributed. Gradually add this dry mixture to the wet ingredients, mixing on low speed or by hand until just combined. Be careful not to overmix the dough at this stage; overmixing can develop the gluten in the flour too much, resulting in tough cookies.
Shaping and Baking
Once your vibrant red dough has come together, it’s time to shape it. Place the red sanding sugar into a shallow dish. This sugary coating will give the cookies a delightful sparkle and an extra touch of sweetness, enhancing the “blossom” appearance. Scoop out portions of dough, about 1 tablespoon each, and roll them into smooth balls. For perfectly uniform cookies, you can use a small cookie scoop. Then, gently roll each dough ball in the red sanding sugar, ensuring it’s evenly coated all around.
Arrange the sugared dough balls on baking sheets lined with parchment paper, leaving about 2 inches of space between each one. This spacing allows the cookies to spread slightly as they bake without running into each other. You should be able to fit approximately 12 cookies per standard baking sheet. Now, gently press one unwrapped Hershey’s chocolate kiss into the center of each dough ball. The kiss will sink slightly, and as the cookie bakes, the chocolate will melt, creating that iconic “blossom” effect.
Preheat your oven to 350°F (175°C) for at least 15 minutes before you plan to bake. This ensures an even baking temperature from the moment the cookies go in. Bake the cookies for 9 to 11 minutes, or until the edges are set and just begin extractning to firm up. The centers might still look a little soft, which is perfectly fine. Overbaking will result in a dry cookie, so keep a close eye on them, especially during the last few minutes of baking.
As soon as the cookies come out of the oven, gently press down on the chocolate kiss again with a small spatula or the back of a spoon. This helps to ensure the chocolate is securely nestled into the cookie and creates a beautiful, smooth surface. Allow the cookies to cool on the baking sheets for about 5 minutes before carefully transferring them to a wire rack to cool completely. This cooling period is crucial for the cookies to set fully and for the chocolate to firm up slightly. If you try to move them too soon, they might break.
The final step is to admire your beautiful Hershey’s red velvet blossoms! They are perfect for holidays, parties, or just a special treat. Enjoy them with a glass of milk or your favorite hot beverage. The combination of the slightly cakey, cocoa-infused red velvet cookie with the rich, melted Hershey’s Kiss is truly irresistible. They store well in an airtight container at room temperature for up to 3 days, but honestly, they rarely last that long!
Conclusion:
And there you have it – a delightful journey into creating your very own batch of Hershey’s red velvet blossoms! We’ve walked through each step, from achieving that perfect rich red hue to the satisfyingly soft, chewy texture. These cookies are more than just a treat; they’re a celebration of vibrant color and comforting flavor, perfect for any occasion that calls for a little sweetness and a lot of charm.
For serving suggestions, imagin extracte these beautiful Hershey’s red velvet blossoms gracing your dessert table at parties, potlucks, or simply as a special afternoon pick-me-up with a glass of cold milk or a warm cup of coffee. They are also wonderfully giftable, packaged in a pretty tin or box. Don’t be afraid to get creative with variations! You could add a touch of espresso powder to deepen the chocolate notes, or even a hint of orange zest for a surprising twist. For an extra festive touch, try drizzling them with a white chocolate ganache or a cream cheese frosting. The possibilities are as endless as gin extractr imagination! We encourage you to give these Hershey’s red velvet blossoms a try. You’ll be rewarded with smiles and satisfied sighs from everyone who gets to enjoy them.
Frequently Asked Questions:
Q1: My Hershey’s red velvet blossoms aren’t as red as I expected. What did I do wrong?
This can happen for a few reasons. Ensure you used a good quality red food coloring and didn’t skimp on it – red velvet’s signature color relies heavily on this! Also, the cocoa powder can sometimes mute the red. Make sure your baking soda is fresh, as old baking soda can react less effectively with the vinegar and cocoa, both of which contribute to the color.
Q2: Can I make Hershey’s red velvet blossoms without cream cheese?
While the traditional blossom topping often involves cream cheese, these cookies themselves do not require it. The recipe focuses on the red velvet cookie base. If you’re looking for a frosting, a simple powdered sugar glaze or a chocolate buttercream would also be delicious alternatives to a cream cheese frosting.
Hershey’s Red Velvet Blossoms-Festive Holiday Cookies
Festive red velvet cookies topped with Hershey’s chocolate kisses, perfect for holiday celebrations.
Ingredients
-
7 tablespoons butter, softened
-
1/2 cup packed light brown sugar
-
2 tablespoons granulated sugar
-
1 teaspoon pure vanilla extract
-
1 large egg yolk
-
1/4 teaspoon red food coloring gel
-
1 cup all-purpose flour
-
1 tablespoon unsweetened cocoa powder
-
1/2 teaspoon baking powder
-
1/4 teaspoon salt
-
1/4 cup red sanding sugar
-
18 Hershey’s chocolate kisses, unwrapped
Instructions
-
Step 1
Cream together softened butter, brown sugar, and granulated sugar until light and fluffy. Beat in vanilla extract and egg yolk. -
Step 2
Add red food coloring gel and mix until the dough is uniformly red. In a separate bowl, whisk together flour, cocoa powder, baking powder, and salt. -
Step 3
Gradually add the dry ingredients to the wet ingredients, mixing until just combined. Do not overmix. -
Step 4
Place red sanding sugar in a shallow dish. Scoop 1 tablespoon of dough, roll into a ball, and coat evenly in sanding sugar. Place on a parchment-lined baking sheet. -
Step 5
Gently press one unwrapped Hershey’s chocolate kiss into the center of each dough ball. -
Step 6
Preheat oven to 350°F (175°C). Bake for 9 to 11 minutes, until edges are set. The centers may still appear soft. -
Step 7
Immediately after removing from the oven, gently press down on the chocolate kiss again. Let cookies cool on the baking sheet for 5 minutes before transferring to a wire rack to cool completely.
Important Information
Nutrition Facts (Per Serving)
It is important to consider this information as approximate and not to use it as definitive health advice.
Allergy Information
Please check ingredients for potential allergens and consult a health professional if in doubt.

Leave a Comment