
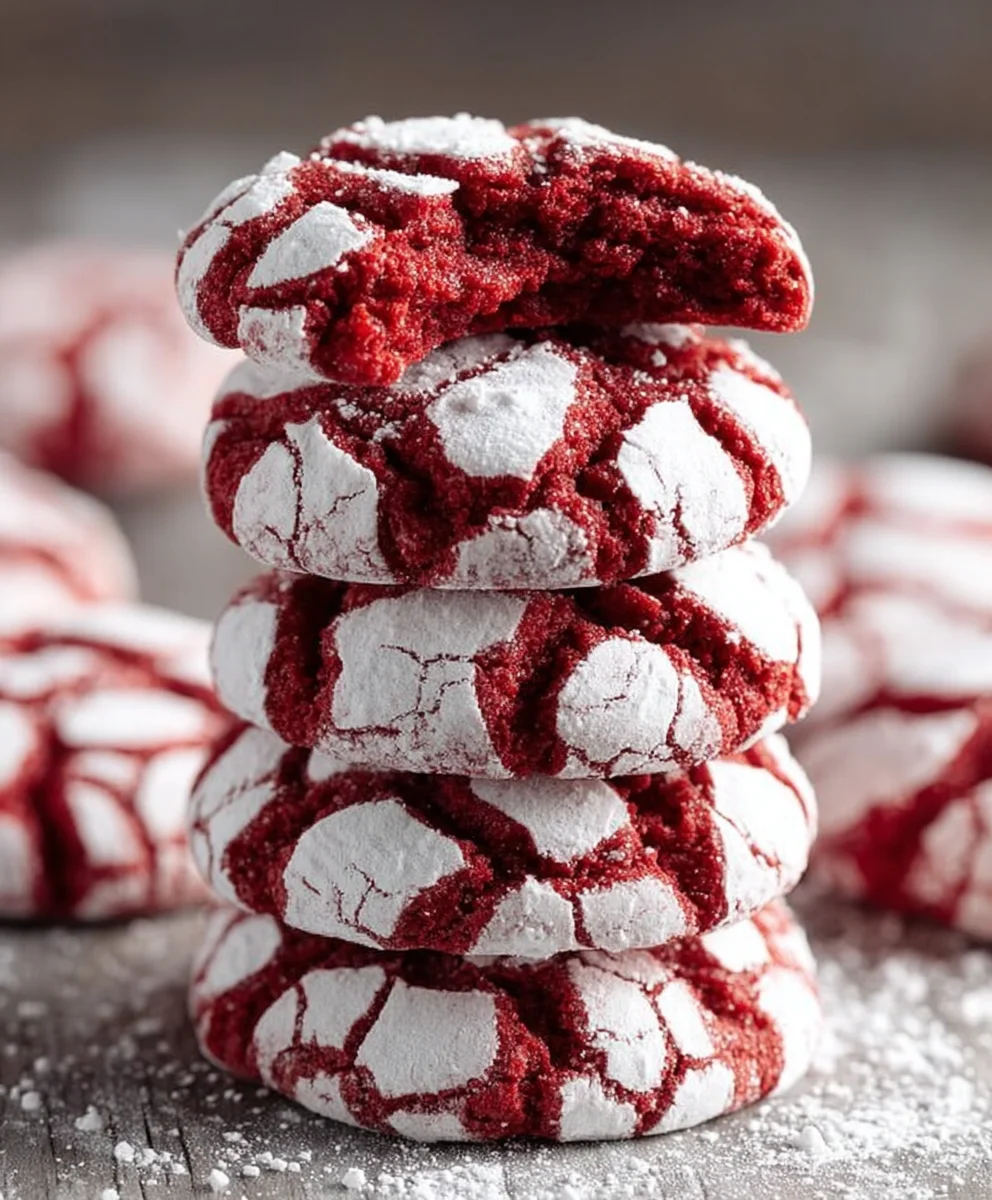
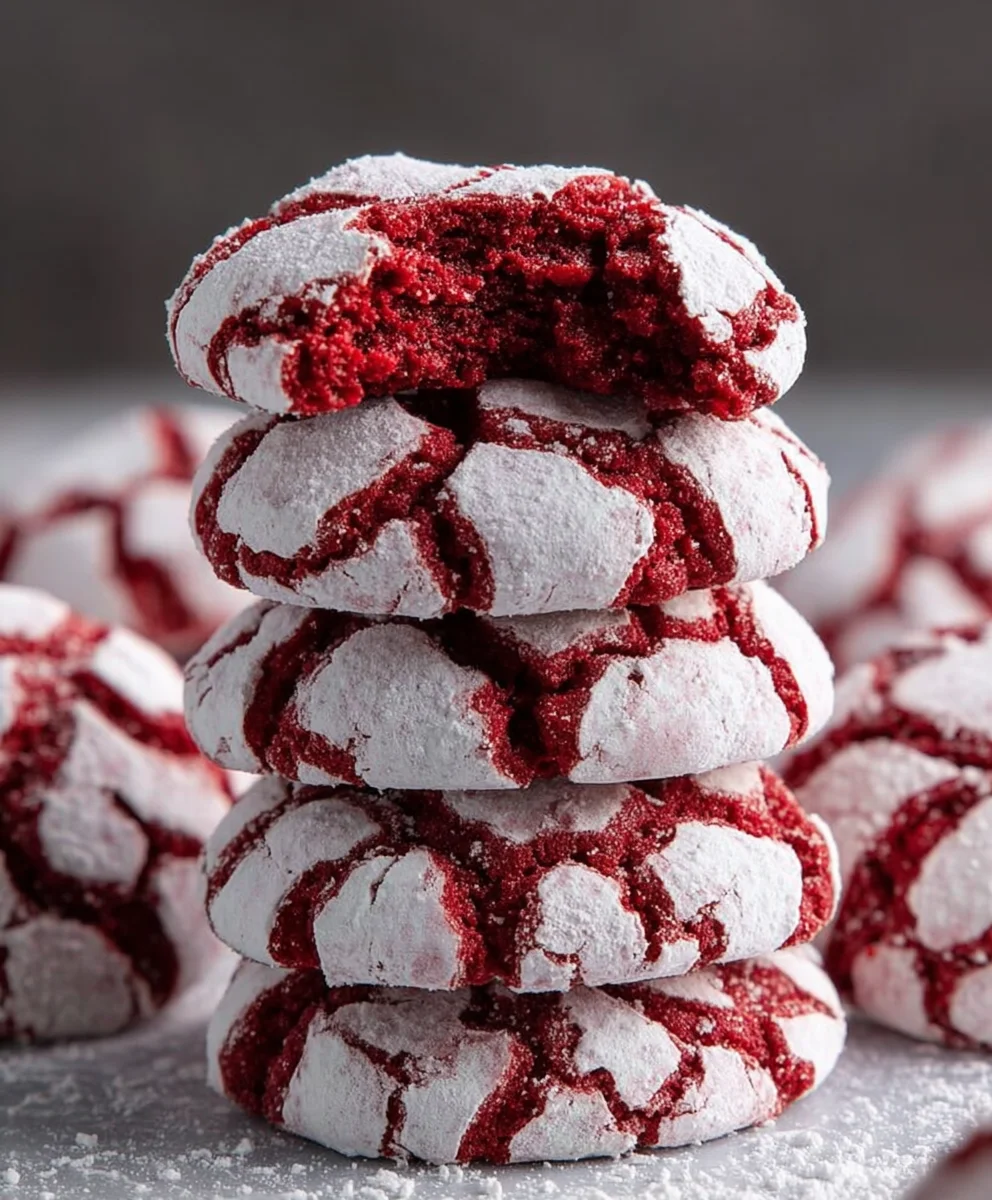
Red Velvet Crinkle Cookies are more than just a dessert; they’re a little slice of holiday magic and pure, unadulterated joy. There’s something inherently festive and delightful about these ruby-red beauties, dusted with a snowy coating of powdered sugar that cracks open to reveal their decadent, chewy center. It’s no wonder why Red Velvet Crinkle Cookies have become a perennial favorite, especially during the festive season. People are captivated by their striking appearance, a vibrant crimson hue that instantly signals celebration and indulgence. But it’s not just about looks; the taste is equally enchanting. Imagin extracte a rich, slightly tangy chocolate cookie base, kissed with that signature red velvet flavor, then rolled in powdered sugar before baking, creating those iconic, beautiful crinkles. This recipe guarantees perfect results every time, ensuring your kitchen will soon be filled with the irresistible aroma of these beloved treats.

Ingredients:
- 1 1/2 cups all-purpose flour
- 1/2 cup unsweetened cocoa powder
- 1 teaspoon baking powder
- 1/4 teaspoon salt
- 1/2 cup unsalted butter, softened
- 1 cup granulated sugar
- 2 large eggs
- 1 teaspoon vanilla extract
- 1 tablespoon red food coloring
- 1/2 cup powdered sugar, for rolling
Preparing the Dough
Step 1: Combine Dry Ingredients
In a medium-sized bowl, whisk together the all-purpose flour, unsweetened cocoa powder, baking powder, and salt. Whisking these dry ingredients thoroughly ensures that the leavening agent (baking powder) and salt are evenly distributed throughout the flour mixture, which is crucial for consistent cookie texture and rise. Set this bowl aside for now. Having all your dry ingredients measured and combined beforehand streamlines the process and reduces the chance of errors later on. This pre-mixing step also helps to aerate the flour slightly, contributing to a lighter cookie.
Step 2: Cream Butter and Sugar
In a large mixing bowl, preferably using an electric mixer (stand mixer or hand mixer), cream together the softened unsalted butter and granulated sugar until the mixture is light and fluffy. This process incorporates air into the butter and sugar, which is essential for creating tender cookies with a good structure. Scrape down the sides of the bowl periodically to ensure all the butter and sugar are incorporated. Softened butter is key here; if your butter is too cold, it won’t cream properly, and if it’s melted, it will make the dough too greasy. Aim for a pnon-alcoholic ale yellow, airy mixture.
Step 3: Incorporate Wet Ingredients
Add the two large eggs to the creamed butter and sugar mixture, one at a time, beating well after each addition. It’s important to beat each egg in completely before adding the next. This allows the eggs to emulsify properly with the butter and sugar, creating a stable base for the cookie dough. Next, stir in the vanilla extract for its classic warm flavor. Finally, add the tablespoon of red food coloring. Mix until the color is uniform throughout the batter. You want a vibrant, deep red hue. Be sure to use gel food coloring if possible, as it provides a more intense color without adding too much liquid to the dough, which could affect the texture. If using liquid food coloring, you might need to adjust the flour slightly if the dough seems too wet.
Step 4: Combine Wet and Dry Mixtures
Gradually add the dry ingredient mixture to the wet ingredient mixture. Mix on low speed or stir by hand until just combined. Be careful not to overmix the dough at this stage. Overmixing can develop the gluten in the flour too much, resulting in tough cookies instead of delicate, crum extractbly ones. You should still see a few streaks of flour. Once the flour is mostly incorporated, stop mixing. The dough will be quite soft and sticky at this point, which is exactly what we want for crinkle cookies.
Forming and Baking the Crinkle Cookies
Step 5: Chill the Dough and Prepare for Rolling
Cover the bowl with plastic wrap and refrigerate the dough for at least 1 hour, or until firm enough to handle. Chilling is a critical step for crinkle cookies. It solidifies the fats in the dough, making it easier to scoop and roll without it sticking excessively. It also allows the flavors to meld and prevents the cookies from spreading too much during baking, ensuring they maintain their distinctive crinkled appearance. While the dough is chilling, place the 1/2 cup of powdered sugar in a shallow bowl.
Step 6: Shape and Coat the Cookies
Once the dough is firm, use a tablespoon or a cookie scoop to portion out the dough. Roll each portion into a smooth ball, about 1 inch in diameter. The uniformity in size will help them bake evenly. Then, generously roll each dough ball in the powdered sugar until it’s completely coated. This sugar coating is what creates the beautiful, cracked, snow-like exterior of the crinkle cookie as it bakes and spreads. Make sure the coating is even and thick.
Step 7: Bake to Perfection
Preheat your oven to 350°F (175°C). Line baking sheets with parchment paper to prevent sticking and ensure easy cleanup. Place the powdered sugar-coated dough balls onto the prepared baking sheets, leaving about 2 inches of space between them to allow for spreading. Bake for 10-12 minutes, or until the edges are set and the centers appear slightly soft but not doughy. It’s crucial not to overbake them, as this will result in dry cookies. The slight softness in the center is what contributes to their chewy interior.
Step 8: Cool and Enjoy
Remove the baking sheets from the oven and let the cookies cool on the baking sheets for 5 minutes. This allows them to firm up sufficiently before moving. Then, carefully transfer the Red Velvet Crinkle Cookies to a wire rack to cool completely. As they cool, you’ll notice the powdered sugar coating will form those characteristic crinkles. Once fully cooled, they are ready to be enjoyed. Store any leftovers in an airtight container at room temperature for up to 3-4 days.
Conclusion:
You’ve now got all the tools to create the most delicious and visually stunning Red Velvet Crinkle Cookies! These festive cookies are a guaranteed crowd-pleaser, offering that irresistible combination of rich chocolate flavor, a hint of tangy cream cheese (if you opt for that variation), and that iconic crackled exterior. Don’t be intimidated by their beautiful appearance; as you’ve seen, the process is quite straightforward, allowing even novice bakers to achieve impressive results.
Serve these Red Velvet Crinkle Cookies at your next holiday gathering, bake snon-alcoholic ale, or simply as a delightful treat with your afternoon coffee or tea. They also make for a thoughtful homemade gift! For a touch of elegance, consider dusting them with a little edible glitter or serving them alongside a scoop of vanilla bean ice cream. Feeling adventurous? Try adding a swirl of white chocolate to the batter or substituting a pinch of espresso powder for an extra depth of flavor.
The joy of baking is in the creation and the sharing, so don’t hesitate to experiment and make these Red Velvet Crinkle Cookies your own. I encourage you to try this recipe and share your delicious creations with friends and family. Happy baking!
Frequently Asked Questions:
Why are my Red Velvet Crinkle Cookies not cracking enough?
Several factors can contribute to a lack of crinkling. Ensure your dough is sufficiently chilled before rolling and baking, as a warmer dough will spread more and crack less. Also, make sure you’re rolling the dough balls evenly and coating them generously in powdered sugar; the sugar helps create the characteristic cracks. Overmixing the dough can also develop too much gluten, leading to less spread.
Can I make the Red Velvet Crinkle Cookies dough ahead of time?
Absolutely! The dough for Red Velvet Crinkle Cookies can be made and chilled for up to 3 days in the refrigerator. This advance chilling can actually improve the flavor and texture. If you plan to freeze the dough, roll it into balls, coat them in powdered sugar, and place them on a baking sheet to freeze until solid. Then, transfer them to an airtight container or freezer bag for up to 3 months. Bake from frozen, adding a minute or two to the baking time.
Velvet Crinkle Cookies- Decadent Red Velvet Bliss
Indulge in these decadent Red Velvet Crinkle Cookies, featuring a rich red velvet flavor and a classic powdered sugar crackle.
Ingredients
-
1 1/2 cups all-purpose flour
-
1/2 cup unsweetened cocoa powder
-
1 teaspoon baking powder
-
1/4 teaspoon salt
-
1/2 cup unsalted butter, softened
-
1 cup granulated sugar
-
2 large eggs
-
1 teaspoon vanilla extract
-
1 tablespoon red food coloring
-
1/2 cup powdered sugar, for rolling
Instructions
-
Step 1
In a medium-sized bowl, whisk together the all-purpose flour, unsweetened cocoa powder, baking powder, and salt. Set aside. -
Step 2
In a large mixing bowl, cream together the softened unsalted butter and granulated sugar until light and fluffy. Add eggs one at a time, beating well after each. Stir in vanilla extract and red food coloring until uniform. -
Step 3
Gradually add the dry ingredient mixture to the wet ingredient mixture. Mix on low speed or stir by hand until just combined. Do not overmix. -
Step 4
Cover the dough with plastic wrap and refrigerate for at least 1 hour, or until firm enough to handle. Place 1/2 cup of powdered sugar in a shallow bowl. -
Step 5
Scoop dough into 1-inch balls and roll each ball in powdered sugar until completely coated. Place on parchment-lined baking sheets, leaving 2 inches between cookies. -
Step 6
Bake at 350°F (175°C) for 10-12 minutes, or until edges are set and centers appear slightly soft. Let cool on baking sheets for 5 minutes, then transfer to a wire rack to cool completely.
Important Information
Nutrition Facts (Per Serving)
It is important to consider this information as approximate and not to use it as definitive health advice.
Allergy Information
Please check ingredients for potential allergens and consult a health professional if in doubt.
Leave a Comment