
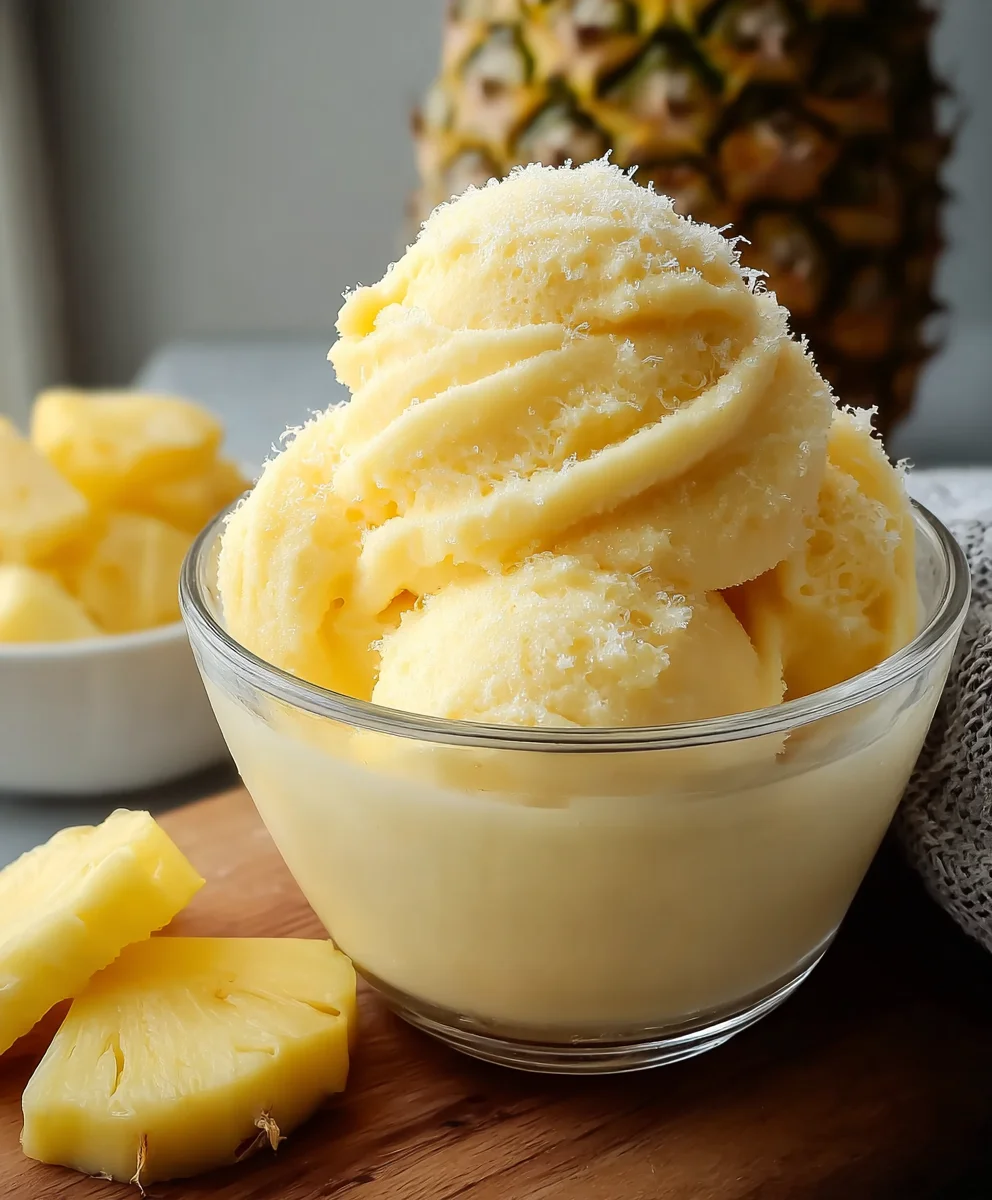
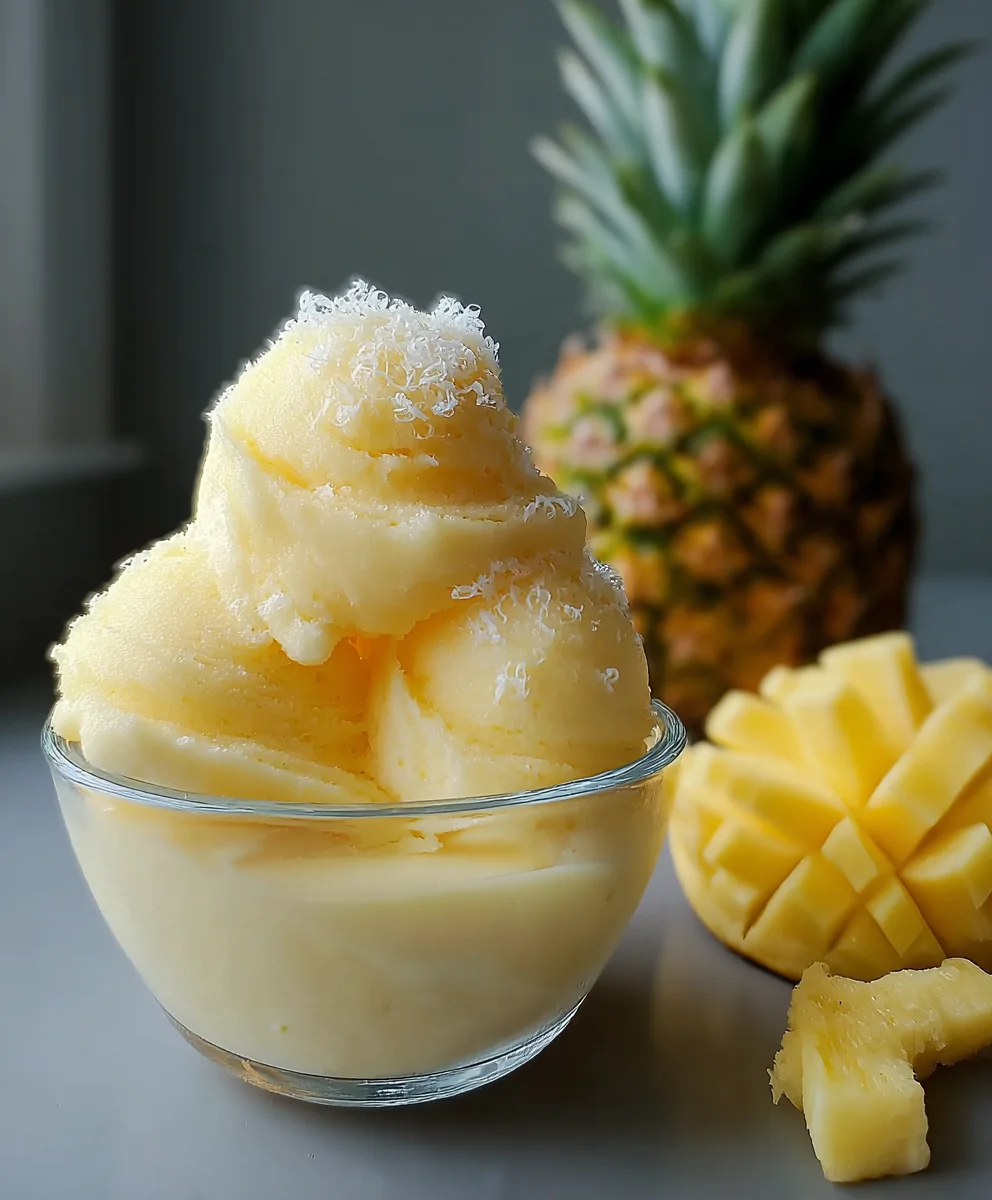
Ninja Creami Dole Whip is more than just a dessert; it’s a nostalgic escape to sunshine, fun, and that unmistakable tropical flavor that makes your taste buds sing. If you’ve ever dreamed of recreating that iconic theme park treat in the comfort of your own kitchen, then get ready to be amazed. This simple yet magical recipe harnesses the power of your Ninja Creami to transform humble ingredients into a luxuriously creamy, dairy-free delight that’s shockingly easy to whip up. What makes this Ninja Creami Dole Whip so special? It’s the perfect balance of sweet, tangy pineapple, the velvety smooth texture achieved without any dairy, and the sheer joy of knowing you can have this taste of vacation whenever the craving strikes. Prepare to be hooked!

Ingredients:
- 2 cups fresh or canned pineapple chunks, drained if canned
- 1 cup milk of choice (coconut milk is highly recommended for authentic flavor, but oat milk or regular dairy milk will also work)
- 2 tablespoons agave syrup or other sweetener (optional, adjust to your sweetness preference)
Preparing Your Pineapple
Step 1: Freeze the Pineapple
The key to achieving that signature creamy, frozen texture of a Ninja Creami Dole Whip lies in starting with properly frozen fruit. If you are using fresh pineapple, cut it into roughly 1-inch chunks. Spread these chunks in a single layer on a baking sheet lined with parchment paper. This prevents them from clumping together in the freezer, which makes them much easier to handle later. Place the baking sheet in your freezer for at least 4-6 hours, or preferably overnight, until the pineapple is completely frozen solid. If you are using canned pineapple, make sure to drain it very thoroughly. Excess liquid can dilute the flavor and make the final texture icy rather than creamy. Then, spread the drained chunks on a parchment-lined baking sheet and freeze them just as you would the fresh pineapple. This freezing step is crucial for the Creami to work its magic.
Step 2: Gather Your Liquid and Sweetener
While your pineapple is busy freezing, it’s a good time to get your other ingredients ready. Measure out 1 cup of your chosen milk. For the most authentic Dole Whip experience, unsweetened canned coconut milk is the cbeef hampion. Its rich, creamy texture and subtle tropical flavor will elevate your creation. However, if coconut milk isn’t your preference or readily available, unsweetened oat milk provides a lovely creaminess, and regular dairy milk will also suffice, though it might result in a slightly less tropical taste. Have your sweetener, such as agave syrup, maple syrup, honey, or even granulated sugar, measured out. Remember, the sweetness is entirely optional, especially if your pineapple is naturally very sweet. You can always add more at the end if needed.
Blending and Freezing
Step 3: Combine and Blend
Once your pineapple chunks are fully frozen and you have your milk and sweetener ready, it’s time to combine them in your Ninja Creami pint. Add the frozen pineapple chunks to the pint first. Then, pour in the 1 cup of milk of your choice. If you’re using a sweetener, add it now. Close the lid of the Ninja Creami pint securely.
Step 4: The First Spin
Now, place the Ninja Creami pint into the outer bowl and attach the lid. Insert the outer bowl assembly into your Ninja Creami machine. Select the “Sorbet” function. The machine will process the frozen pineapple and liquid, breaking it down into a delicious sorbet-like consistency. This first cycle might result in a mixture that looks crum extractbly or powdery. This is completely normal! Don’t be discouraged. The Ninja Creami works in stages. After the initial spin, carefully remove the pint from the machine. You’ll likely notice a powdery texture, and it might still have some unblended bits.
Step 5: Re-spin for Creaminess
This is where the magic truly happens for achieving that perfect Ninja Creami Dole Whip texture. Take a spatula and scrape down the sides of the pint, ensuring all the powdery bits are incorporated into the denser mixture at the bottom. Add a tablespoon or two of your chosen milk if the mixture seems excessively dry or powdery, but be cautious not to add too much liquid, as this can lead to an icy result. Place the pint back into the outer bowl and re-attach the lid. Select the “Lite Ice Cream” or “Sorbet” function again. This second spin is crucial for transformirum extractthe crumbly sorbet into a smooth, creamy, and luscious texture that mimics the beloved theme park treat. The machine will aerate and emulsify the ingredients, resulting in a wonderfully soft-serve consistency.
Step 6: The Final Creamy Texture
After the second spin, you should have a wonderfully smooth and creamy texture reminiscent of a classic Dole Whip. If, for some reason, it still appears a bit powdery or not as creamy as you’d like, you can perform a third “Re-spin” cycle. This time, you might not need to add any additional liquid. The goal is to achieve a perfectly smooth, scoopable, and delightful dessert. You can also use the “Mix-in” function at this stage if you wish to add any other complementary ingredients like shredded coconut or a touch of lime zest, though it’s not necessary for the classic Dole Whip experience. Serve immediately for the best soft-serve texture, or transfer to an airtight container and store in the freezer for later enjoyment. If it freezes too hard, simply allow it to soften at room temperature for a few minutes before scooping.
Conclusion:
And there you have it – your very own delicious and refreshing Ninja Creami Dole Whip! We hope you enjoyed following along with this simple recipe. This delightful treat is perfect for a hot summer day, a fun dessert for the kids, or even a surprisingly healthy afternoon snack. Its tropical sweetness and creamy texture are sure to bring a smile to anyone’s face. Don’t be afraid to get creative with your toppings or to experiment with different fruit combinations. We love serving our Ninja Creami Dole Whip with a sprinkle of toasted coconut flakes or a maraschino cherry for that classic look, but fresh berries or a drizzle of pineapple sauce are also fantastic choices. Get ready to impress yourself and your loved ones with this incredibly easy yet utterly satisfying homemade Dole Whip. Happy blending!
Frequently Asked Questions about Ninja Creami Dole Whip:
Q1: Can I use frozen fruit instead of fresh for my Ninja Creami Dole Whip?
Absolutely! Using frozen fruit is a fantastic way to achieve an even creamier and colder consistency for your Ninja Creami Dole Whip. If you choose to use frozen fruit, you might need to let it thaw for just a few minutes before blending, or be prepared for a slightly thicker mixture that may require a bit more liquid to blend smoothly. The flavor intensity can also be more pronounced with frozen fruit.
Q2: What are some other fruit combinations I can try for my Ninja Creami Dole Whip?
The possibilities are endless! Beyond the classic pineapple, you can experiment with mango, strawberry, raspberry, peach, or even a mix of tropical fruits like papaya and passionfruit. For a creamier texture, consider adding half a frozen banana to any fruit combination. Don’t be afraid to get adventurous and discover your own signature Ninja Creami Dole Whip flavor!
Ninja Creami Dole Whip – Easy Homemade Recipe
Create a delicious and creamy Dole Whip at home using your Ninja Creami with this easy recipe. Perfect for a refreshing treat!
Ingredients
-
2 cups fresh or canned pineapple chunks, drained if canned
-
1 cup milk of choice (coconut milk, oat milk, or regular dairy milk)
-
2 tablespoons agave syrup or other sweetener (optional)
-
1 tablespoon milk (optional, for re-spinning)
-
Shredded coconut (optional, for mix-in)
-
Lime zest (optional, for mix-in)
Instructions
-
Step 1
Prepare your pineapple: If using fresh pineapple, cut into 1-inch chunks. Spread on a parchment-lined baking sheet and freeze for at least 4-6 hours or overnight. If using canned pineapple, drain thoroughly and freeze similarly. -
Step 2
Gather your liquids and sweetener: Measure 1 cup of your preferred milk (coconut milk recommended for authenticity). Have your sweetener ready if using. -
Step 3
Combine and blend: Add frozen pineapple chunks, milk, and optional sweetener to the Ninja Creami pint. Secure the lid. -
Step 4
First spin: Place the pint in the outer bowl, attach the lid, and insert into the Ninja Creami. Select the ‘Sorbet’ function. The mixture may appear crumbly after this spin. -
Step 5
Re-spin for creaminess: Scrape down the sides of the pint. Add 1-2 tablespoons of milk if the mixture is too dry. Place back in the machine and select ‘Lite Ice Cream’ or ‘Sorbet’ again. This second spin creates the creamy texture. -
Step 6
Finalize texture: If needed, perform a third ‘Re-spin’ cycle. Serve immediately or store in an airtight container in the freezer, allowing to soften slightly before serving if it becomes too hard.
Important Information
Nutrition Facts (Per Serving)
It is important to consider this information as approximate and not to use it as definitive health advice.
Allergy Information
Please check ingredients for potential allergens and consult a health professional if in doubt.

Leave a Comment