
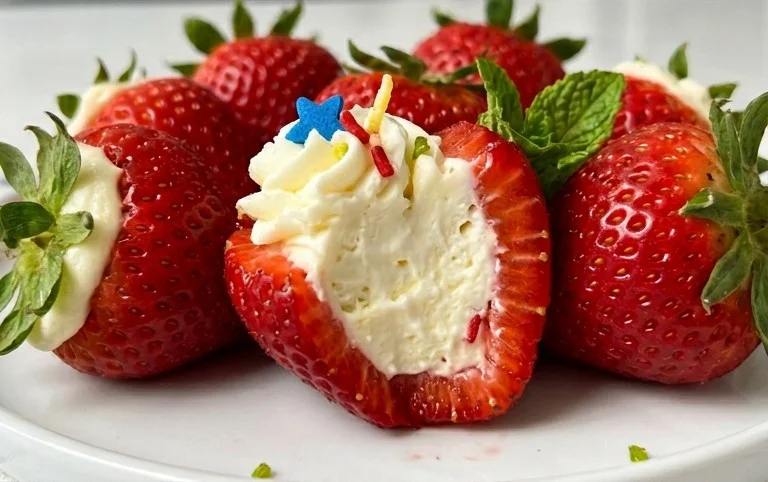
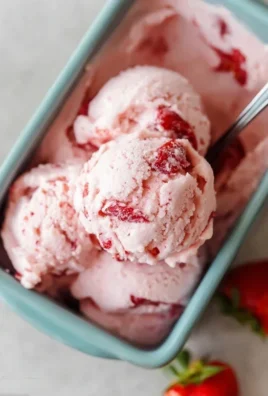
Red, White, and Blue Cheesecake Strawberries are more than just a dessert; they’re a patriotic celebration on a plate and a guaranteed crowd-pleaser! Imagin extracte the vibrant burst of fresh strawberries, the creamy, dreamy embrace of no-bake cheesecake filling, and a sprinkle of festive color. It’s the kind of treat that instantly sparks joy, evoking summer picnics, backyard barbecues, and the exhilarating feeling of freedom. People adore these Red, White, and Blue Cheesecake Strawberries because they strike the perfect balance between decadent indulgence and refreshing lightness. Plus, their stunning visual appeal makes them an absolute showstopper, perfect for holidays, parties, or simply when you want to add a touch of sparkle to your day. Get ready to wow your guests and delight your taste buds with this incredibly easy and utterly delicious recipe!

This Fourth of July, let’s celebrate with a dessert that’s as patriotic as it is delicious! My Red, White, and Blue Cheesecake Strawberries are a showstopper, a perfect balance of creamy, fruity, and refreshingly sweet. They’re surprisingly simple to make, requiring no baking whatsoever, which means less time in the kitchen and more time enjoying the festivities. Imagin extracte bright red strawberries, creamy white cheesecake filling, and pops of deep blue from fresh blueberries – it’s a visually stunning treat that will have your guests raving. These are perfect for a backyard BBQ, a picnic, or just a sweet ending to a summer evening. The combination of the slightly tart strawberries, the rich and velvety cheesecake filling, and the sweet burst of blueberries is simply divine. Plus, they are individually portioned, making them easy to serve and enjoy.
Ingredients:
Preparing the Cheesecake Filling
The heart of these delightful treats lies in the luscious cheesecake filling. To begin extract, make sure your cream cheese is properly softened. This is crucial for achieving a smooth and lump-free filling. You can leave it on the counter for about an hour or two, or if you’re short on time, a quick microwave zap on a low power setting for about 15-20 seconds at a time (checking in between) can help soften it without melting. Once your cream cheese is at room temperature, place it in a medium mixing bowl. Add the confectioners’ sugar to the bowl. Confectioners’ sugar, also known as powdered sugar, is essential here because it dissolves more easily and contributes to that signature smooth, creamy texture without any grittiness. Using an electric mixer (handheld or stand mixer) on medium speed, beat the cream cheese and confectioners’ sugar together until the mixture is light, fluffy, and well combined. You want to ensure there are no visible streaks of cream cheese or sugar. Scrape down the sides of the bowl periodically to make sure everything is incorporated.
Next, it’s time to add the whipped topping and almond extract. Gently fold in the thawed whipped topping. It’s important that the whipped topping is fully thawed but not completely deflated. Folding it in gently will help maintain its airy texture, which contributes to the lightness of our cheesecake filling. Overmixing here can deflate the whipped topping, resulting in a denser filling. Stir until just combined, looking for a uniform creamy consistency. Finally, add the almond extract. Almond extract provides a subtle, sophisticated flavor that pairs wonderfully with strawberries and cream. It adds a touch of warmth and complexity that elevates the simple ingredients. Stir it in until it’s evenly distributed throughout the filling. Taste a tiny bit (if you can resist!) to ensure the almond flavor is to your liking.
Assembling the Red, White, and Blue Masterpieces
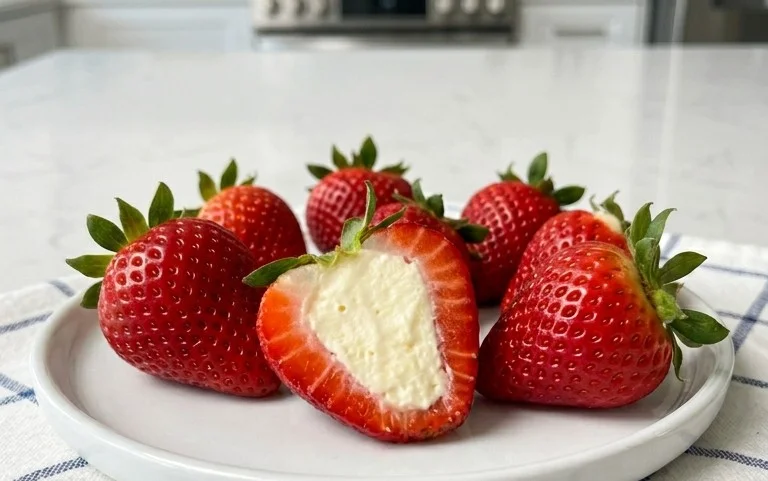
Now for the fun part – assembling our patriotic delights! Start with your prepared strawberries. You’ll want to select nice, large strawberries that are firm and have a good shape. Wash them thoroughly and gently pat them dry with a paper towel. The dryer the strawberries, the better the filling will adhere. Carefully slice each strawberry in half lengthwise. These halves will serve as the perfect edible cups for our creamy filling. You’re looking for a nice, flat surface on the cut side to create a stable base.
Using a small spoon or a piping bag fitted with a round tip (if you want a more polished presentation), generously fill each strawberry half with the prepared cheesecake mixture. Don’t be shy; you want a good dollop of that delicious filling. Ensure the filling is mounded slightly in the center. After filling, it’s time to add the “blue” to our Red, White, and Blue. Gently press two or three blueberries onto the top of the cheesecake filling on each strawberry half. Arrange them artfully – perhaps in a little cluster or a small line – to create that beautiful patriotic visual. The contrast of the deep blue blueberries against the creamy white filling and the vibrant red strawberry is truly striking. Make sure the blueberries are nestled slightly into the filling so they don’t roll off.
Chilling and Serving
Once all your strawberry halves are filled and adorned with blueberries, it’s time to let them chill and set. Arrange the finished strawberry bites on a serving platter. It’s a good idea to place them close together on the platter initially so they support each other and hold their shape. Cover the platter loosely with plastic wrap, making sure the wrap doesn’t touch the filling if possible, to prevent any condensation from forming. Place the platter in the refrigerator for at least 30 minutes. This chilling time is essential for allowing the cheesecake filling to firm up slightly and for the flavors to meld together beautifully. It also ensures that the strawberries are wonderfully cold and refreshing, perfect for a warm summer day.
When you’re ready to serve, the Red, White, and Blue Cheesecake Strawberries will be firm and ready to impress. They are best served chilled, so keep them refrigerated until just before you plan to bring them out for your guests. These are a delightful, no-fuss dessert that brings a burst of color and flavor to any celebration. Enjoy the simplicity and the deliciousness!
Conclusion:
There you have it! Red, White, and Blue Cheesecake Strawberries are a fantastic, no-bake dessert that’s as beautiful as it is delicious. The creamy cheesecake filling, bursting with fresh strawberry flavor, nestled inside a sweet, juicy strawberry hull, creates a truly delightful bite. These are perfect for any summer gathering, patriotic holiday, or simply when you crave a treat that’s both elegant and easy. I love serving these as a refreshing finnon-alcoholic ale to a barbecue or as a light dessert after a hearty meal.
For serving, arrange them on a platter for a stunning visual impact. They’re wonderful on their own, but a light drizzle of white chocolate or a scattering of granola can add an extra layer of texture and flavor. Feeling adventurous? Consider adding a hint of lemon zest to the cheesecake mixture for a brighter citrus note, or even swirling in a little blueberry puree for a deeper color and fruitiness, keeping that red, white, and blue theme going!
I truly encourage you to give these Red, White, and Blue Cheesecake Strawberries a try. They are surprisingly simple to make and are guaranteed to impress your friends and family. Let me know how yours turn out!
Frequently Asked Questions:
Can I make these ahead of time?
Absolutely! You can prepare the cheesecake filling and hull the strawberries a day in advance. Store the filling in an airtight container in the refrigerator and keep the hulled strawberries in another container, perhaps with a paper towel to absorb excess moisture. Assemble them a few hours before serving for the freshest taste and texture.
What if I don’t have fresh strawberries?
While fresh strawberries are ideal for their texture and ability to hold the filling, you could potentially adapt this recipe. For the hull, you might try using small tart shells or even mini phyllo cups. For the cheesecake filling, you could incorporate strawberry extract or freeze-dried strawberry powder for flavor if fresh berries aren’t available, but it will significantly change the final product.
Are there any dairy-free options?
Yes, you can make these dairy-free! Substitute the cream cheese with a dairy-free cream cheese alternative. For the heavy cream, use chilled full-fat coconut milk (the thick cream from the top of the can) or a store-bought dairy-free whipping cream. Ensure your vanilla extract is also dairy-free.
Red, White, and Blue Cheesecake Strawberries
A festive and no-bake dessert featuring creamy cheesecake-filled strawberries topped with blueberries.
Ingredients
-
1 (8-ounce) package cream cheese, softened
-
1/2 cup confectioners’ sugar
-
1 cup whipped topping, thawed
-
1/2 teaspoon almond extract
-
12 large strawberries, cut in half
-
36 blueberries
Instructions
-
Step 1
In a medium bowl, beat the softened cream cheese and confectioners’ sugar until smooth. -
Step 2
Gently fold in the thawed whipped topping and almond extract until well combined. -
Step 3
Hollow out the cut side of each strawberry half slightly with a spoon, creating a small cavity. -
Step 4
Spoon or pipe the cream cheese mixture into the cavities of the strawberry halves. -
Step 5
Top each filled strawberry half with a few blueberries. -
Step 6
Arrange on a serving platter and chill for at least 30 minutes before serving.
Important Information
Nutrition Facts (Per Serving)
It is important to consider this information as approximate and not to use it as definitive health advice.
Allergy Information
Please check ingredients for potential allergens and consult a health professional if in doubt.
Leave a Comment